Installing a rain barrel system is a practical way to lower your water bill and create a sustainable garden irrigation source.
Key Takeaways
- A rainwater harvesting system captures runoff from your roof, reducing stormwater pollution and providing free water for landscaping.
- Proper rain barrel installation requires a level foundation, a diverter kit to prevent overflow, and regular maintenance to ensure water quality.
- You can choose between a DIY rain barrel made from a drum or a pre-made commercial kit depending on your budget and aesthetic preference.
Although the idea of capturing storm runoff might sound highly technical, setting up a rain barrel is a straightforward weekend project that transforms how you manage your home’s water supply. A rain barrel is a specialized container connected directly to your gutter downspout, designed to collect and store rainwater for future outdoor use. We love this sustainable upgrade because it allows you to easily reduce your reliance on municipal resources, lower your monthly utility costs, and provide your garden with water that is completely free of the harsh chemicals often found in tap water. Whether you decide to build a custom system from scratch or install a pre-made commercial kit, harvesting rainwater is one of the smartest, most impactful upgrades you can make for your wallet and the local environment.
What Is a Rain Barrel and How Does It Work
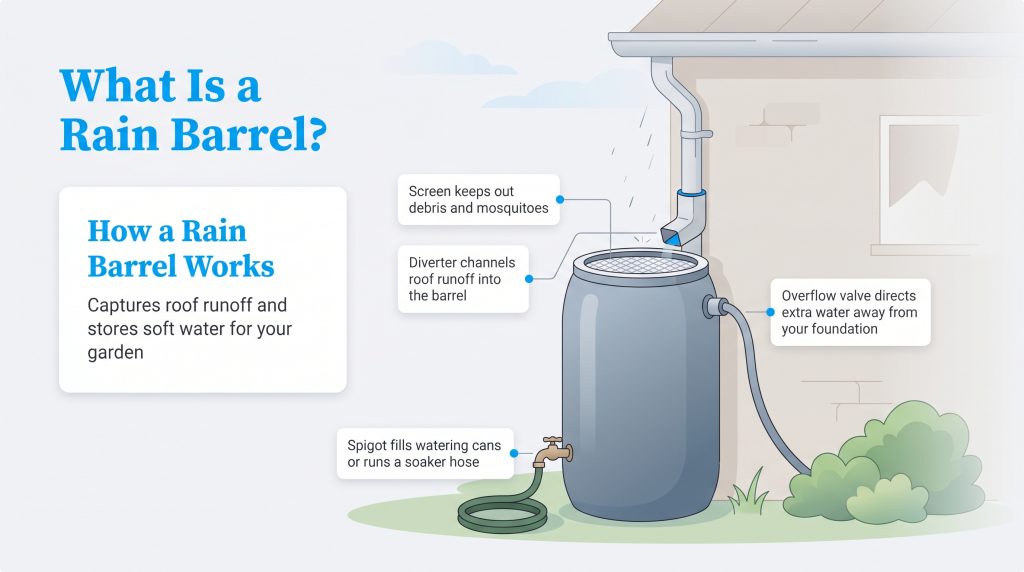
A rain barrel is a dedicated water catchment container that connects directly to your gutter downspout, capturing and storing rainwater that would otherwise wash away into the street. By diverting this natural runoff, you secure a free, naturally soft water supply for your lawn and garden while simultaneously reducing the strain on municipal storm drains. Modern rainwater harvesting systems rely on a few crucial parts to operate safely and efficiently:
- Barrel: The primary storage tank, typically holding 50 to 55 gallons of harvested rainwater.
- Spigot: The lower brass or plastic valve used to easily fill watering cans or attach a soaker hose.
- Screen: A fine mesh cover that blocks debris, leaves, and adult mosquitoes from entering the water supply.
- Overflow Valve: A critical safety mechanism that directs excess water away from your foundation when the container reaches maximum capacity.
- Downspout Diverter: An internal gutter attachment that automatically channels rainwater into the barrel and routes overflow back down the existing gutter system once the tank is full.
The Eco-Friendly and Financial Benefits of Rainwater Harvesting
Many homeowners overlook the staggering volume of water their roof sheds during a single storm. The math behind rainwater harvesting is incredibly encouraging. As a general rule, 1 inch of rain falling on a 1,000-square-foot roof yields approximately 623 gallons of usable water. By capturing just a fraction of this runoff, you noticeably cut how much tap water you use outdoors, directly helping you save on your water bill during the peak growing season.
Average Municipal Water Bill Reductions: By replacing municipal tap water with harvested rainwater for outdoor landscaping, households can effectively reduce their peak summer water usage, keeping monthly utility bills noticeably lower during prolonged drought seasons.
Protect your home’s structural integrity by actively capturing this stormwater runoff. When heavy rain hits your roof, it races down your gutters and naturally pools around your basement walls. Intercepting this rapid runoff stops severe soil erosion and prevents water seepage from compromising your foundation. Instead of overwhelming local municipal storm drains with fertilizer and motor oil runoff, your rain barrel actively interrupts this cycle, protecting nearby rivers and streams.
To give you a clearer picture of the financial benefits, here is a comparison of typical municipal water costs versus harvesting rainwater for a garden over a standard three-month summer season:
| Water Source | Summer Usage (Gallons) | Estimated Cost (3 Months) |
|---|---|---|
| Municipal Tap Water | ~3,000 gallons | $15 – $35+ (varies by city) |
| Harvested Rainwater | ~3,000 gallons | $0 (100% Free) |
| Total Potential Savings | — | Up to $35+ per summer |
Essential Tools and Materials for DIY Rain Barrel Installation
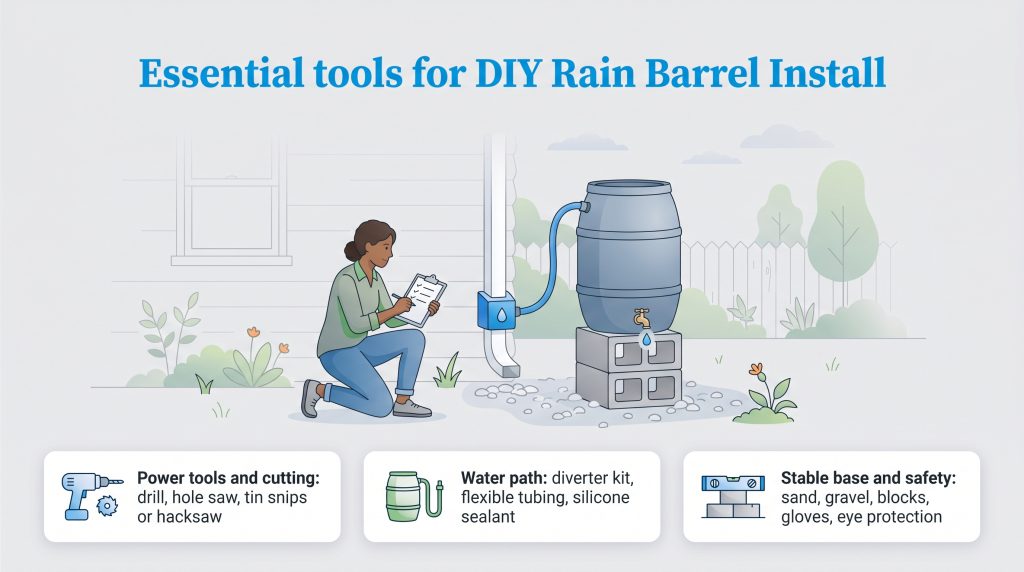
Whether you choose to convert an upcycled food-grade drum or buy a set of commercial kits, organizing your tools beforehand guarantees a smooth, leak-free installation process. Before cutting into your home’s downspouts, verify you have the following essential items ready to go:
- Power drill: Required for creating clean, perfectly sized ports in the plastic container.
- Hole saw attachments: Usually included if you purchase a complete rain barrel diverter kit.
- Tin snips or a hacksaw: Used to carefully cut the aluminum or vinyl downspout.
- Leveling sand and crushed gravel: Essential for tamping down a stable, perfectly flat base.
- Cinder blocks or a rain barrel stand: Gravity-fed systems require elevation to generate adequate water pressure.
- Rain barrel diverter kit: An absolute must for modern setups to prevent structural overflow issues.
- Flexible tubing: Connects the gutter diverter seamlessly to the barrel intake.
- Silicone sealant: Ensures watertight connections around the brass spigot and overflow ports.
- Safety glasses, work gloves, measuring tape, and a pencil.
How to Install a Rain Barrel (Step-By-Step)
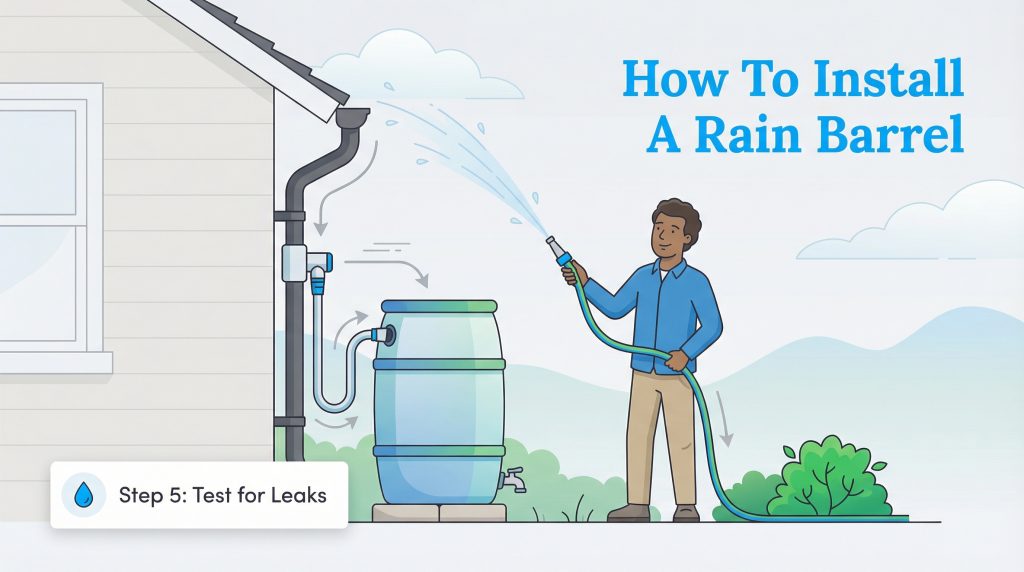
Proper installation ensures your system remains completely secure and highly effective throughout the changing seasons. Keep in mind that a full 55-gallon rain barrel weighs roughly 400 to 500 pounds. Follow these exact steps to prioritize safety and maximize your water pressure.
Step 1: Prep the Ground and Level the Base
Select a location near a downspout that sits conveniently close to your garden beds. Dig out the top layer of soft topsoil and rigorously compact the earth underneath. Lay down a sturdy bed of crushed gravel or a set of flat concrete patio pavers. Place your cinder blocks or stand securely on the base. Finally, use a carpenter’s level to verify the surface is completely flat before lifting the empty barrel onto the stand.
Step 2: Cut the Downspout and Install the Diverter
Hold your diverter kit directly against the downspout to determine the ideal functional height. Measure carefully and mark exactly where you need to cut into the downspout according to the manufacturer’s specifications. Put on your safety glasses, cut the downspout cleanly with your tin snips or hacksaw, and insert the diverter mechanism. Connect the flexible fill hose from the diverter straight to the intake port on your barrel, ensuring the tubing slopes slightly downward without any awkward kinks.
Step 3: Attach the Spigot and Overflow Valve
If you are building a DIY setup from a blank drum, mark your spigot point near the bottom of the container — high enough to fit a watering can underneath but low enough to access the water. Drill the hole using the appropriate hole saw attachment and tightly thread the brass spigot into place. Repeat this process near the top rim to install your overflow valve.
Rain Barrel Maintenance Schedule
A rainwater harvesting system is not a “set it and forget it” appliance. Establishing a reliable maintenance schedule keeps the harvested water clean, prevents foul odors, and guarantees your hardware survives years of heavy use without cracking.
| Task | Frequency | How-To |
|---|---|---|
| Clean Debris Screen | Monthly | Remove the top mesh screen and brush away accumulated leaves, pine needles, and sediment to ensure steady water flow. |
| Check for Leaks | Bi-Monthly | Inspect the spigot, overflow valve, and diverter hose connections. Hand-tighten loose clamps and reapply silicone sealant if necessary. |
| Flush the System | Annually | Drain the barrel completely. Scrub the interior with a mild white vinegar solution to remove algae buildup, then rinse thoroughly. |
Beyond these specific tasks, following a broader seasonal routine addresses environmental challenges like pests and extreme temperatures:
- Spring: As an essential spring yard water conservation step, reconnect the diverter kit to the downspout, flush out lingering organic debris from the home’s gutters, and visually inspect the plastic barrel for hairline cracks before the first major rainstorm.
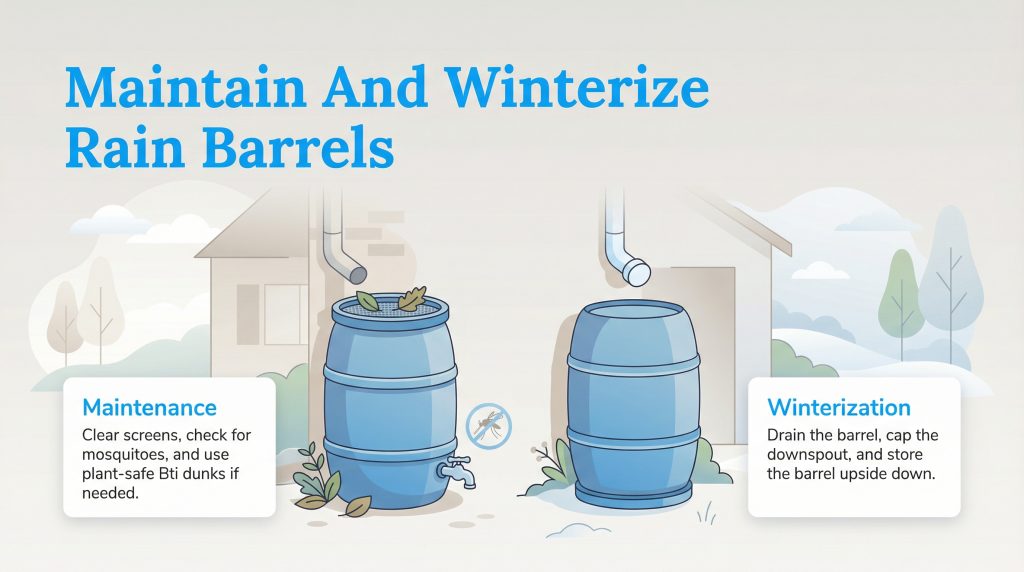
- Summer: Empty the water completely every three to four days to water your garden. Apply organic Bti mosquito dunks monthly to proactively stop larvae from breeding in the standing water.
- Fall: Disconnect the flexible tubing and scrub the interior of the barrel. Clean out the downspout diverter trap to prevent winter ice blockages.
Winterization: Protecting Your Barrel From Freezing
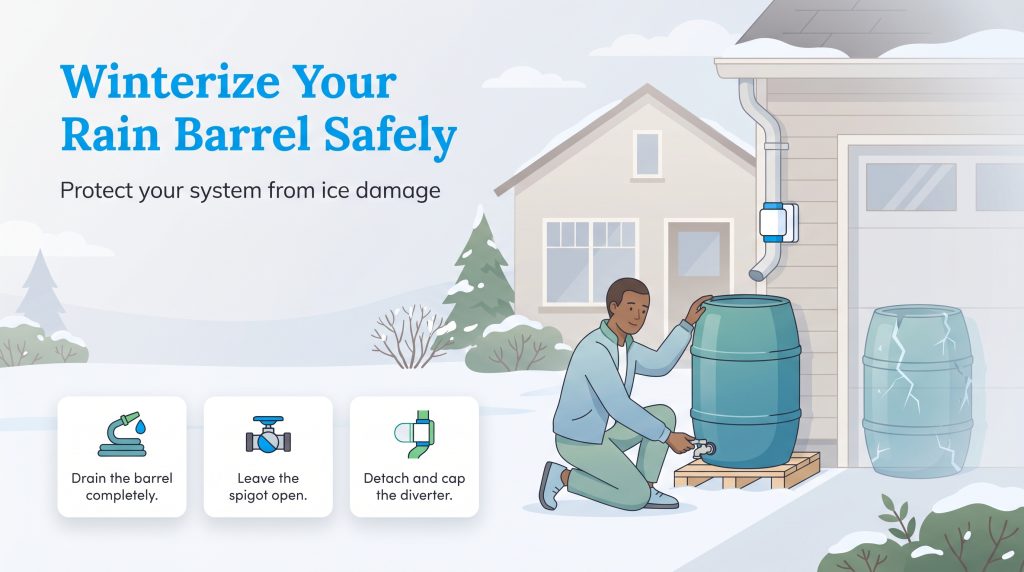
If you reside in a region where temperatures regularly dip below freezing, you absolutely must winterize your rainwater harvesting system. Water forcibly expands as it turns into ice, which will quickly shatter a rigid plastic barrel or split an expensive brass spigot. Protect your investment by following these three crucial steps:
- Drain the barrel completely: Attach a garden hose to the lower spigot and empty every drop of remaining water into your yard before the season’s first hard freeze hits.
- Leave the spigot open: Turn the primary valve to the fully open position. Leaving it open allows any lingering condensation or trapped moisture to escape harmlessly, preventing internal ice pressure from breaking the seal.
- Detach and cap the diverter: Remove the flexible hose connecting the downspout diverter to the main tank. Install a winterized hole cover or a specialized cap over the diverter opening so all winter precipitation bypasses the system entirely. Turn the empty barrel upside down and store it safely in your garage or shed.
Start Harvesting Rain Today
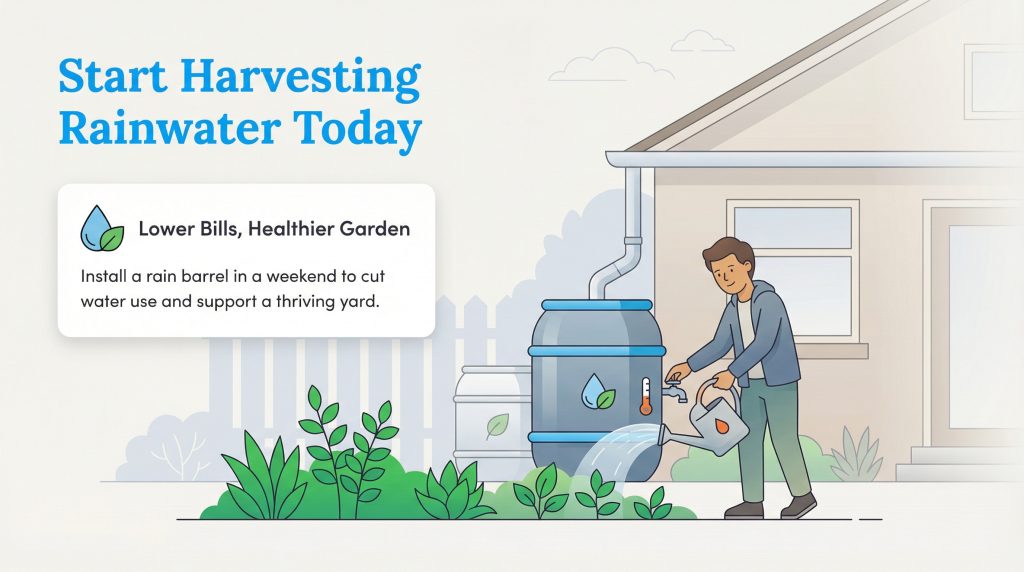
Taking direct control of your home’s water management is a deeply rewarding utility decision that benefits both your landscape and the broader local ecosystem. Whether you opt for a sleek commercial kit or build an upcycled DIY setup tailored precisely to your gardening needs, capturing stormwater empowers you to utilize free resources that literally fall from the sky. You will spot a tangible difference in your municipal water bill and the overall vibrancy of your plants almost immediately. By dedicating just a few hours to this environmentally mindful choice, you establish a fantastic foundation for a more resilient, self-reliant household.
Frequently Asked Questions About Rain Barrels
Do I need a diverter kit for my rain barrel?
How do I keep mosquitoes out of my rainwater harvesting system?
How do you keep rain barrel water from smelling?
Is rainwater safe to drink?
How much money can I save with a rain barrel?
How many rain barrels do I need for my home?
Can I link multiple rain barrels together?
Do I need a pump for my rain barrel?
Is it legal to collect rainwater in my state?
About the Author

LaLeesha has a Masters degree in English and enjoys writing whenever she has the chance. She is passionate about gardening, reducing her carbon footprint, and protecting the environment. She also recently served as President of the Board for City Sprouts (a community garden).