Taking Proactive Steps to Prepare Your New Residence for Warm Weather Can Noticeably Lower Your Summer Cooling Costs
Key Takeaways
- Completing these 10 DIY weatherization projects this spring can noticeably lower your cooling costs as summer approaches.
- Learning how to identify and seal air leaks around your windows, doors, and basements keeps the hot air out and the cold air inside.
- Scheduling proactive spring HVAC maintenance ensures your system runs efficiently and typically improves the lifespan of your equipment.
Settling into a new home or rental property often brings unexpected utility costs, but tackling a few simple spring weatherization tips can noticeably lower your monthly energy bills. Whether you are setting up utilities in a new home or renewing your lease, as the weather warms up, your primary goal shifts from keeping the freezing cold out to trapping expensive, air-conditioned air inside. Taking an afternoon to inspect your new space for air leaks, upgrade to energy-efficient settings, and apply basic weatherstripping can make a meaningful difference in your home’s comfort. Whether you are tackling a comprehensive spring home maintenance checklist or just looking for quick weekend projects, these 10 practical steps will help you create a more eco-conscious and budget-friendly living space before the intense heat arrives.
Start With a Spring Home Maintenance Checklist and Energy Audit
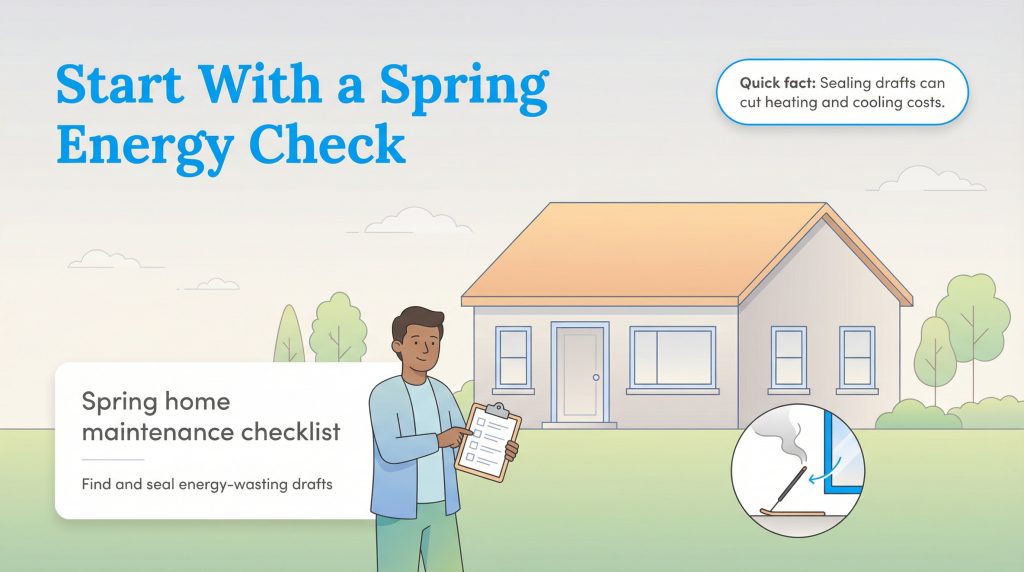
Every new homeowner should establish a solid baseline for their property’s energy efficiency long before the sweltering heat forces their air conditioner into overdrive. Creating a comprehensive spring home maintenance checklist helps you systematically diagnose the root causes of uneven temperatures and stubbornly high utility bills. Rather than randomly applying caulk, a strategic audit gives you a clear roadmap of exactly where your house is losing energy. To keep yourself organized, follow our expanded checklist that outlines the most common cooling-season prep tasks.
| Task | Time Estimate | Cost Range | Skill Level |
|---|---|---|---|
| Perform a draft test around doors and windows | Under 1 hour | Free | Beginner |
| Apply fresh weatherstripping and caulk | 2 to 4 hours | Low | Beginner |
| Inspect basements and crawl spaces for drafts | 1 to 2 hours | Free (to inspect) | Intermediate |
| Inspect attic insulation levels | 1 hour | Free (to inspect) | Intermediate |
| Replace HVAC air filters with MERV-rated options | Under 15 minutes | Low | Beginner |
| Schedule professional HVAC maintenance | 1 to 2 hours | Medium | Professional |
Rather than guessing where the cool air escapes, you can conduct a remarkably simple DIY draft test right now. Light an incense stick and slowly pass it around the edges of your window frames, exterior doors, and baseboards. If the smoke wavers or blows sideways, you have pinpointed an invisible gap where unconditioned air is freely moving. If you are sensitive to smoke, use a thin piece of tissue or simply feel for drafts with a damp hand on a breezy day. Running a damp hand along these same boundaries makes it incredibly easy to feel subtle temperature changes. Tackling these targeted DIY weatherization projects empowers you to take control of your indoor climate rather than letting the turbulent spring weather dictate your family’s comfort.
Weatherstripping Doors in Spring to Stop Air Leaks
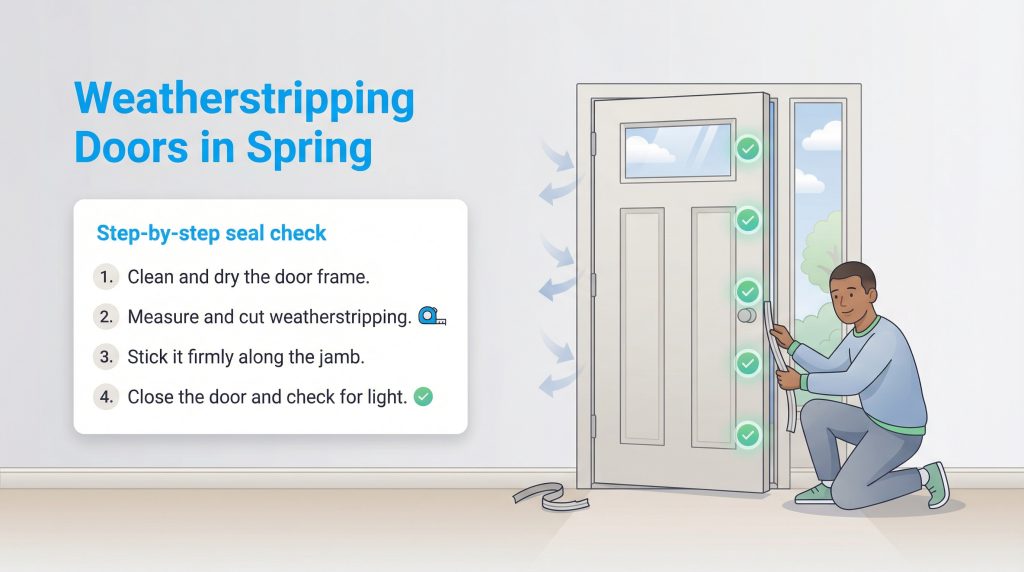
Drafty exterior doors are notorious energy wasters, but fixing them requires only basic tools and a little patience. If you want to figure out how to tackle draft sealing along your home’s perimeter, start by inspecting the main entryways. Winter weather brutalizes door seals, often leaving them cracked, brittle, or entirely flattened from heavy use and freezing temperatures. Weatherstripping doors in spring is the perfect weekend task because the mild temperatures allow the adhesive backings on new foam or rubber strips to cure properly without freezing or melting. You will want to completely strip away the failing materials before applying anything new, ensuring the surface is pristine.
To ensure you purchase the right supplies for the job, here is a breakdown of the most common weatherstripping materials and their specific use cases:
- V-Strip (Tension Seal): Ideal for the sides of sliding windows or the top and sides of a primary exterior door frame. It folds into a “V” shape that springs open to create a firm, durable barrier against the elements.
- Foam Tape: Best used for irregular gaps, interior door frames leading to unfinished basements, or slightly warped window sashes. It is highly affordable and incredibly easy to apply for beginners.
- Door Sweeps: Attached directly to the bottom interior of exterior doors to block drafts, heavy humidity, and summer pests from crawling across your threshold.
Here are the steps you’ll need to take to weatherstrip a door:
- Clean the door frame thoroughly with soapy water (or rubbing alcohol) and let it dry completely to ensure maximum adhesive grip.
- Measure the top and sides of your door jamb, then cut your V-strip or foam tape to the exact lengths required.
- Peel back a small section of the adhesive liner, pressing the stripping firmly into place as you slowly work your way down the frame.
- Close the door to test the seal, checking that the latch clicks easily and no visible daylight peeks through the edges.
How to Weatherize Windows for Warm Weather
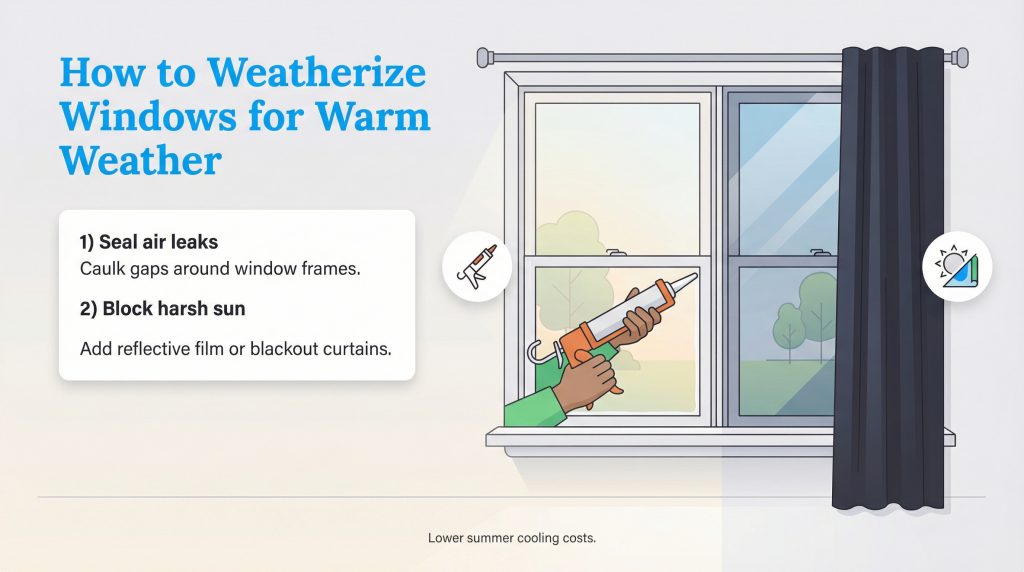
Many people assume window insulation is only for winter, but keeping blistering heat outside is just as vital as blocking winter chills. Learning how to weatherize windows for warm weather requires a dual approach. First, you must address the physical home envelope by caulking any gaps along the exterior and interior window frames. Old caulk shrinks and separates from the wood or vinyl, creating an easy pathway for unconditioned air to infiltrate your living room. A fresh bead of silicone caulk blocks those invisible leaks instantly. Renters should always check their lease or ask for landlord permission before applying exterior caulk. If you cannot use permanent sealants, consider pressing removable rope caulk into the gaps along the window sashes for a temporary, damage-free barrier.
The second half of this strategy involves actively managing solar heat gain. Sunlight streaming through unprotected glass acts like a natural oven, forcing your air conditioner into overdrive just to maintain a baseline temperature. To fully conquer how to weatherize windows for warm weather, we highly recommend installing thermal curtains and applying reflective window films, particularly on any east- and west-facing glass. Reflective window films reject incoming ultraviolet and infrared light before it penetrates the room, drastically reducing solar heat gain. Meanwhile, heavy thermal curtains create an insulating pocket of air against the glass, keeping the cool air trapped inside where it belongs. Adding these treatments to block harsh rays is one of the smartest energy-efficient home upgrades spring offers, and it is absolutely critical if you want to lower your summer electric bill.
Investing in a Comprehensive Weatherization Kit Guide
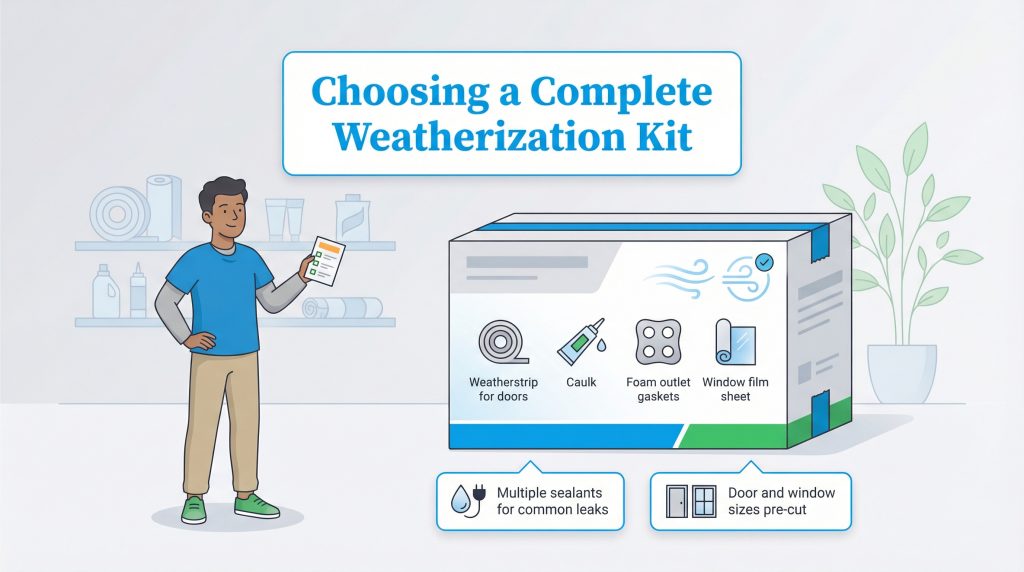
Walking through the aisles of a massive hardware store can feel incredibly overwhelming when you just want to stop a simple draft in your hallway. Staring at dozens of different caulk tubes and industrial-sized rolls of foam tape often leaves homeowners paralyzed by choice. Fortunately, retailers sell all-in-one packages that are absolutely perfect for renters or those short on spare time. Following a basic weatherization kit guide helps you understand exactly what to look for when purchasing these convenient, cost-effective bundles.
A high-quality kit typically includes multiple types of sealants and insulators designed specifically to tackle the most common household leaks. Instead of buying massive rolls of commercial material that will sit in your garage for a decade, you get perfectly sized, ready-to-install portions for standard doors and windows. This makes it much easier to commit to the project on a lazy Saturday afternoon. For anyone feeling intimidated by home improvement, these kits remove the guesswork and provide everything you need to tighten up your living space in one simple purchase.
| Item | Best Used For |
|---|---|
| Rope Caulk | Drafty older windows and temporary gap filling |
| Outlet Gaskets | Insulating light switches and exterior-facing wall plugs |
| Foam Tape | Interior door frames and slightly warped window sashes |
| Door Sweeps | Blocking under-door airflow and keeping out summer pests |
Check Your Attic Insulation and Ventilation
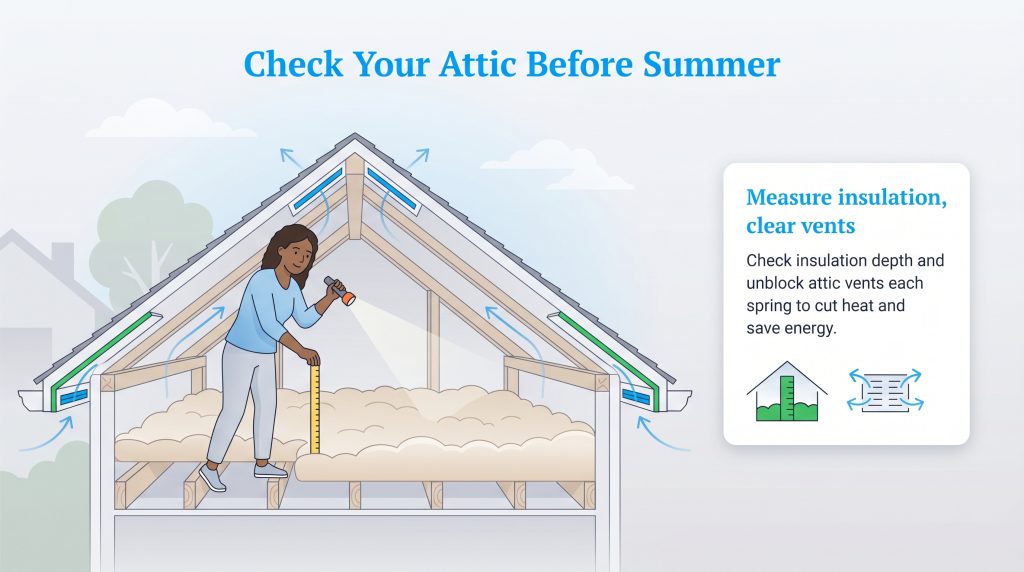
Your roof absorbs a massive amount of radiant heat from the blistering summer sun, and without a solid thermal barrier, that heat easily bleeds downward into your living spaces. Performing a thorough home insulation check spring routine is especially critical if you recently purchased an older house. Over the years, loose-fill fiberglass or cellulose insulation slowly settles, compresses, and degrades. This natural degradation noticeably lowers the material’s ability to resist heat transfer. Peeking into your attic to measure the depth of your existing coverage with a simple ruler is a fast diagnostic tool. Upgrading your attic’s thermal envelope provides a fantastic return on investment, keeping you comfortably cool while cutting energy waste.
Equally important to insulation depth is ensuring proper roof airflow. Take a flashlight and carefully inspect your attic exhaust vents, including your ridge vents and soffit vents, to ensure they are completely clear of debris, blown-in debris, or old bird nests. Clearing these blocked vents allows your roof to properly release trapped, superheated air before the peak summer cooling season ramps up. Without ventilation, your attic acts like a giant radiator baking your home from above. If you rent your home or cannot easily access the attic space, focus your efforts on ground-level improvements like installing outlet gaskets, sealing your doors, and practicing smart thermostat habits. For specific guidance on proper regional depth levels, you can consult the Environmental Protection Agency’s ENERGY STAR program to ensure your upgrades meet modern sustainability standards.
Prevent Energy Loss in Garages, Basements, and Crawl Spaces
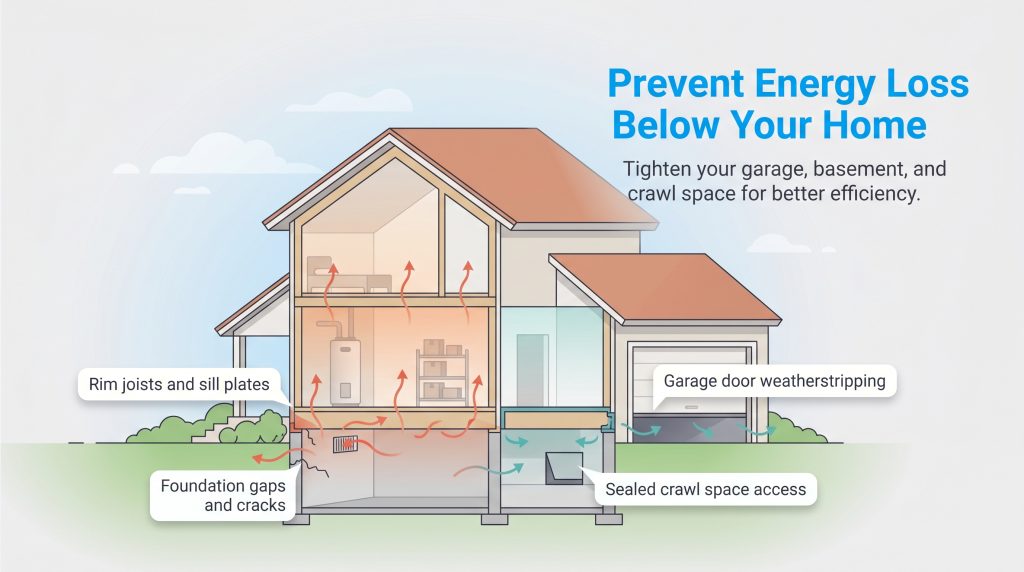
When homeowners think about weatherization, they typically look straight at their living room windows and front doors, entirely ignoring the lowest levels of their property. However, a significant portion of whole-home energy loss originates below your feet. During volatile spring storms, wind-driven unconditioned air easily forces its way through unprotected rim joists, sill plates, and unseen foundation gaps. Due to a natural phenomenon called the “stack effect,” this hot, humid air enters the basement, rises up through the interior walls of your home, and pushes your expensive conditioned air out through the roof. Securing these lower boundaries creates a much tighter, more efficient thermal envelope.
To stop this massive drain on your HVAC efficiency, you must address the vulnerabilities in your home’s foundation and adjoining structures. Here are a few imperative sealing techniques for unfinished basements, crawl spaces, and attached garages:
- Seal the Rim Joists: Apply expanding spray foam or rigid foam board insulation where the wooden framing of your house meets the concrete foundation wall to stop major air intrusion.
- Address Foundation Cracks: Use masonry caulk to seal small, non-structural cracks in your basement walls where humid spring air and ground moisture can slowly seep inside.
- Weatherstrip the Garage Door: Apply a heavy-duty rubber threshold seal to the bottom of your garage door, and use foam weatherstripping on the interior door that connects the garage directly to your living space.
- Check Crawl Space Vents: If you have an encapsulated crawl space, ensure the vents and access doors are tightly sealed and insulated against exterior heat and humidity.
Program Your Smart Thermostat Spring Settings
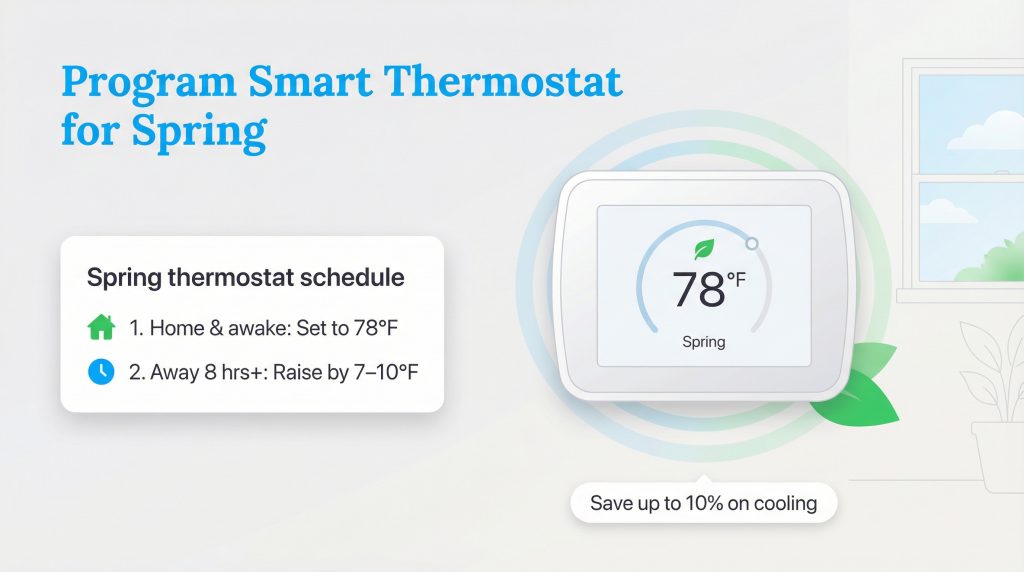
Digital climate controls are only as effective as the daily schedules programmed into them. Transitioning your smart thermostat spring settings ensures your equipment responds properly to unpredictable seasonal temperature swings, rather than fighting against the weather outside. When making the switch from a cozy winter heating schedule to an efficient cooling schedule, a common energy-saving starting point is around 78 degrees Fahrenheit when you are home and awake. This provides an excellent balance of comfort and utility savings.
If you prefer a cooler sleeping environment, drop it slightly at night to help you rest, but always remember to program a significantly warmer baseline for the hours the house sits entirely empty. Telling your system to ease up while you are at the office or running errands prevents your condenser from running needlessly during the hottest, most demanding parts of the afternoon. Many modern devices even offer geofencing features, tracking your smartphone’s location to automatically dial back the cooling when you drive away from the neighborhood.
Optimize Ceiling Fans and Airflow for Spring Cooling
If you are looking to prepare your home for efficient spring cooling without spending a single dime, optimizing your existing ceiling fans is the ultimate zero-cost solution. Many homeowners leave their fans spinning the same direction year-round, completely missing out on their seasonal benefits. Locate the small directional switch on your ceiling fan’s motor housing and flip it so the blades rotate counterclockwise.
This counterclockwise motion creates a strong, downward draft that immediately pushes cooler air toward the floor. While fans do not actually lower the temperature of the room, this powerful downdraft creates a localized wind-chill effect against your skin, making you feel several degrees cooler. Because of this added comfort, you can comfortably set your smart thermostat a few degrees higher without sacrificing your quality of life. Just remember the golden rule of ceiling fans: they cool people, not empty rooms. Always turn them off when you walk out the door to avoid wasting electricity.
Schedule Professional Spring HVAC Maintenance
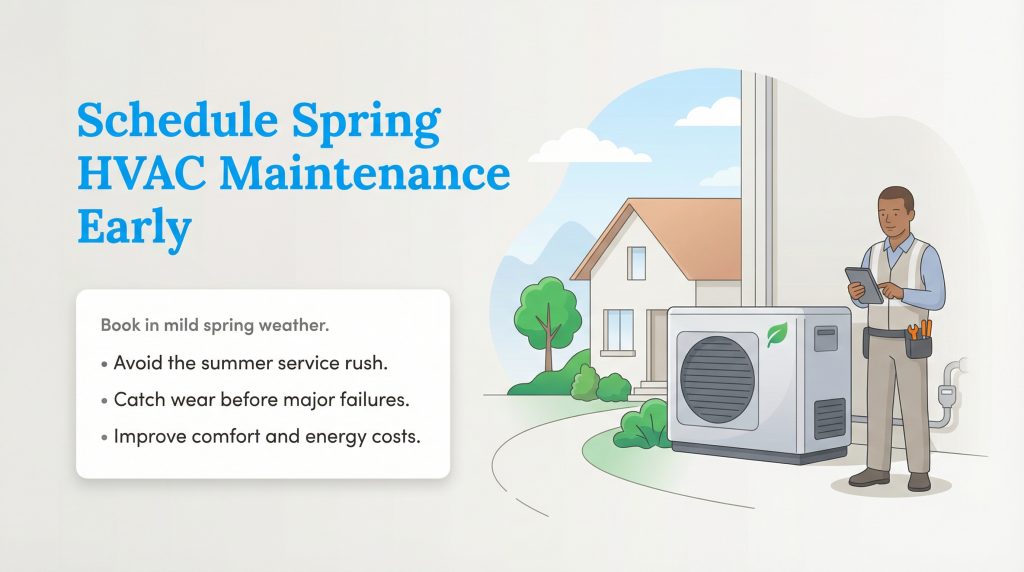
While sealing gaps is an excellent weekend task, your central air conditioning unit requires expert attention to handle the demanding months ahead. Booking a licensed technician during the mild transition between seasons completely avoids the frantic summer rush when local companies are fully booked. A professional will test refrigerant levels, clean the evaporator coils, and clear the condensate drain line. Catching minor wear and tear early easily prevents a catastrophic mechanical failure when temperatures hit their absolute peak.
Replace Your Air Filters With MERV-Rated Options
Before the technician even arrives, you should immediately replace your dirty, dust-clogged winter filters with proper MERV-rated options (Minimum Efficiency Reporting Value). Running an air conditioner with a suffocated filter restricts necessary airflow, forcing your blower motor to work twice as hard to push cool air into your home. We strongly recommend upgrading to a fresh filter with a MERV rating between 8 and 11. These mid-tier ratings strike the perfect balance, maximizing your AC airflow efficiency while capturing the heavy pollen, pet dander, and dust typical of spring allergy season. Swapping these out every 60 to 90 days drastically improves your indoor air quality.
Inspect Your System for Leaky Ducts
During your spring checkup, it is crucial to address your ventilation network. Leaky air ducts are a major hidden issue for many new homeowners, often causing up to 30% of your precious cool air to escape into unfinished basements, dark attics, or crawl spaces before it ever reaches your living room. If you consistently notice that certain rooms feel significantly warmer or stuffier than others, specifically ask your HVAC technician to inspect your exposed ductwork for loose metallic connections, degraded mastic tape, and compromised seals. Proper duct sealing ensures every ounce of cooling effort makes it exactly where you need it.
Regional Spring Energy and Weatherization Tips
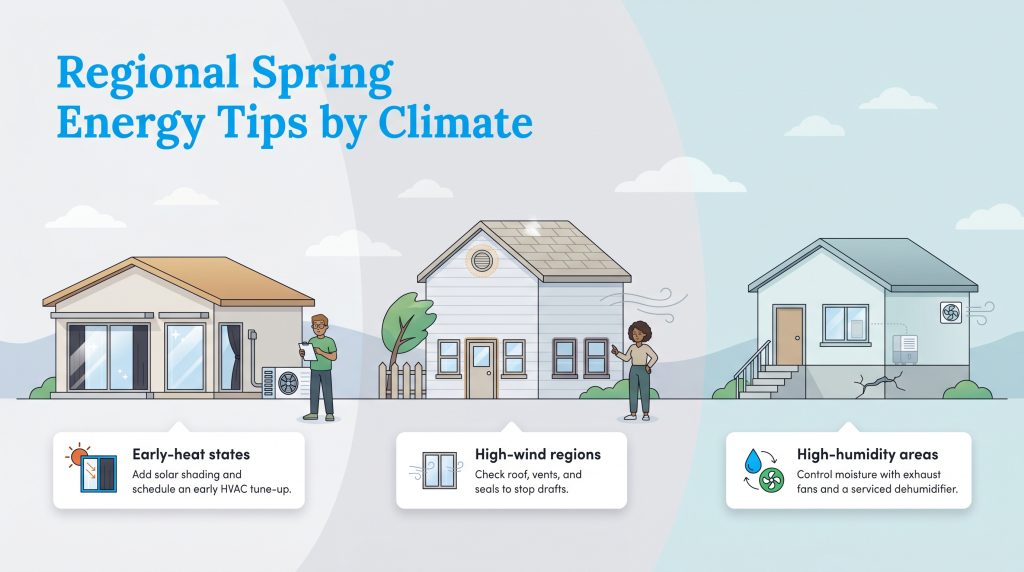
Not all weatherization strategies are created equal, and where you live heavily dictates your home maintenance priorities. A homeowner preparing for spring in the blistering heat of Texas faces an entirely different set of environmental challenges than someone bracing for the gusty storm season in the Midwest. To maximize your energy efficiency, tailor your approach based on your specific geographic climate zones.
| Early-Heat States (e.g., Texas, Arizona) | High-Wind Regions (e.g., Midwest, Plains) | High-Humidity Areas (e.g., Southeast, Florida) |
|---|---|---|
| Prioritize aggressive solar shading. Install blackout curtains and reflective window films early in the season to block intense radiant heat before May. | Focus heavily on draft prevention. High spring winds force unconditioned air through weakened door seals and degraded window frames. | Prioritize moisture control. Ensure your bathroom exhaust fans are working properly and seal any foundation cracks to block damp ground air. |
| Schedule HVAC tune-ups by late March. Air conditioning systems in these states experience the longest and most demanding operational run times. | Check roof shingles and attic exhaust vents frequently, as severe spring storms can loosen exterior barriers and disrupt proper ventilation. | Service your whole-home dehumidifier or standalone units. Reducing indoor humidity makes the air feel cooler, easing the burden on your AC. |
Deciding Between DIY Weatherization and Hiring a Professional
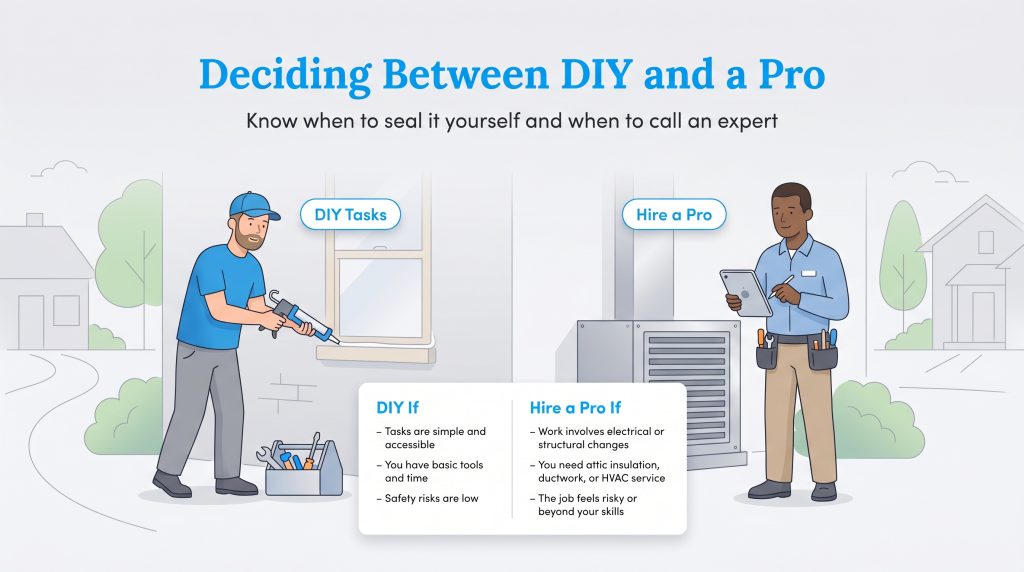
Knowing your limits is a vital part of any home improvement journey. While many simple draft-sealing projects are perfect for a confident weekend warrior, complex electrical or structural upgrades require specialized tools and expert knowledge. Diving into a complicated duct repair without the right training can often cause more harm than good, leading to expensive emergency repair bills down the line. Using a quick reference guide helps you determine the best approach for your specific situation, preventing costly mistakes and ensuring your residence remains structurally safe.
| Task | DIY If | Hire a Pro If |
|---|---|---|
| Caulking and Weatherstripping | You are sealing ground-level windows or basic exterior doors. | You need to seal second-story windows or replace entire door frames. |
| Attic Insulation | You are simply unrolling a few fiberglass batts over easily accessible areas. | You need to blow in deep loose-fill insulation or address old, damaged materials. |
| HVAC Maintenance | You are only swapping out the disposable air filter. | You need a seasonal tune-up, refrigerant check, or ductwork inspection. |
| Window Upgrades | You are applying removable thermal films or hanging blackout curtains. | You are fully replacing old, single-pane glass units with modern fixtures. |
Preparing Your Home Envelope for the Summer Heat
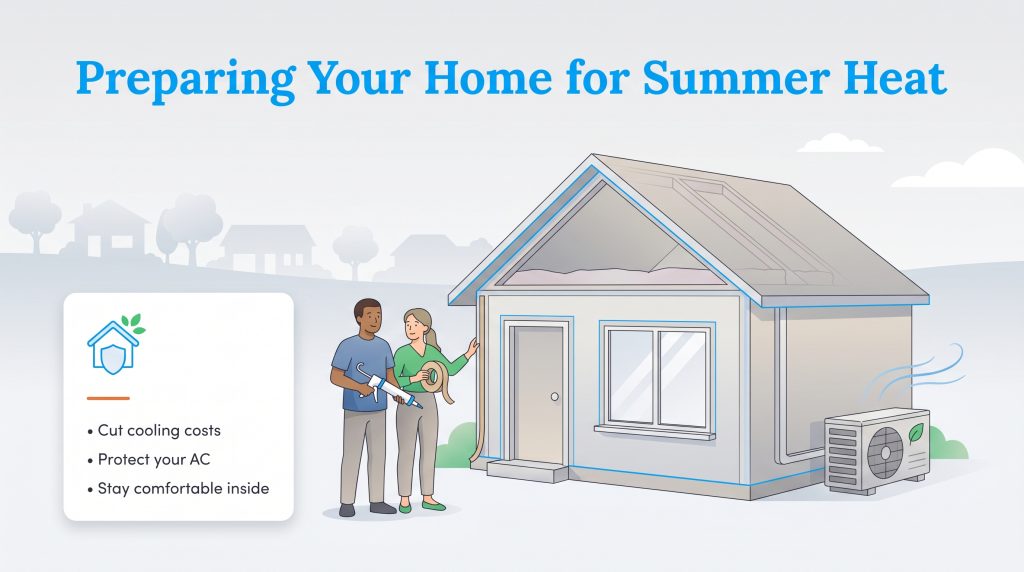
Moving into a new home brings an endless to-do list, making it incredibly tempting to push climate efficiency to the back burner while you unpack boxes. Yet, if you want to protect your budget, finishing these 10 spring weatherization tips before the first brutal summer heatwave hits is absolutely non-negotiable. Preparing your home envelope now aggressively slashes your cooling costs and prevents your air conditioner from working itself into an early grave. Taking the time to patch a few hidden basement drafts or swap out flattened weatherstripping protects your wallet and noticeably lowers your household’s overall carbon footprint.
Once you master these basic seasonal tasks, you might even consider researching long-term solar energy upgrades to further offset your electricity usage in the future. You deserve a relaxing, consistently cool environment after a long day of work, without the anxiety of a massive impending utility bill. Roll up your sleeves, grab a tube of silicone caulk, optimize those ceiling fans, and enjoy the immediate, long-lasting comfort that comes with a beautifully sealed home.
Frequently Asked Questions About Spring Weatherization
Is weatherstripping necessary in the spring and summer?
What is the most cost-effective DIY weatherization project?
Can renters weatherize their apartments without losing their security deposit?
When should I hire a professional instead of using a weatherization kit?
How do I know if my home has air leaks?
What is a good MERV rating for a home air filter in the spring?
Does weatherstripping help reduce indoor spring allergies?
How do I adjust my ceiling fans for warm weather?
About the Author

LaLeesha has a Masters degree in English and enjoys writing whenever she has the chance. She is passionate about gardening, reducing her carbon footprint, and protecting the environment. She also recently served as President of the Board for City Sprouts (a community garden).