Keep Your Home Warm, Efficient, And Ready For Whatever Winter Brings

Key Takeaways
- Sealing drafts around doors and windows is the most cost-effective way to immediately lower your winter heating bills.
- Upgrading your attic insulation helps maintain a consistent indoor temperature and significantly reduces overall energy waste.
- Taking advantage of financial assistance like the Weatherization Assistance Program can help cover the costs of major efficiency upgrades.
When freezing temperatures arrive, a properly winterized home acts as a fortress against the cold, keeping your family comfortable while protecting your wallet. According to the Environmental Protection Agency, comprehensive Home Weatherization Tips — like air sealing drafts and upgrading attic insulation — can save homeowners an average of 15% on heating and cooling costs, putting hundreds of dollars back in your pocket each year. Learning how to weatherize a house for winter boils down to a systematic approach of sealing your home’s envelope, reinforcing insulation, and optimizing your mechanical heating systems. Taking these proactive, energy-saving steps today will drastically reduce your winter utility bills and prevent expensive emergency repairs down the road.
Why Home Weatherization Matters (And What You Save)
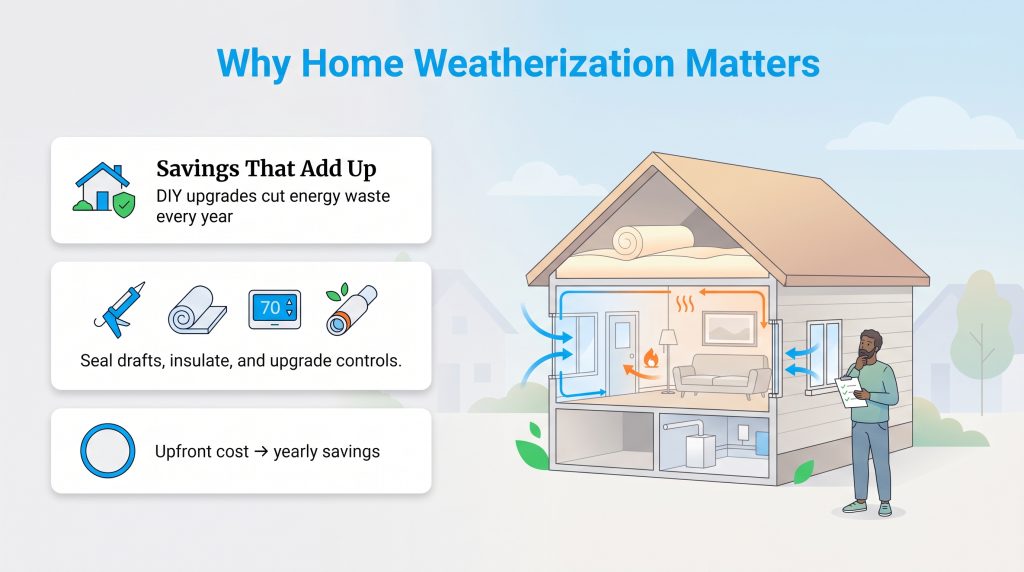
Energy efficient home improvements are more than just weekend chores; they are high-return investments that pay dividends year after year. Taking the time to execute a DIY home weatherization strategy directly combats the drafts and heat loss that force your heating system into overdrive. By addressing the structural vulnerabilities where warm air escapes and freezing air intrudes, you are making an environmentally mindful choice that lowers your household carbon footprint while easing the strain on your budget. Below is a breakdown of common weatherization upgrades, what you can expect to spend upfront, and the anticipated annual savings you will enjoy.
| Weatherization Upgrade | Estimated DIY Cost | Expected Annual Savings |
|---|---|---|
| Sealing Drafts (Caulk & Weatherstripping) | $20 – $50 | 10% – 20% on heating bills |
| Upgrading Attic Insulation for Winter | $300 – $600 | Up to 15% on overall energy costs |
| Installing a Smart Thermostat | $100 – $250 | 10% – 15% on heating and cooling |
| Insulating Pipes & Water Heater | $30 – $60 | 7% – 14% on water heating costs |
Phase 1: Weatherize Doors And Windows
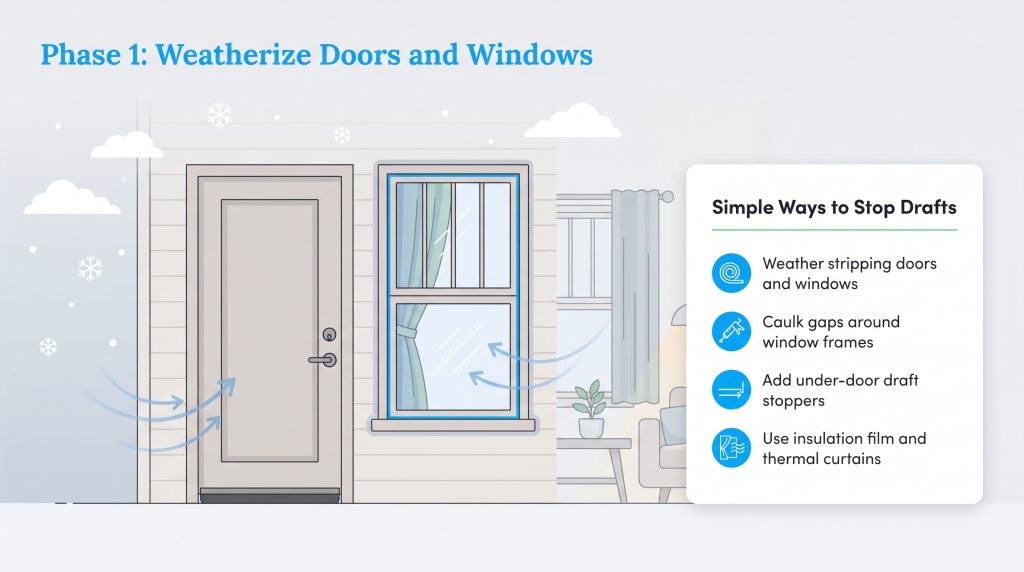
Stopping drafts around your home’s exterior doors and windows is the absolute foundation of our weatherization strategy. Because glass and door frames naturally expand and contract with seasonal temperature shifts, these entry points are notorious for leaking warm air. Securing your home’s envelope is a highly accessible DIY task that requires just a few basic materials and a free Saturday afternoon.
1. Apply Energy Efficient Weather Stripping
Tiny gaps around your home’s envelope can cause massive heat loss over a long winter. When applying materials for weatherstripping doors and windows, match the specific profile to the job to ensure a tight seal. We recommend using V-strip (tension seal) for the sliding sides of double-hung windows, felt strips for low-traffic window sashes, and durable foam tape for irregular gaps around exterior door frames. Clean the surface thoroughly before you add or replace worn weather stripping so the adhesive backs bond securely.
2. Caulking Windows For Winter
While weather stripping handles the moving parts of your windows, you need an air-tight solution for the stationary frames. Use a high-quality silicone caulk to seal the stationary joints where the window frame meets your drywall or exterior siding. Silicone is ideal because it remains flexible in freezing temperatures and creates a waterproof barrier. Apply a continuous bead around the perimeter, then smooth it out with a damp finger to push the material deep into the cracks.
Compare Utility Providers for Your Home
Find which utilities service your address and connect your home to the best electricity, natural gas, water, internet, and trash companies in your area.
3. Install Under-Door Draft Stoppers
The gap at the bottom of your front and back doors is a prime culprit for icy drafts creeping across your floors. To fix this, install heavy-duty door sweeps screwed directly into the bottom of the door. For interior doors leading to unheated spaces like a basement or an attached garage, slide a weighted fabric draft stopper along the floor. This completely blocks the under-door airflow and keeps your main living areas consistently warm.
4. Apply Thermal Curtains And Insulation Film
Old, single-pane windows act as thermal bridges that let precious heat escape rapidly right through the glass. You can cover the glass with transparent insulation film, which creates a dead-air space that acts as an invisible barrier. You can also block out the cold by layering your window treatments with heavy thermal curtains, which trap heat effectively while adding seasonal style to your living space. If your budget allows, upgrading your home’s exterior with storm windows offers excellent extra protection against high winter winds.
Phase 2: Upgrading Attic And Wall Insulation
Because warm air naturally rises, a poorly insulated attic acts like a giant chimney, silently draining your budget by pulling heat out of your living spaces. Addressing your attic is often the single most impactful project for long-term energy savings.
5. Assess Current Attic Insulation Levels
Attic insulation relies on a metric called R-value, which measures how well a specific material resists conductive heat flow. The higher the R-value, the greater the insulating effectiveness. Depending on your specific climate zone, the Department of Energy generally recommends an attic R-value between R-38 and R-60. You can perform a quick visual test to check your current levels: look across your uncovered attic floor. If your insulation is perfectly level with or below the floor joists, you absolutely need to add more. The general rule of thumb is to aim for 10 to 14 inches of insulation for optimal energy savings.
6. Utilize Fiberglass Batts (Attic Insulation Tips)
When topping up your attic, un-faced fiberglass batts are incredibly easy to roll out yourself, making them a great DIY solution for unfinished spaces. Simply layer the new batts perpendicular to the existing joists to cover any gaps. Ensure you wear protective clothing, gloves, and a mask during installation. Adding this eco-conscious alternative over older, compressed materials restores your home’s thermal barrier without requiring professional blown-in equipment.
7. Clear Blocked Soffit And Roof Vents
It might seem counterintuitive to let cold air into your attic during winter, but proper ventilation is just as critical as insulation. If your attic gets too warm, it melts the snow on your roof, which refreezes at the eaves and creates damaging ice dams. Make sure your soffit and roof vents aren’t blocked by displaced fiberglass batts or accumulated debris. Consistent, cold airflow above the insulation prevents moisture buildup and protects your roof’s structural integrity.
Phase 3: Optimizing Your HVAC And Heating Systems
Your heating system works overtime during the winter, making mechanical optimization an essential part of any winterize home checklist. Taking care of your furnace ensures that the energy you are paying for actually translates into warmth.
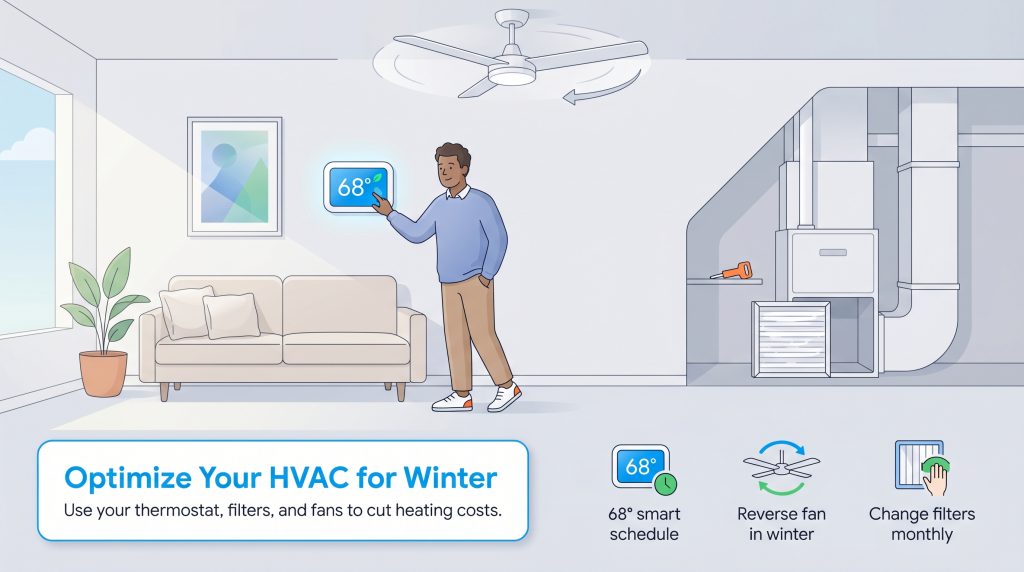
8. Maximize Smart Thermostat Energy Savings
If your current HVAC system relies on an older manual thermostat, you are likely leaving money on the table. Upgrading to a smart device is one of the smartest energy efficient home upgrades you can make. For maximum savings, set your thermostat to 68 degrees when you are awake. When you sleep or leave the house for work, program it to automatically lower by 7 to 10 degrees. Avoiding massive, manual temperature swings helps your furnace maintain a steady, efficient burn while significantly reducing winter heating bills.
Our Top Five Smart Thermostats
- Best Overall: Ecobee Smart Thermostat Premium
- Best automation: Google Nest Learning Thermostat (4th gen)
- Best budget pick: Honeywell Home T9
- Best for DIY and renters: Sensi Touch 2
- Cheapest way to go Smart: Wyze Thermostat
See more about our picks for Best Smart Thermostats
9. Reverse Ceiling Fan Direction
Use your existing home features to your advantage. Switch your ceiling fans to spin clockwise at a low speed. Because heat rises naturally, this reverse motion creates a gentle updraft that pushes warm air trapped near the ceiling back down into your living space along the walls. Reversing your ceiling fans can lower heating costs by up to 10%. Just remember to turn the fan off when you leave the room, as fans cool people, not empty spaces.
10. Replace HVAC Filters Monthly
To keep your furnace running efficiently, you should replace dirty filters monthly to maintain strong airflow and lower your heating costs. A clogged filter restricts airflow, forcing the blower motor to work twice as hard to push warm air through your ducts. This single maintenance step prolongs the life of your unit and improves your indoor air quality.
11. Schedule A Professional Heating Inspection
Have your system serviced by a professional before the first major freeze hits. A technician will clean the heat exchanger, test the burner for maximum efficiency, and ensure that your system is venting properly. If you rely on a traditional fireplace, have your chimney cleaned and inspected to remove dangerous creosote buildup, and remember to keep the damper closed when there is no active fire so you do not pull warm air out of your house.
Finally, swap out old incandescent lights for LED bulbs during the shorter daylight hours of winter. LED technology uses a fraction of the electricity, which improves your home’s overall electrical efficiency and keeps utility bills low.
See more Ways to Save on your Electric Bills
Phase 4: Protecting Plumbing And Water Heaters
Frozen pipes can burst and cause thousands of dollars in catastrophic water damage overnight. Protecting your plumbing system requires addressing exposed lines and making sure your hot water heater is not wasting excess energy during the coldest months.
12. Winterizing Plumbing Pipes In Unheated Spaces
Focus your attention on unheated areas like basements, crawlspaces, attics, and garages. Insulate any exposed plumbing in these zones using simple, inexpensive foam pipe sleeves. Just cut the foam to length, wrap it around the pipe, and secure it with heavy-duty tape. This minor investment drastically reduces the chance of the water inside freezing solid during a cold snap.
13. Insulate Your Water Heater Tank
Your water heater also needs seasonal attention to operate efficiently. Sediment buildup at the bottom of the tank forces the burner to work harder, lowering overall efficiency. Flush your water heater annually to clear out this debris. If your tank is located in a cold basement or garage, wrap it in a specialized insulated blanket to retain heat and reduce energy waste.
14. Let Faucets Drip During Freezes
When temperatures drop deep below freezing, let your indoor faucets drip slightly overnight. Even a tiny trickle of moving water relieves the extreme pressure buildup inside the pipes that actually causes them to burst. Additionally, open your bathroom and kitchen cabinet doors to allow warm indoor air to circulate around the plumbing under the sinks.
Phase 5: Exterior Maintenance And Roof Preparation
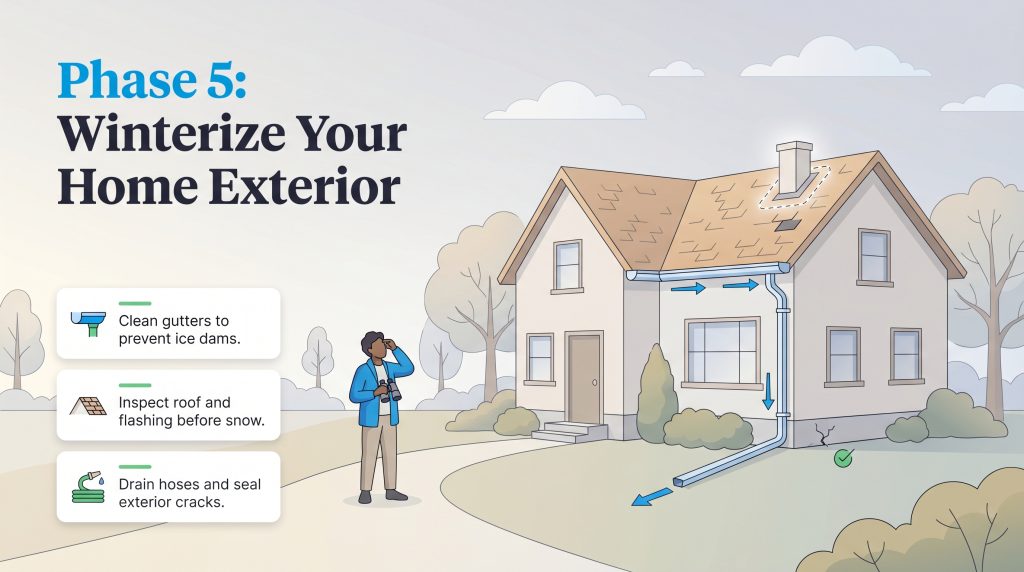
Your home’s exterior is the first line of defense against winter storms, heavy snowfall, and ice. Taking a proactive walk around your property before winter arrives ensures your house can withstand whatever the season throws at it.
15. Clean Gutters To Prevent Ice Dams
You must clean and maintain your gutters before the first freeze. Clogged gutters trap standing water that freezes into massive ice dams, pushing moisture up under your shingles and leading to severe roof leaks. Clear out autumn debris, consider adding gutter guards, and ensure your downspouts extend at least 3 to 4 feet away from your home’s foundation to prevent water from pooling near your basement walls.
16. Inspect Roof Flashing And Shingles
Use binoculars to safely inspect your roof from the ground. Look for missing or damaged shingles and compromised metal flashing around chimneys and vent pipes. If you spot structural issues, hire a roofing professional to patch them before snow accumulates and hides the damage.
17. Drain And Store Outdoor Hoses
Prepare your outdoor equipment for the off-season to prevent ice expansion damage. Disconnect, drain, and store all outdoor garden hoses in your garage or shed. Shut off interior water valves leading to your exterior spigots, then open the outside spigots to drain any remaining water from the line.
18. Seal Exterior Foundation Cracks
Inspect your siding, touch up exterior paint, and seal any foundation cracks with a durable masonry caulk. Doing this prevents water infiltration, which can freeze and expand the cracks further. It also stops small rodents and pests from seeking warmth inside your basement as temperatures plummet outside.
How To Pay For Upgrades: The Weatherization Assistance Program
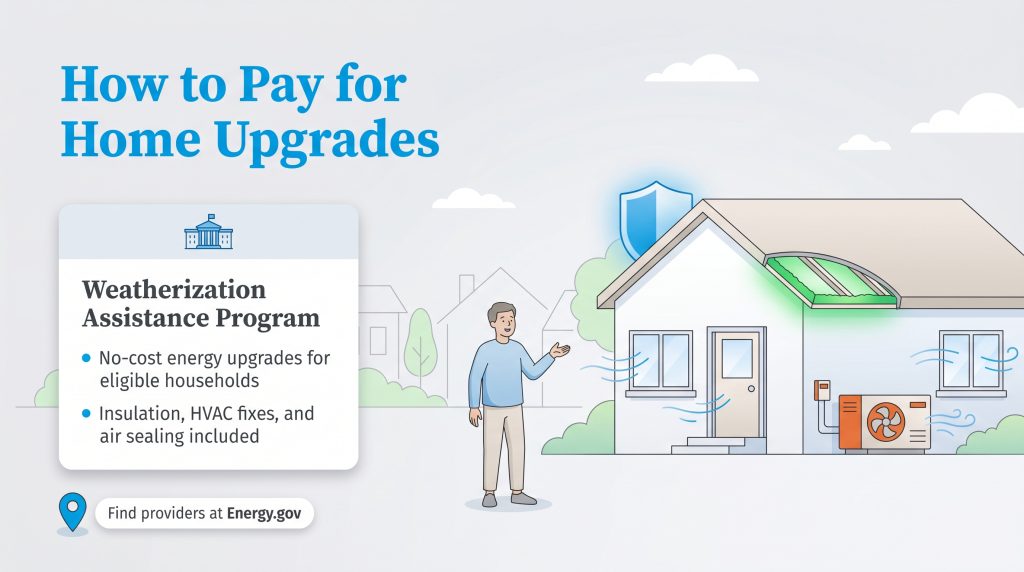
We know that completely sealing and insulating a home requires an upfront investment that not everyone can comfortably afford. Fortunately, the federal government provides substantial resources to help. The Weatherization Assistance Program (WAP) is an initiative managed by the U.S. Department of Energy that provides free, comprehensive weatherization services to eligible low-income households. Instead of paying out of pocket, qualifying families receive professional energy upgrades at absolutely no cost.
State and local agencies manage the implementation of these services, which often include adding high-efficiency insulation, repairing HVAC systems, and sealing major air leaks. Eligibility generally depends on several core factors:
- Income Limits: Your total household income must typically fall below 200% of the federal poverty level.
- Automatic Eligibility: If you receive Supplemental Security Income (SSI) or Temporary Assistance for Needy Families (TANF), you automatically qualify for the program.
- Priority Groups: Preference is often given to the elderly, families with young children, and individuals with disabilities.
- Property Types: Homeowners and renters (with landlord permission) living in single-family homes, multi-family complexes, and mobile homes are all eligible to apply.
To learn more about your specific state’s application process, find local providers, and review current income guidelines, visit the official Energy.gov WAP resource center.
Home Energy Audit Benefits (Professional Vs. DIY)
Home energy audit benefits extend far beyond simply diagnosing a cold draft; they provide a comprehensive, room-by-room roadmap to maximize your energy efficiency. Before you begin purchasing weatherization materials, it pays to understand exactly where your home is losing heat. You generally have two paths to evaluate your home’s thermal performance: hiring a professional or performing a DIY test.
A professional home energy audit involves certified technicians utilizing advanced diagnostic tools. They will typically run a blower door test to depressurize your home and use infrared cameras to visually pinpoint hidden air leaks and missing insulation behind your drywall. While a professional audit requires an upfront fee, many state utility programs offer heavy rebates to offset this cost, making it highly accessible.
Conversely, a DIY audit is an entirely free and highly effective way to identify the most severe leaks yourself. Up to 30% of a home’s heat can escape through small gaps and leaks. To find them, pick a cold, windy day, close all windows and exterior doors, and turn off your furnace. Light an incense stick and trace it carefully around your window frames, door hinges, baseboards, and electrical outlets. If the smoke wavers or blows sideways, you have successfully located a hidden draft that needs immediate sealing.
Preparing For The First Winter Freeze
Heavy winter weather can easily knock out local power grids, so preparing for winter storms is just as important as sealing drafts. As part of a complete home safety plan, build a dedicated emergency kit containing Flashlights, extra batteries, bottled water, non-perishable foods, and a portable charger to keep your mobile devices powered during an extended outage. Because you will be running your heating systems and potentially alternative fuel heat sources more frequently, your carbon monoxide risk increases significantly. Test all your smoke alarms and install at least one CO detector on every level of your home well before winter begins.
Winterizing your home does not have to be a stressful or complicated process. By following this 18-tip home weatherization guide — focusing heavily on sealing the envelope, upgrading attic insulation, and optimizing your HVAC machinery — you take immediate control of your household energy consumption. The upfront effort and small material costs will pay dividends all season long, resulting in a warmer, safer, and drastically more efficient home for you and your family.
Frequently Asked Questions About Home Weatherization
What is the most cost-effective DIY home weatherization project?
The most cost-effective approach is air sealing. By using inexpensive silicone caulk, foam weatherstripping around doors, and under-door draft stoppers, you can immediately stop drafts from stealing your heat. This relatively cheap way to insulate a house provides an exceptionally high return on investment by significantly lowering your heating load without requiring a contractor or specialized installation tools.
How much can I save on my heating bill by weatherizing my windows?
While exact financial savings depend heavily on your specific climate and the age of your home, applying insulation window film, sealing frame gaps, and utilizing thick thermal curtains can reduce localized heat loss by up to 30%. Homeowners typically see a 10% to 15% reduction in their overall monthly heating bills after properly identifying and sealing drafty windows.
Does the government offer free home weatherization assistance programs?
Yes, the Department of Energy runs the Weatherization Assistance Program (WAP), which provides free professional weatherization services to low-income households. Additionally, many state governments and local utility companies offer sizable rebates, free diagnostic energy audits, and heavily discounted smart thermostats to help you upgrade your home’s overall efficiency affordably.
What are the main home energy audit benefits?
A professional home energy audit identifies precisely where your home is losing the most energy, allowing you to prioritize repairs that yield the highest savings. The main benefits include a detailed roadmap for insulation upgrades, identification of hidden safety issues like carbon monoxide leaks or poor ventilation, and access to state-specific utility rebate programs that often require an audit before paying out funds.
Does the Weatherization Assistance Program cover mobile homes?
Yes, the Weatherization Assistance Program explicitly covers mobile homes, as well as single-family houses and multi-family complexes. As long as you meet the standard income eligibility requirements and receive approval, technicians can implement vital upgrades like sealing ductwork, adding belly insulation, and improving the heating systems commonly found in manufactured housing.
What are the telltale signs that my home needs an energy audit?
You should strongly consider a home energy audit if you notice inconsistent temperatures between different rooms, constantly feel cold drafts near closed windows, or experience sudden, unexplained spikes in your winter heating bills. Additionally, the rapid formation of ice dams on your roof or excess condensation on your interior window glass are clear indicators that your home’s envelope and ventilation systems are failing.
About the Author

LaLeesha has a Masters degree in English and enjoys writing whenever she has the chance. She is passionate about gardening, reducing her carbon footprint, and protecting the environment. She also recently served as President of the Board for City Sprouts (a community garden).