

A proactive safety strategy protects your family and property from utility hazards, natural disasters, and unexpected emergencies.
Key Takeaways
- Master your utility shutoffs immediately upon moving in to prevent gas leaks, water damage, or electrical fires during an emergency.
- Customize your escape routes and meeting spots based on specific scenarios like fires, severe weather, or power outages.
- Conduct a room-by-room audit to identify hidden hazards, secure furniture, and test safety devices like smoke detectors.
Creating a reliable and well-documented home safety plan is one of the most critical steps you can take to protect your household from unpredictable emergencies. While settling into your daily routine is important, a proactive approach to natural disaster preparedness ensures you are never caught off guard when a crisis strikes. A structured, reliable strategy bridges the gap between extreme weather events and everyday household hazards, providing peace of mind for your entire family. By breaking your responsibilities into manageable, sequential steps — like performing a rigorous home safety audit, establishing shelter-in-place protocols, building a comprehensive medical emergency kit, safely managing your utility shutoffs, and customizing your setup for vulnerable family members — we can help you build an environment that prioritizes security without feeling overwhelming.
1. Perform a Comprehensive Home Safety Audit
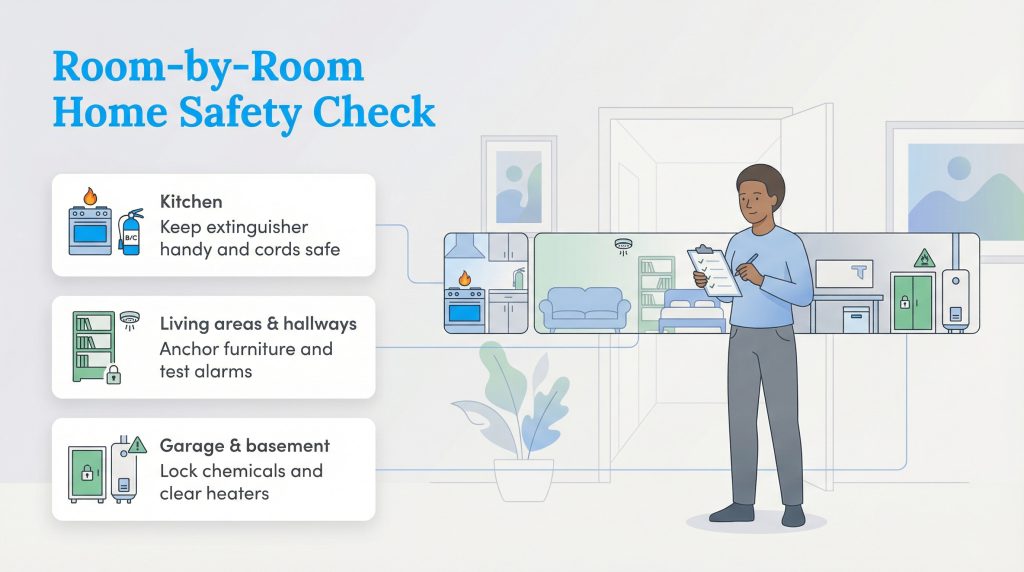
Before you begin stocking up on emergency supplies or mapping out evacuation exits, it is vital to understand what makes a preparedness strategy truly effective. A comprehensive setup starts with a thorough, physical house safety checklist. This means walking through your property with a critical eye to identify unique vulnerabilities — such as outdated electrical wiring, flood-prone basement layouts, or older bedroom windows that are difficult to open. Once you understand your baseline risks, you can build a customized approach rather than relying on generic, one-size-fits-all advice.
During your walkthrough, you must pay close attention to the hidden hazards that often go unnoticed during daily life. We recommend completing a room-by-room audit to document these findings, allowing you to tackle minor repairs before they escalate into major dangers during a severe weather event or power outage. Use the following checklist as your starting point:
- Kitchen Inspections: Test all Ground Fault Circuit Interrupter (GFCI) outlets by pressing the “test” and “reset” buttons. Ensure your stovetop is clear of combustible materials like paper towels, and check the expiration date on your under-sink fire extinguisher.
- Bathroom Safety: Identify potential slip risks by adding non-slip mats inside and outside of tubs. Check your water heater settings to ensure the temperature is below 120 degrees Fahrenheit to prevent accidental scalding.
- Living Area Walkthrough: Look for trip hazards such as loose rug corners or trailing extension cords. Heavy furniture like bookshelves, dressers, and televisions should be anchored firmly to the wall to prevent tipping if climbed on or shaken during an earthquake.
- Staircase and Hallway Checks: Verify the structural integrity of your staircase railings. Ensure all transition areas and steps have adequate, bright lighting and are completely free of clutter.
- Utility Room and Basement Vetting: Ensure your HVAC system is free of combustible dust buildup and replace your air filters. Check around your washer and water heater for slow leaks, and clear away any boxes or debris stacked too close to your furnace.
2. Map Out Your Fire Escape and Evacuation Routes
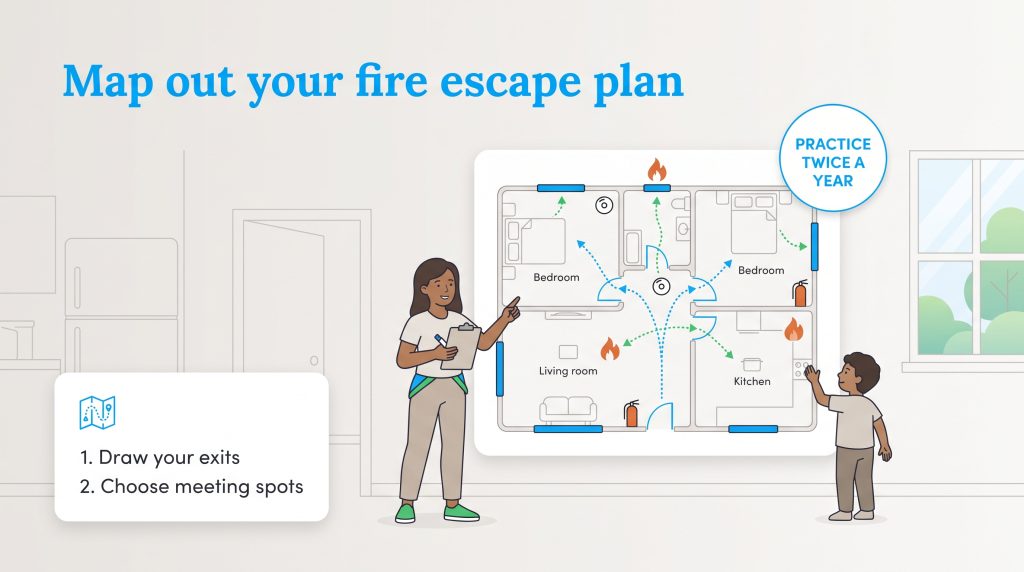
When a fire, gas leak, or sudden disaster occurs, panic can quickly take over. Smoke can fill a home in minutes, severely limiting visibility and making familiar hallways completely disorienting. Designing a physical fire escape plan gives your household a clear, undeniable path to safety. A solid home fire safety checklist demands that every family member understands exactly how to get out of the house in under two minutes.
To make this process highly engaging — especially if you have young children — we recommend transforming your escape plan into an interactive, color-coded mapping activity. Grab a large piece of poster board, some markers, and follow these step-by-step instructions to map your routes effectively:
- Sketch your floor plan: Draw a basic map of your property, including all windows, doors, hallways, and staircases. Clearly mark the locations of smoke alarms and fire extinguishers using a bright color like yellow.
- Identify two exit routes per room: Use a green marker to draw the primary exit (usually the main interior door) and a red marker to draw the secondary exit (usually an exterior window). Walk through these routes physically to ensure windows aren’t painted shut and screens can be easily pushed out.
- Designate two indoor meeting spots: In the event of a weather emergency where you must shelter in place (like a tornado), designate two safe interior gathering zones, such as the basement stairs or an interior windowless hallway.
- Designate two outdoor meeting spots: First, choose a primary location right outside your home, like a mailbox, a specific sturdy tree, or a neighbor’s driveway. Then, select a secondary neighborhood meeting spot slightly further away, such as a community center or street corner, just in case you cannot safely remain on your immediate block.
- Post the plan visually: Place your finalized, color-coded map in a central, highly visible area like the refrigerator or family bulletin board so the whole family sees it regularly.
Once your map is drawn and posted, you must put it into action. We highly recommend that you practice the drill twice a year. Run practice sessions during the day and at night to ensure children know how to safely open their bedroom windows in the dark and that everyone can physically navigate the escape routes without hesitation.
3. Establish a Family Emergency Communication Plan
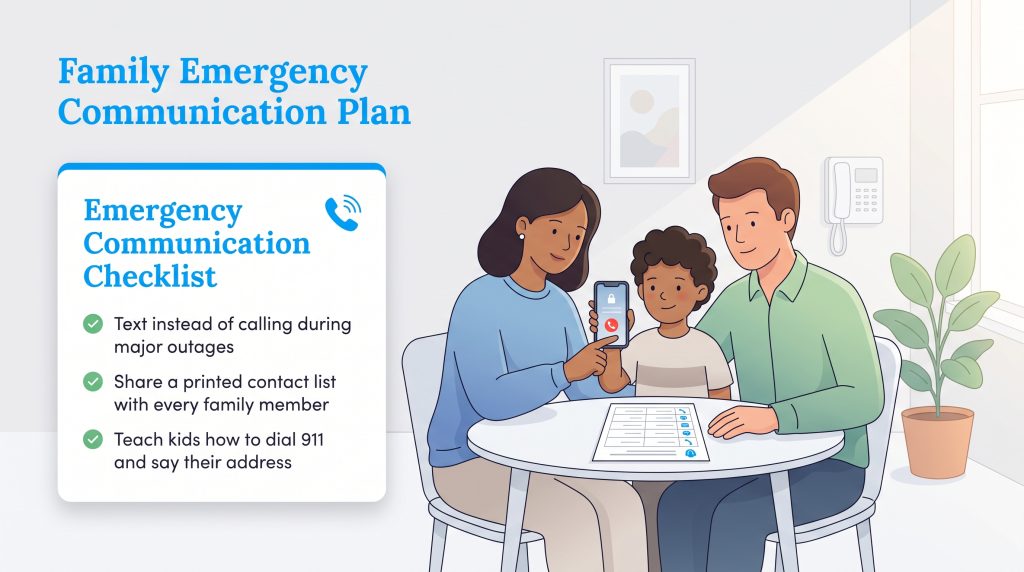
A physical escape route is only half the battle; the rest relies on staying connected when the unexpected happens. Establishing a family emergency communication plan ensures that even if you are separated during a crisis, you can quickly verify everyone’s safety. Local cellular networks often become jammed during regional disasters, making text messages more reliable than voice calls. However, having a predefined list of contacts ensures you aren’t scrolling through your phone in a panic while battery life drains.
If you have young children, an essential part of your communication strategy involves teaching them how to independently seek help. Dedicate time to sit down and teach your children exactly how to dial 911 on both landlines and locked cell phones (most smartphones have a bypass button for emergency calls on the lock screen). Roleplay different scenarios so they understand what constitutes a true emergency, and practice having them clearly recite their full name, parents’ names, and their exact home address. Turning their home address into a simple song or rhyme is an incredibly effective memory tool.
To streamline your overall communication strategy, fill out the template below, print multiple copies, and keep one in your emergency kit, your car’s glovebox, and your wallet.
| Contact Role | Phone Number & Details |
|---|---|
| Designated Out-of-Town Contact | [Name / Phone] — Long-distance lines often connect when local ones fail. This person acts as the central check-in hub for your family. |
| Primary Care Physician | [Name / Phone] — Crucial for emergency medical advice or accessing prescription records. |
| Home Insurance Provider | [Company / Phone / Policy #] — Needed immediately for filing property damage claims after a flood or fire. |
| Local Utility Providers | [Electric / Gas / Water Phone #s] — Keep the 24/7 emergency dispatch numbers handy to report downed lines or severe leaks. |
| Non-Emergency Police/Fire | [Department / Phone] — Save 911 for life-threatening emergencies; use these lines for post-disaster neighborhood updates. |
💡 Pro Tip: Create a “Digital Safety Plan” in a shared note app on your phones containing medical information and emergency contacts. This ensures you have crucial data accessible via the cloud even if you lose physical documents.
4. Prepare for Natural Disasters: Evacuation vs Shelter-in-Place
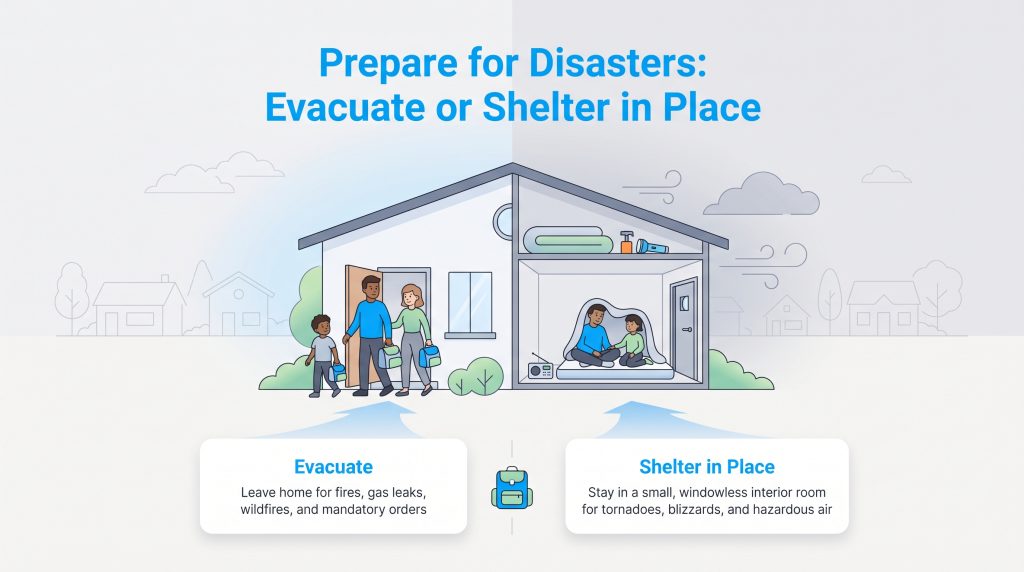
Natural disaster preparedness requires you to make split-second decisions that dictate the immediate safety of your family. One of the most critical elements of a home safety plan is knowing exactly when to flee your property and when to hunker down inside. Misjudging the nature of an environmental hazard can place you in the direct path of danger. Understanding the strict differences between evacuation protocols and shelter-in-place protocols is non-negotiable.
Evacuation means leaving your home entirely to escape an advancing threat, while sheltering in place means utilizing the architectural strength of your home to protect you from an outside force. Here is a breakdown of how to respond to various threats:
- When to Evacuate: You should immediately execute your evacuation plan during house fires, confirmed natural gas leaks, approaching wildfires, and mandatory hurricane or flood orders. In these scenarios, the structural integrity of the home is compromised, or the environment is becoming toxic. Grab your pre-packed emergency go-bag and proceed directly to your outdoor meeting spots or community shelters.
- When to Shelter in Place: You should initiate shelter-in-place protocols during tornadoes, severe winter blizzards, extreme thunderstorms, or airborne chemical spills in your community. In these situations, stepping outside exposes you to flying debris, freezing temperatures, or hazardous air. Your goal is to stay indoors and block out the external environment.
If you must shelter in place during a severe weather event like a tornado, the architectural parameters of your chosen safe room are crucial. You must head to the lowest possible level of your home, ideally an underground basement. If you do not have a basement, seek out a small, windowless interior room on the ground floor, such as a central hallway, a bathroom, or a reinforced closet. Avoid rooms with large, expansive ceilings or heavy objects on the floor directly above you. Keep thick blankets or mattresses nearby to protect your head and neck from falling debris.
5. Utility Shut-Off Protocols: Gas, Water, and Electric
Your home’s utility systems are the lifeblood of your property, providing comfort and convenience daily. However, they can pose significant, immediate risks during a severe emergency. Prioritizing utility shut-off safety is your absolute first line of defense against secondary disasters like basement flooding, chemical explosions, and electrical fires. If you are renting, you must ask your landlord or property manager to clarify exactly which valves or breakers you are authorized to operate yourself. For homeowners, you should locate, test, and clearly label these shutoffs during your very first week on the property.
How to Safely Manage Your Natural Gas
If your home uses natural gas for heating or cooking, you must know where the main shutoff valve is located, usually sitting on the iron pipe leading directly into the outdoor gas meter. Be highly alert for the distinct “rotten egg” smell of mercaptan, an additive utility companies use to make invisible gas leaks detectable. If you smell this odor or hear a harsh hissing sound, evacuate the house immediately. Do not touch any light switches, garage door openers, or cell phones while inside, as even a microscopic static spark could ignite the gas.
To shut off the gas safely from the outside meter, use a 12-inch adjustable non-sparking wrench. Turn the rectangular valve exactly a quarter turn so that the metal lever sits perpendicular (crosswise) to the pipe. Always contact your utility provider before turning a gas line back on. You generally require a certified professional utility technician to restore service, perform pressure tests for hidden structural leaks, and relight all appliance pilot lights safely.
How to Shut Off Your Main Water Supply
Water damage resulting from burst pipes is one of the most common and expensive homeowner insurance claims in the country. Find your main water shutoff valve immediately so you aren’t frantically searching for it in the dark while icy water floods your expensive hardwood floors. This primary valve is most often found in the basement near the front foundation wall, inside an attached garage, or housed in a concrete utility box near the street curb. Tag it with a bright neon label so any family member can spot it in seconds. To shut off the flow, turn a round wheel valve completely clockwise until it stops, or flip a straight lever so it sits perpendicular to the water pipe.
How to Control Your Electrical Panel
Your electricity flows through a central hub that powers everything on your property. Open your metal circuit breaker panel and ensure every single breaker is clearly, accurately labeled for the specific room or appliance it serves. In the event of a major grid surge, an impending flood risk, or a localized fire, you need to know how to instantly cut power to the entire house to prevent electrocution. Simply locate the large, heavy “Main” breaker at the very top or bottom of the panel block and firmly flip it to the “Off” position. Remember to use a battery-powered LED flashlight rather than open-flame candles when navigating to the breaker box during a blackout.
7. Prepare a Carbon Monoxide Safety Plan
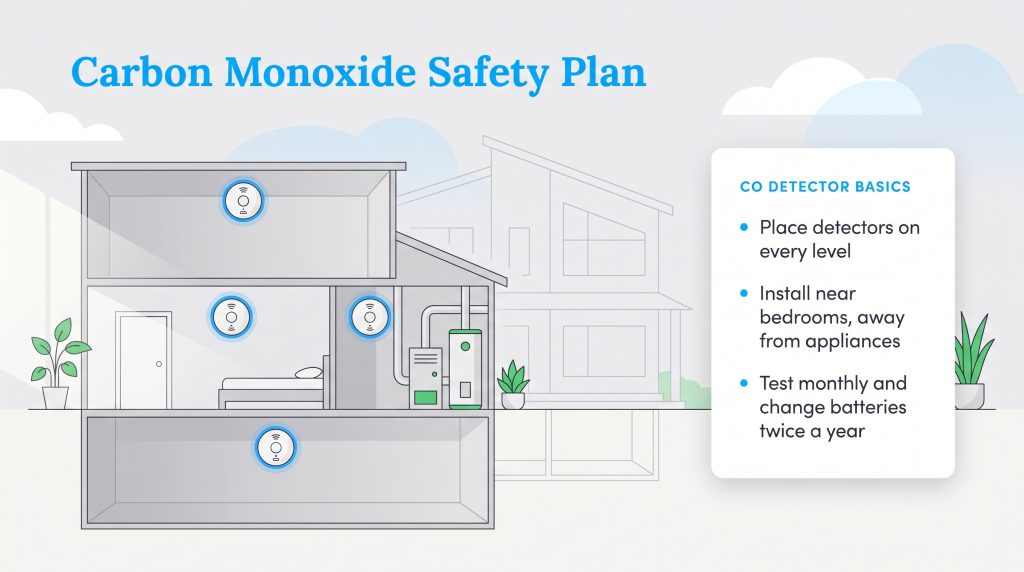
Unlike smoke from a fire, carbon monoxide (CO) is entirely invisible, tasteless, and odorless, tragically earning it the nickname “the silent killer.” A dedicated carbon monoxide safety plan is essential for every single household, but it becomes critically urgent if your home utilizes gas-powered appliances like stoves, central furnaces, water heaters, or an attached garage where vehicles park. The foundation of your family’s defense involves deeply understanding what carbon monoxide is, how it accumulates, and executing strategic detector placement throughout the property.
To prevent annoying false alarms caused by minor, normal operational bursts of gas from ovens or heaters, you should install CO detectors at least 15 feet away from all fuel-burning appliances. Carbon monoxide detectors should follow a similar placement strategy, prioritizing areas near bedrooms so the alarm can easily wake you up at night. Because this toxic gas mixes evenly with indoor air rather than rising immediately like hot smoke, detector height is slightly less rigid, but they should ideally sit at knee or eye level. You must mount a functional unit on every single level of your home, including the basement and outside of every separate sleeping area.
Ongoing hardware maintenance is just as critical as proper initial installation. Instruct your household to test all carbon monoxide detectors monthly by holding down the test button on the face of the device until it chimes. Additionally, make it a firm semi-annual habit to change out the internal backup batteries. Most safety experts recommend syncing this battery replacement task with Daylight Saving Time in the spring and fall to ensure you never forget to keep your defenses powered. While you’re updating your environmental sensors, it’s also an excellent time to verify you have the best radon detectors installed to monitor for other invisible, hazardous gases.
8. Integrate a Smart Home Security Plan
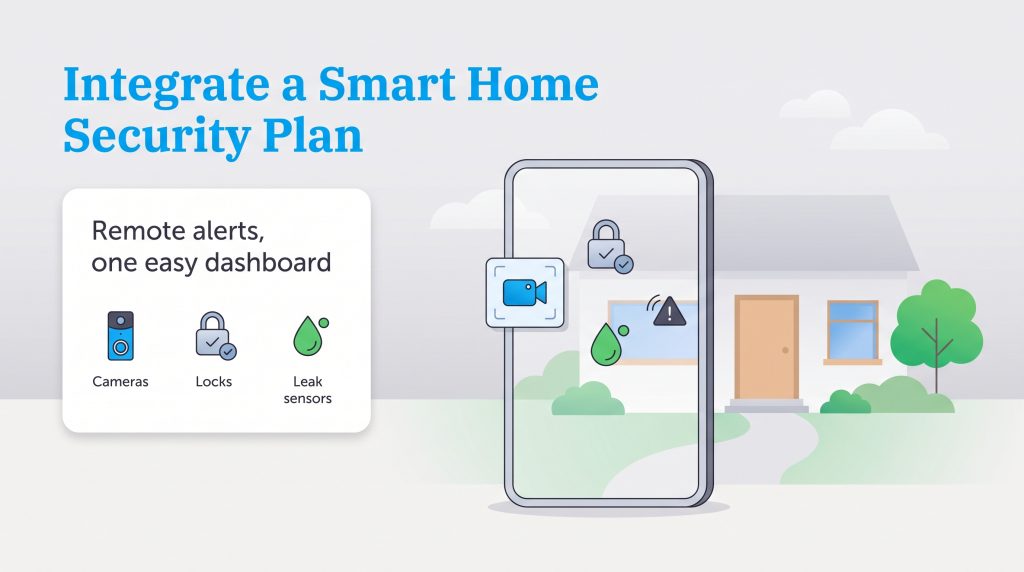
Modern technology has completely revolutionized how we monitor and protect our residential properties. Integrating a smart home security plan allows you to monitor your household remotely, offering automated, real-time alerts that can save you thousands of dollars in property damage and provide unparalleled peace of mind. A well-designed, interconnected digital setup moves far beyond basic local burglar alarms; it actively monitors for severe environmental hazards and utility failures.
To upgrade your home’s technological defenses and create a more responsive safety net, consider installing the following essential smart devices on your local network:
- Video Doorbells and Exterior Cameras: Monitor unexpected visitors, keep an eye on package deliveries, and communicate securely with anyone standing on your porch via two-way audio from your smartphone.
- Smart Locks and Keypads: Eliminate the dangerous need for hidden spare keys under doormats. Smart locks allow you to grant temporary, trackable digital access codes to emergency responders, trusted family members, or pet sitters from anywhere in the world.
- Water Leak and Freeze Sensors: Place these small, wireless devices directly near your water heater, underneath bathroom sinks, and behind washing machines. If liquid moisture or freezing temperatures are detected, you receive an instant push notification on your phone, allowing you to shut off your water main before a burst pipe ruins your flooring.
- Smart Smoke and CO Listeners: These advanced detectors not only sound a loud alarm in the house but also send alerts to your mobile device. Some systems can even automatically shut down your smart thermostat’s HVAC fan to prevent circulating toxic smoke throughout the ductwork.
The true power of these connected tools comes from integrating them into a central, unified mobile dashboard. By linking your smart locks, exterior cameras, and environmental leak sensors into a single application ecosystem, you gain a holistic, real-time view of your property’s safety status, whether you are sleeping comfortably upstairs or traveling halfway across the country.
9. Customize an Aging in Place Safety Plan
Different family demographics require highly specialized approaches to safety. While a healthy, able-bodied adult might easily evacuate through a first-floor window during a house fire, elderly relatives dealing with mobility issues face unique physical hurdles that must be addressed proactively. A generic evacuation strategy often fails to account for vision changes, joint stiffness, or balance concerns.
If you share your home with older adults — or are preparing the property for your own future — your focus should shift heavily toward building a comprehensive aging in place safety plan. Older individuals are far more vulnerable to dangerous slips and severe mobility challenges during a high-stress, fast-paced evacuation.
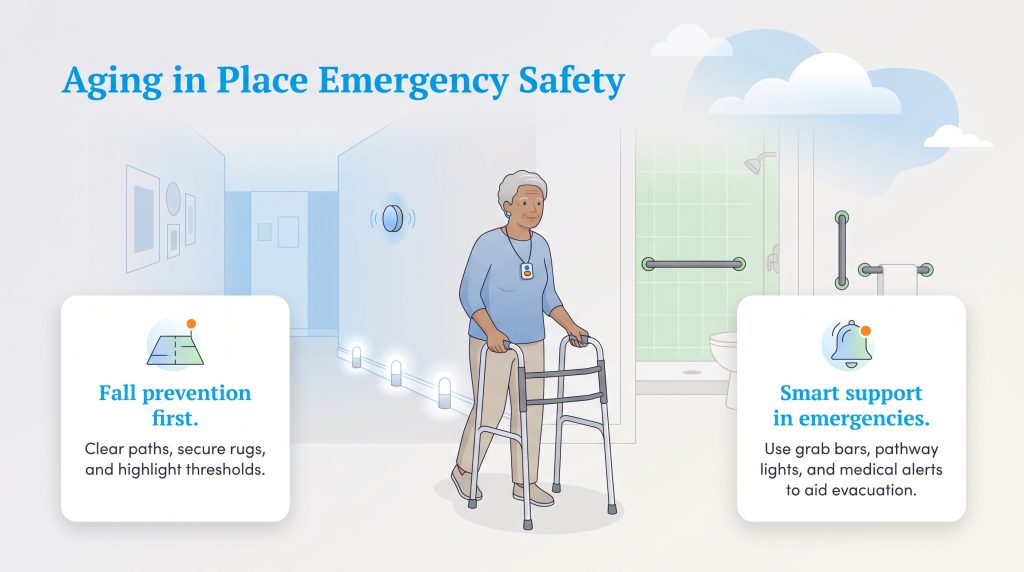
Start by aggressively implementing fall prevention tactics across your entire floor plan. Eliminate elevated thresholds between rooms if possible, or highlight them with high-contrast safety tape. Secure all loose throw rugs with heavy-duty double-sided tape, or better yet, remove them entirely from primary escape pathways to ensure walkers and canes do not catch on the edges. In the bathroom, you must mount sturdy, ADA-compliant grab bars inside the shower and near the toilet, and consider upgrading to a walk-in shower layout to eliminate the need to step over high bathtub walls. We also highly recommend installing bright pathway lighting with motion sensors along all hallways and staircases to help guide nighttime movements safely without fumbling for light switches.
Beyond physical modifications, you should consider incorporating modern medical alert systems or voice-activated smart home speakers throughout the residence. Wearable alert pendants provide immediate emergency dispatch at the push of a button. Alternatively, smart speakers placed in bedrooms and living areas allow seniors to call for help completely hands-free if they fall to the ground and cannot physically reach a telephone or their alert pendant.
Securing Your Household Moving Forward
Implementing a comprehensive strategy offers incredible peace of mind and heavy resilience against the unexpected, transforming your house into a true sanctuary for sustainable living and safety. However, an elaborate emergency plan that sits forgotten inside a desk drawer is entirely useless when the smoke alarms start blaring or the storm sirens wail. True security is an active, continuous process rather than a one-time weekend chore that you can cross off a list and forget.
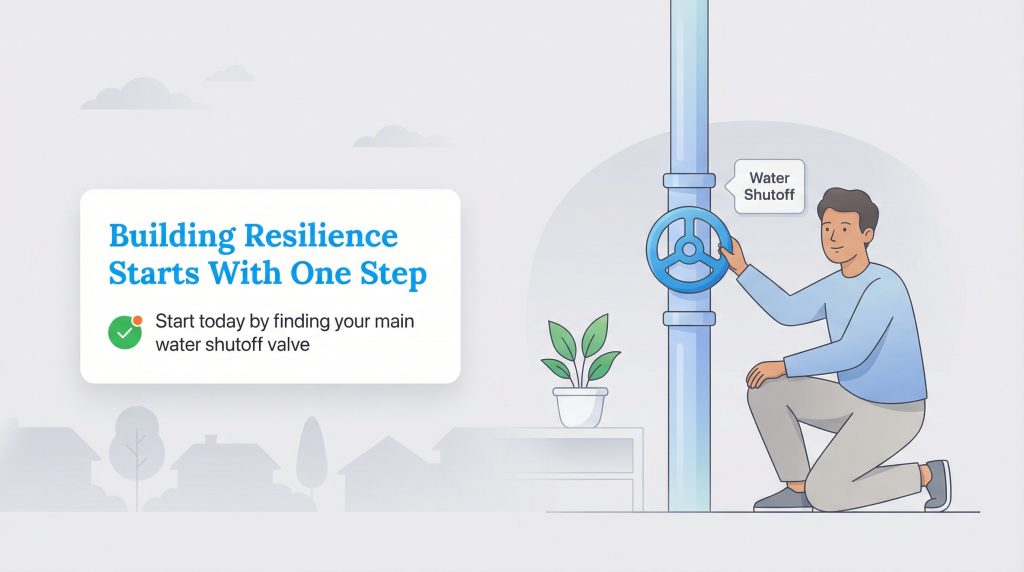
To avoid feeling overwhelmed by the sheer volume of preparedness tasks, start by taking just one immediate, actionable step today. We recommend scheduling a 30-minute block this weekend to physically locate your main water and gas shutoff valves, tag them with bright labels, and ensure you have the correct wrench stored nearby. By mastering this single utility protocol, you immediately lower your risk of catastrophic property damage. The more familiar and comfortable your household becomes with these foundational protocols, the more confidently you can face whatever challenges come your way.
Frequently Asked Questions About Home Safety Plans
What are the 4 main components of a home safety plan?
What is the difference between an evacuation plan and a shelter-in-place plan?
How do I teach my young children about our home safety plan?
How often should we practice our home fire escape plan?
What should be included in a home safety audit for a new house?
What information must be included in a family emergency communication plan?
What are the 4 stages of a home emergency plan?
What should be included in a home safety checklist for seniors?
Where is the safest place to store a fire extinguisher?
Do I need a different safety plan for natural gas vs electric homes?
How should I update my home safety plan when I move to a new place?
About the Author

Claudio is a sustainability-focused writer with a background in Anthropology and Psychology from NC State University. He has spent over 15 years working in writing, interpretation, and translation, driven by a deep interest in how human culture shapes the environment. Today, he shares his curiosity with readers by writing about sustainable living solutions and the connection between everyday choices and environmental impact.

LaLeesha has a Masters degree in English and enjoys writing whenever she has the chance. She is passionate about gardening, reducing her carbon footprint, and protecting the environment. She also recently served as President of the Board for City Sprouts (a community garden).