

Checking your new home for energy leaks during the first 30 days can help lower your utility bills and set a smarter energy baseline
Key Takeaways
- Perform a DIY home energy audit within your first 30 days of moving in to establish a highly efficient baseline for your monthly utility bills.
- Identify and seal air leaks using simple draft detection techniques to immediately reduce heating and cooling costs.
- Upgrade to smart home technology, such as smart thermostats and smart plugs, to make daily energy savings easier.
Moving into a new place is exciting, but the upfront expenses pile up fast. Between signing endless paperwork and arranging furniture, optimizing your monthly utility costs might not be your immediate priority. Yet, figuring out how to conduct a home energy audit during your first month is a high-impact weekend project that pays off almost immediately. By following our straightforward home energy audit checklist, we can help you uncover hidden drafts, tame rogue electronics, and transform your fresh space into an efficient haven. You won’t need expensive diagnostic equipment or specialized training to catch those sneaky inefficiencies and keep more of your hard-earned cash in your wallet.
Gathering Your DIY Home Energy Audit Toolkit
Before you begin inspecting baseboards and crawling around utility closets, you need to assemble a basic savings toolkit. Think of this as your low-cost starter kit for finding and fixing the most obvious energy waste. You won’t have to spend a fortune, and you might already own most of these items — representing some of the best home energy audit tools — before you even finish unpacking your moving boxes. Having everything within arm’s reach prevents you from abandoning your DIY home energy audit halfway through the afternoon.
Grab a sturdy bag or small bucket and collect these essential items:
- An incense stick (or a thin tissue paper) for finding drafts
- A bright LED flashlight for inspecting dark attic spaces and basements
- A notepad and pen to document the specific locations of air leaks
- Adhesive weatherstripping for sealing loose doors and window sashes
- A tube of silicone caulk and a caulk gun to fill permanent exterior gaps
Your First 30-Day Home Energy Audit Checklist
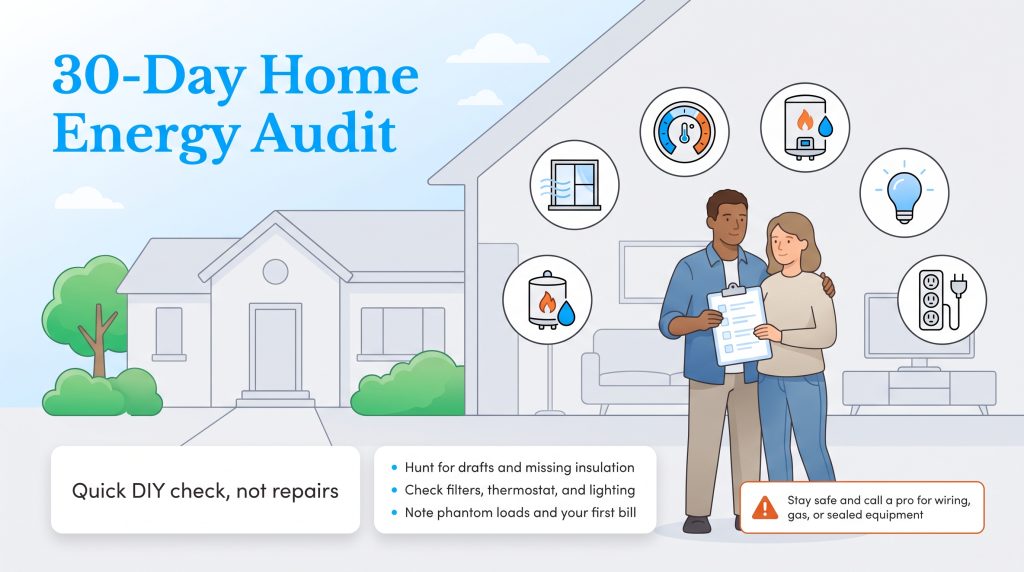
An energy efficiency checklist for homeowners allows you to systematically cover your new space without getting overwhelmed. Walking through your property with this basic outline keeps your DIY assessment focused and efficient.
- Windows and exterior doors: Check for drafts, daylight shining through edges, and damaged weatherstripping.
- Attic, basement, and crawl space: Inspect for missing insulation and obvious air leaks.
- HVAC filter and visible ductwork: Ensure filters are clean and accessible ducts are connected.
- Thermostat settings: Confirm your scheduling aligns with your daily habits to maximize savings.
- Water heater temperature: Verify the thermostat is not set unnecessarily high.
- Lighting: Note any incandescent bulbs that require modern LED replacements.
- Phantom loads: Identify entertainment centers and office setups that can utilize smart plugs.
- Utility bill baseline: Save your first monthly statements to easily track your future improvements.
Step 1: Utilize Draft Detection Techniques for Windows and Doors
Air leaks are a common source of heating and cooling waste, especially around windows, doors, outlets, attic hatches, and baseboards, forcing your climate control systems to work overtime. Finding these invisible gaps requires a bit of detective work, but it remains one of the most satisfying parts of the process. The easiest method relies on the classic incense smoke test. First, turn off your furnace, air conditioner, and any ceiling fans so the indoor air sits completely still. Light an incense stick and slowly trace the edges of your windows, exterior doors, electrical outlets, and baseboards.
Watch the smoke column closely. If it suddenly wavers, dances, or gets sucked toward the frame, you have found an active air leak. Document every drafty spot on your notepad so you can seal them up later with fresh caulk or weatherstripping. These simple draft detection techniques are heavily recommended for do-it-yourself home energy assessments because they yield immediate results. Sealing these gaps can help reduce heating fuel use in winter and keep conditioned air indoors during summer.
Step 2: Inspect Your Heating and Cooling Equipment
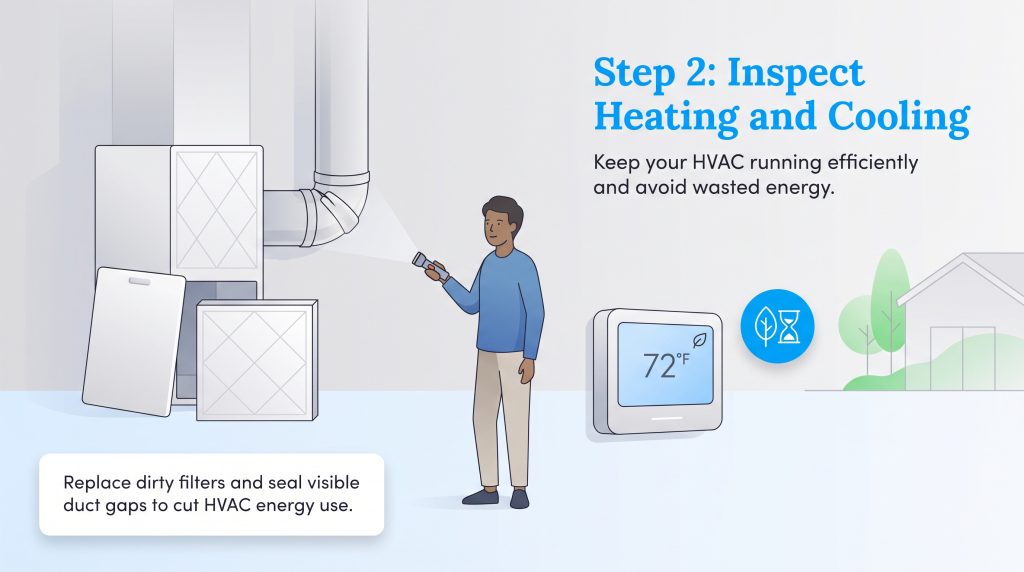
Your HVAC system is the beating heart of your home’s comfort, and it typically represents the largest energy draw on your monthly statement. Treating this equipment poorly guarantees inflated utility bills. Start your inspection by checking the system’s air filter. A clogged, dusty filter restricts airflow, forcing the blower motor to strain and consume excess electricity. Next, take your flashlight into the basement or attic to examine any exposed ductwork. Look for disconnected joints, peeling duct tape, or spots where the metal feels completely uninsulated. If the ductwork is easy to access and you can work safely, small visible gaps can often be sealed with mastic sealant. For hard-to-reach ducts, damaged ducts, or suspected combustion safety issues, bring in an HVAC professional.
Another crucial item on your home energy assessment checklist should involve evaluating how you control that climate equipment. Outdated manual thermostats often lead to heating or cooling an empty house. Upgrading to ENERGY STAR certified smart thermostats stands out as a premier energy-saving option. These modern devices learn your daily schedule, detect when you leave the house, and adjust temperatures automatically to minimize unnecessary runtime.
Step 3: Lower Your Water Heater Temperature
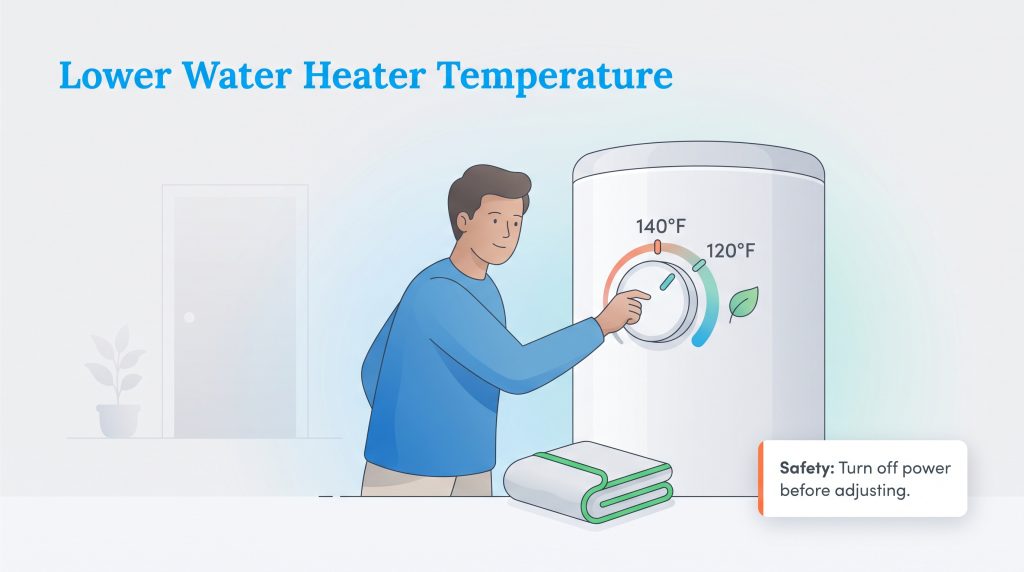
Most people rarely think about their water heater until they are suddenly subjected to a freezing shower. However, this appliance silently burns through energy 24 hours a day to keep water hot and ready for use. Many manufacturers ship new water heaters with the internal thermostat set to a scorching 140 degrees Fahrenheit. Lowering that dial to 120 degrees provides an environmentally mindful choice that simultaneously slows mineral buildup in your pipes and protects your family from accidental scalding.
Adjusting the temperature only takes a few minutes, yet it significantly cuts down on standby heat loss. While you are managing your home water setup, consider wrapping older, uninsulated water heater tanks in a thermal blanket to trap the heat inside the reservoir where it belongs.
Step 4: Identify Phantom Loads and Upgrade to LED Lighting
Modern homes run on digital convenience, but that convenience comes with a hidden cost. Phantom loads — also known as vampire power — refer to the electricity slowly drained by electronics that are technically turned off but remain plugged into the wall. Game consoles, televisions, smart speakers, and idle phone chargers are notorious culprits. You can combat this invisible drain by plugging entertainment centers into smart power strips that automatically cut power to peripheral devices when the main device powers down.
While handling those phantom loads, look up at your light fixtures. If your new home still relies on outdated incandescent or halogen bulbs, swap them out for modern LEDs. They use a fraction of the electricity and last for years, making this one of the most effective strategies for how to save on your electric bill. Lighting upgrades take very little effort but deliver consistent, reliable savings.
How to Set Your New Home’s Energy Baseline
Since you just moved into a new property, you won’t immediately know what a “normal” utility bill looks like for your household. Save your first few electric, gas, and water bills so you can accurately monitor your consumption over the coming months. Pay close attention to the raw usage numbers — such as kilowatt-hours, therms, and gallons — rather than just the final dollar amount.
Because utility rates fluctuate and seasonal weather heavily impacts energy demand, raw consumption metrics give you a much more accurate picture of how your DIY efforts are performing. Comparing your monthly usage allows you to spot sudden spikes that might indicate a developing inefficiency.
Climate-Specific Energy Considerations
Your local climate heavily dictates which home weatherization checklist tasks you should prioritize. Homeowners moving into hot southern regions should immediately focus on attic insulation, air conditioner filters, thermostat schedules, and shading sun-facing windows to minimize cooling demands.
Conversely, if you live in a colder northern climate, your immediate focus should shift toward winterizing the property. Prioritize air sealing, tackling attic bypasses, installing heavy weatherstripping, and checking your basement rim joists to keep freezing temperatures at bay. If you live in a mixed climate, start with general air leaks, efficient lighting, and optimizing your thermostat settings for year-round balance.
Prioritizing Your Home Weatherization Tasks
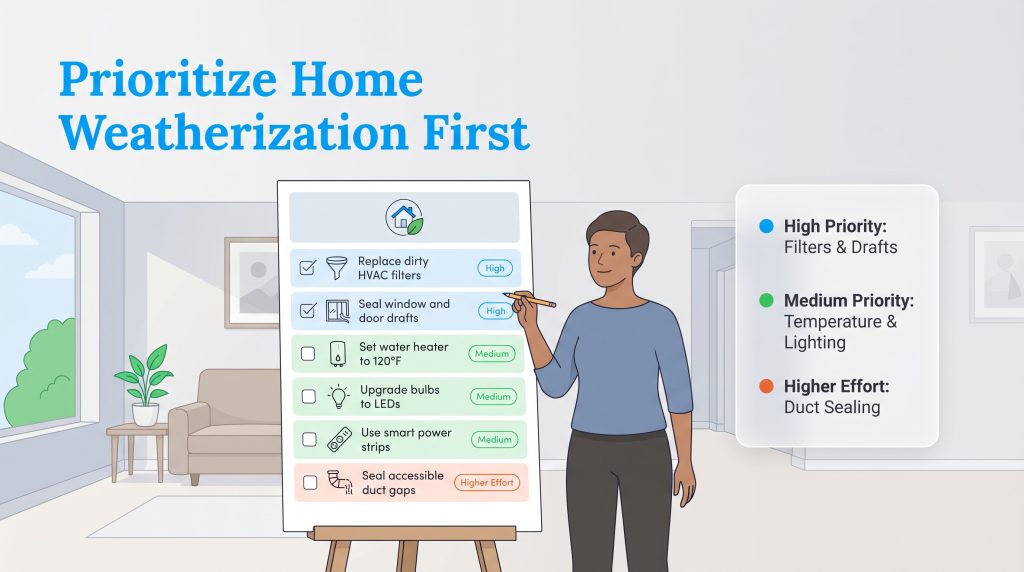
Figuring out where to start can be tricky when you have limited time and a small budget. Use this breakdown to tackle the easiest and most impactful projects during your first few weekends in the house.
| Priority | Task | Why It Matters | DIY Difficulty |
|---|---|---|---|
| High | Replace dirty HVAC filters | Improves airflow and may reduce cooling energy use | Easy |
| High | Seal obvious window and door drafts | Reduces heating and cooling loss | Easy |
| Medium | Lower water heater to 120 degrees | Reduces standby losses and scald risk | Easy to moderate |
| Medium | Replace incandescent bulbs with LEDs | Cuts lighting energy use | Easy |
| Medium | Use smart power strips | Reduces phantom loads | Easy |
| Higher effort | Seal accessible duct gaps | Keeps conditioned air where you need it | Moderate |
Professional Versus DIY Home Energy Audits
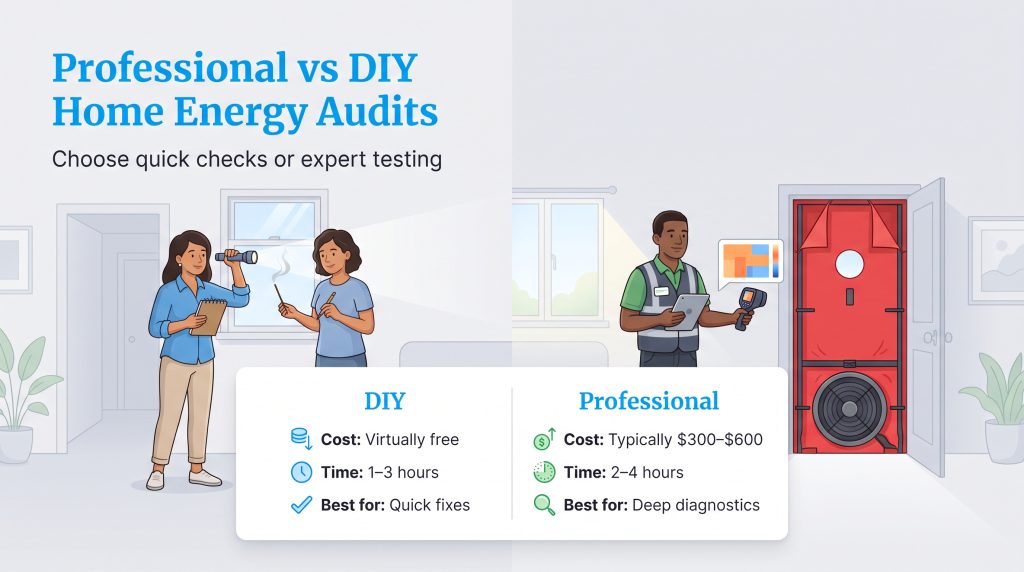
Evaluating your new home on your own provides a wonderful foundation for lowering your bills, but you might wonder how it compares to hiring a certified technician. When weighing a professional vs DIY home energy audit, you are essentially deciding between immediate accessibility and deep diagnostic accuracy. The DIY route costs almost nothing and tackles the most glaring inefficiencies right away. Professional audits often cost a few hundred dollars, though prices vary by home size, location, diagnostic testing, and local utility incentives. They use specialized tools you won’t find in a basic DIY toolkit.
Professionals deploy blower doors to depressurize the house and quantify the exact volume of air leaking through the structure. They also use infrared cameras to peer behind your drywall, identifying missing insulation and hidden moisture issues.
| Feature | DIY Home Energy Audit | Professional Energy Audit |
|---|---|---|
| Cost | Virtually free (cost of basic supplies) | Typically $300 to $600 |
| Time Commitment | 1 to 3 hours over a weekend | 2 to 4 hours of technician inspection |
| Tools Used | Flashlight, incense stick, basic visual checks | Blower doors, infrared thermography, gas leak detectors |
| Best For | New homeowners wanting immediate, basic improvements | Resolving persistent, expensive structural inefficiencies |
When to Call a Professional
Sometimes, DIY efforts just aren’t enough to solve the problem. If you notice severely uneven temperatures between rooms, indoor drafts that persist even after caulking, or utility bills that remain inexplicably high despite your best conservation efforts, it is time to call an expert. A professional audit pinpoints systemic issues in your ductwork or insulation barriers that simple weatherstripping cannot fix.
Enjoying a More Efficient and Comfortable Home
Tackling your home’s energy performance during those crucial first 30 days sets you up for long-term comfort and financial stability. By actively hunting down drafts, optimizing your climate control equipment, and banishing phantom power loads, you take total ownership of your living environment. These small weekend adjustments compound over time, creating an eco-conscious home that actively works to keep your monthly expenses low. You can settle into your new space knowing you’ve handled several of the most common energy-wasters.
Frequently Asked Questions About Home Energy Audits
How Much Does a Professional Home Energy Audit Cost?
Is a DIY Home Energy Audit Worth It Before Hiring a Professional?
What Is a Home Energy Assessment Checklist?
What Is the Most Effective Draft Detection Technique for Beginners?
Do I Need Special Tools for a DIY Home Energy Audit?
How Often Should I Check My New Home for Air Leaks?
Will an Energy Audit Increase My Home’s Resale Value?
About the Author

LaLeesha has a Masters degree in English and enjoys writing whenever she has the chance. She is passionate about gardening, reducing her carbon footprint, and protecting the environment. She also recently served as President of the Board for City Sprouts (a community garden).

Jared Evans is a licensed electrician and the owner of Full Circuit Electric in Omaha, Nebraska. As an expert reviewer for UtilitiesForMyHome.com, Jared uses his 10+ years of hands-on experience to ensure our electrical advice is safe, accurate, and easy to follow. Whether he's troubleshooting a complex wiring issue or sharing tips on green energy upgrades, Jared is dedicated to helping you power your home efficiently — and safely.