Proper placement and manual configuration are the secrets to eliminating dead zones effectively.
Key Takeaways
- Place your extender halfway between your router and the dead zone for the best performance.
- Use the manual browser setup if the automatic WPS button fails to connect your device.
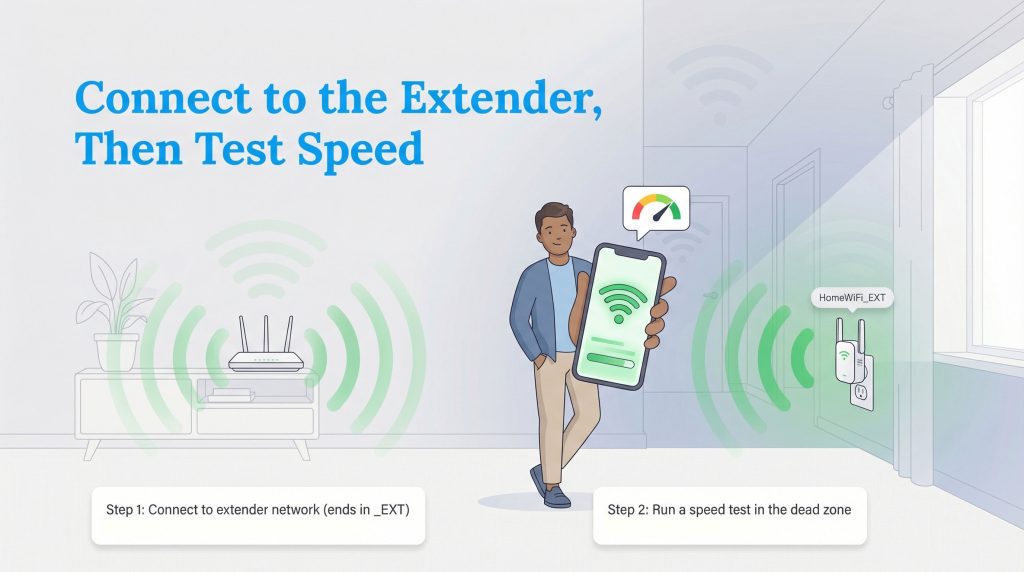
- Check your signal strength with a speed test app to verify the extender is actually working.
If you are constantly battling dead zone Wi-Fi solutions that fail to reach every room in your house, installing a signal booster is the most cost-effective way to regain reliable coverage. In this Wi-Fi extender setup guide, we will walk you through exactly how to connect a Wi-Fi extender to router hardware and permanently eliminate those frustrating drop-offs. Whether you are trying to push a stable connection to a backyard patio or stream seamlessly from an upstairs home office, getting your new hardware up and running properly ensures you achieve a good internet speed. By following these step-by-step instructions, you can bypass the technical headaches and finally enjoy the fast, stable internet connection you are actually paying for.
3 Ways To Connect Your Wi-Fi Extender To A Router
Before you unbox your new hardware and dive into the specific Wi-Fi repeater setup instructions, taking a few minutes to gather your credentials will save you a massive amount of frustration. Find your existing router password, locate an available power outlet in the same room as your main router, and keep your smartphone or laptop handy. Once you have these items ready, you can choose one of three straightforward methods to pair your devices.
Method 1: The WPS Button (Fastest Setup)
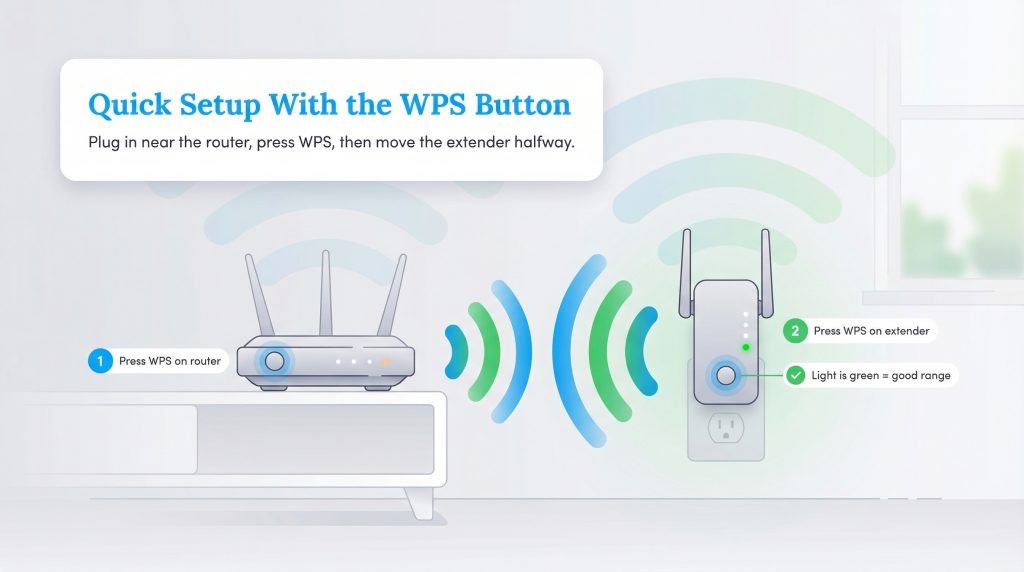
The absolute easiest way to handle your WPS button Wi-Fi extender setup is by utilizing the Wi-Fi Protected Setup (WPS) button found on the back or side of most modern routers. Do not worry about permanent placement just yet; keeping the devices close together simply ensures they can easily communicate during this initial pairing handshake.
- Plug in the extender: Connect the device to a wall outlet in the exact same room as your router.
- Press the router’s WPS button: Push the WPS button on your main router for about one second.
- Press the extender’s WPS button: Within two minutes, press the corresponding WPS button on your extender. The indicator lights will typically begin to blink rapidly.
- Wait for a solid connection: Once the lights turn solid green or white, the devices are successfully paired, and you can safely unplug the extender to move it to a better location.
Method 2: Web Browser Configuration (Universal Method)
If your router lacks a WPS button and you prefer not to download additional smartphone applications, you will need to configure the device manually using a web browser. This method requires typing a specific Wi-Fi extender login page IP or URL into your address bar.
- Connect to the open network: Plug in the extender and wait for it to boot up. Open your phone or laptop’s Wi-Fi settings and select the new, unsecured network matching your extender’s brand (e.g., NETGEAR_EXT).
- Launch the setup wizard: Open a web browser and type in the manufacturer’s default login URL. If you are unsure which URL to use, refer to the table below or try a common IP address like 192.168.1.1.
- Follow the on-screen prompts: The wizard will scan for available networks. Select your home network, enter your current router password, and follow the steps to finalize the bridge.
| Brand | Common Login URL |
|---|---|
| Netgear | mywifiext.net |
| TP-Link | tplinkrepeater.net |
| Linksys | extender.linksys.com |
| ASUS | repeater.asus.com |
For more specific instructions related to your model, you can visit the official Netgear Support or TP-Link Support pages to download the manual for your exact hardware. If you are using a premium model equipped with an ethernet port, you can run a physical cable directly from the extender to your desktop or console, bypassing the wireless jump to drastically reduce latency.
Method 3: Mobile App Setup (Best For TP-Link & Netgear)
Nearly every major networking manufacturer now provides a dedicated smartphone application to handle configuration visually. Whether you are looking for a TP-Link Wi-Fi extender setup guide or need to run through a Netgear Wi-Fi extender setup wizard, the mobile app approach bypasses confusing IP addresses and provides a highly guided experience.
- Download the manufacturer app: Head to the Apple App Store or Google Play Store and download your brand’s specific app (e.g., TP-Link Tether, Netgear Nighthawk).
- Create a user account: Open the app and create a free account if prompted. This step secures your hardware and allows you to manage your network remotely.
- Add the device and scan the QR code: Tap the “Add Device” button and select “Range Extender.” Use your smartphone’s camera to scan the QR code printed on the back or bottom sticker of the extender.
- Finalize the network bridge: The app will scan for your primary Wi-Fi network. Tap your network name, enter your main router’s password, and confirm to complete the setup process.
Finding The Perfect Placement For Your Extender
The most common mistake people make during installation is plugging the hardware directly into the room where the signal is already weak. Finding the best placement for Wi-Fi extender hardware is critical because the device works exactly like a relay runner — it needs to receive a strong, stable signal from the main router in order to pass it along effectively.
- The Halfway Rule: You should place your device exactly halfway between your main router and the specific room where you need better coverage. We recommend downloading a free Wi-Fi analyzer app to verify the edge of your router’s reach (usually around -65 dBm) before plugging the extender in permanently.
- Avoid Physical Obstructions: Keep the device away from signal-killing barriers. Large metal appliances like microwaves and refrigerators, thick concrete walls, and large mirrors easily block wireless transmission.
- Elevate for Clear Broadcasting: Try to elevate your extender on a bookshelf or side table rather than hiding it behind a couch or low furniture. A clear line of sight drastically improves range and stability.
How To Read Your Extender’s LED Status Lights

Wi-Fi extenders communicate their status entirely through LED lights, and learning to decode them is your first line of defense during technical hiccups. Use the table below to map the specific light colors on your device to the action required to fix the connection.
| LED Light Color | Meaning & Action Required |
|---|---|
| Solid Green / White | Your extender has a strong connection to the router and is working perfectly. No further action is needed. |
| Blinking Amber / Orange | The extender is connected, but it is either too close or too far from the router. Relocate it closer to the halfway point. |
| Solid Red | There is no connection to the router. You are likely out of range or entered the wrong network password during setup. |
| Off / No Light | The device has no power or is completely disconnected. Check the wall outlet or the unit’s power switch. |
Troubleshooting Common Connection Issues
Even with optimal placement, you might occasionally need to troubleshoot Wi-Fi extender no internet issues. If your connection drops unexpectedly or you are actively trying to figure out how to fix slow internet in your dead zones, check these common problems and quick solutions.
- Problem: Connected but no internet access.
Solution: You likely need to update the device’s firmware. Log into the extender’s dashboard using the mobile app or browser IP address, navigate to “System Tools” or “Settings,” and click “Firmware Update.” - Problem: The extender won’t connect to a new router.
Solution: You must learn how to reset Wi-Fi range extender hardware completely. While the unit is fully powered on, use a straightened paperclip to press and hold the internal reset button (found in a small pinhole on the side or bottom) for exactly 10 seconds. Once the lights flash, the factory reset is complete, and you can re-run the initial setup wizard. - Problem: Devices aren’t switching to the stronger signal.
Solution: Unless you are utilizing a modern smart roaming system, you often need to manually open your phone’s Wi-Fi settings and select the new network ending in “_EXT”. Familiarizing yourself with understanding your speed test results by using an official government testing app will confirm whether your device successfully switched to the faster, extended channel.
Making A Sustainable Networking Choice
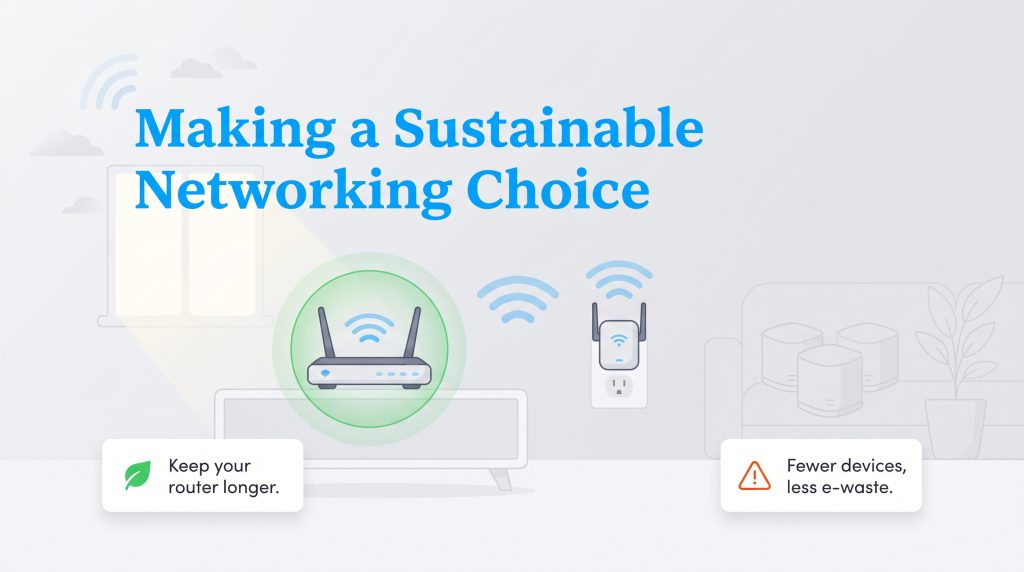
When facing annoying connectivity issues, many consumers are quick to throw out their old router and purchase an expensive, multi-unit Mesh Wi-Fi system. While premium Mesh systems are undeniably powerful, they generate a significant amount of unnecessary electronic waste by rendering perfectly functional hardware obsolete overnight. Choosing a simple plug-in extender is a fantastic way to support the “reduce and reuse” principles of sustainable living. By extending the operational lifespan of your existing networking gear, you actively help reduce toxic electronic waste and keep plastics, rare earth metals, and circuit boards out of local landfills.
Preparing Your Home For Seamless Wi-Fi Coverage
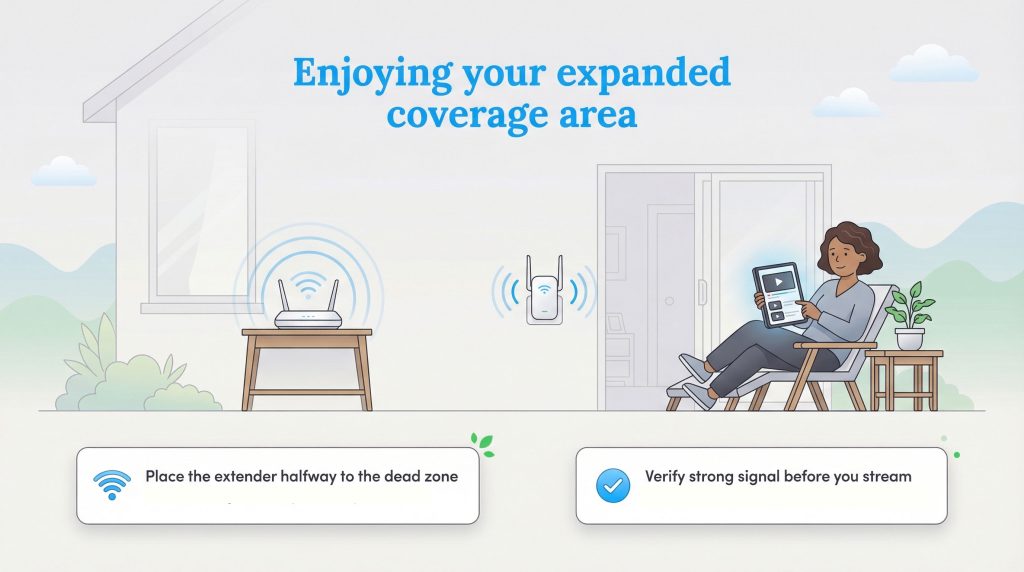
Expanding your home network does not have to be a highly technical nightmare if you follow the right configuration steps. By securely verifying your connection via an app or browser, utilizing proper placement strategies, and maintaining updated firmware, you can eliminate buffering completely. Enjoy streaming movies on the patio or taking professional video calls from the spare room, knowing you have optimized your digital life efficiently. If you go out of town for the weekend, remember that plugged-in networking devices consume vampire standby power even when no one is actively using them, so pulling the extender out of the wall saves electricity and lowers your utility bill.
Frequently Asked Questions About Wi-Fi Extenders
What is the difference between a Wi-Fi extender, booster, and repeater?
These terms are often used interchangeably in marketing and usually refer to the exact same type of device. Technically, they all perform the same core function: they receive an existing wireless signal from your primary router, amplify it, and rebroadcast it to expand coverage into hard-to-reach areas of your home.
How do I connect my Wi-Fi extender to a new router?
If you recently upgraded your internet service provider or bought a new main router, your extender will lose its connection because it is still searching for the old network name and password. To fix this, you must perform a factory reset on the extender (usually by holding a paperclip in the reset pinhole for 10 seconds). Once it restarts, you can run through the initial setup process again to pair it with your new router’s updated credentials.
Should I connect my extender to the 2.4 GHz or 5 GHz band?
Your choice depends on distance and speed needs. Connect to the 2.4 GHz band if your extender is placed far away from the main router or needs to penetrate thick walls, as this frequency is highly resilient. Connect to the 5 GHz band if the extender is relatively close to the router and you need blazing-fast speeds for streaming video or online gaming. Modern dual-band extenders allow you to utilize both simultaneously for maximum efficiency.
What is the default IP address for a Wi-Fi extender login page?
While it varies slightly by manufacturer, the most common default IP addresses used to access an extender’s configuration dashboard are 192.168.1.1, 192.168.0.1, or 192.168.1.250. You type this sequence of numbers directly into the address bar of a web browser while connected to the extender’s network. If these numbers fail, check the printed sticker on the back of the device for a brand-specific login URL.
How do I know if my Wi-Fi extender is actually working?
To confirm your extender is working properly, first check that the LED indicator light for the router connection is solid green or white. Next, physically walk to your previous dead zone, ensure your phone or laptop is connected to the new “_EXT” network, and run a speed test using a service like Ookla. If you see a significant improvement in connection stability and speed compared to before, the hardware is bridging the gap successfully.
Should I use the same SSID (network name) for my extender and router?
If your primary router and extender both support unified network features like OneMesh or Smart Roaming, using the exact same SSID (network name) is highly recommended. This allows your devices to seamlessly hand off the connection as you walk through your home. However, if you are using older hardware, giving the extender a different name (like “HomeNetwork_EXT”) forces you to manually switch connections but prevents your phone from stubbornly clinging to a weak signal.
Do I need the same brand of extender as my router?
Generally, no. Most Wi-Fi extenders are built to universal networking standards and will communicate perfectly fine with any standard router, regardless of the manufacturer. However, sticking within the same brand ecosystem can sometimes offer easier app integration and access to proprietary features like unified network roaming.
Why is my Wi-Fi extender slow?
Extenders often suffer from a phenomenon known as “bandwidth halving” because single-band devices must constantly switch back and forth between talking to the router and talking to your smartphone. Additionally, poor initial placement — such as burying the extender too deep in a dead zone rather than halfway — is a common cause of slow, frustrating speeds.
Can I chain multiple extenders together?
You should strictly avoid “daisy-chaining” your equipment, which involves connecting one extender wirelessly to a second extender. This setup severely degrades signal strength, slashes bandwidth, and increases latency, making your internet connection incredibly unstable. If you genuinely need to cover a very large, multi-story property, investing in a true Mesh system is a far superior alternative.
How do I reset my extender if I move?
To properly reset your device to its factory default state, search for the small pinhole button labeled “Reset” on the side or bottom panel of the unit. While the device is fully plugged in and powered on, use a straightened paperclip to press and hold the internal button for about 10 seconds. Wait until the indicator lights flash, then release the button to restart the entire setup process from scratch.
About the Author

LaLeesha has a Masters degree in English and enjoys writing whenever she has the chance. She is passionate about gardening, reducing her carbon footprint, and protecting the environment. She also recently served as President of the Board for City Sprouts (a community garden).