

Discover how to safely install a home energy monitor, calculate your potential savings, and decide if a DIY approach is right for your electrical panel.
Key Takeaways
- Monitoring your home’s electricity usage can help you identify power-hungry appliances and lower your monthly utility bills.
- Deciding between a DIY installation or hiring a pro depends entirely on your comfort level with opening your main electrical panel.
- The upfront cost can pay off over time if you use the monitor’s data to reduce waste, shift usage, or fix inefficient appliances.
If your electric bill keeps creeping up, a home energy monitor can help you see where your power is actually going. Unpredictable energy costs make budgeting a headache, but a home energy monitor presents a practical, eco-conscious solution to regain control. By tracking exactly where your electricity goes, you can stop wasting power and start keeping more money in your pocket. Our goal is to walk you through the entire installation process, lay out realistic cost expectations, and help you determine whether this project is a weekend DIY job or if you need to bring in a professional electrician.
Why Set Up a Whole House Energy Monitor?
Tackling a whole house energy monitor setup is one of the smartest investments you can make for your household budget and the environment. These compact devices offer real-time data about your electricity consumption, empowering you to pinpoint energy hogs and eliminate sneaky phantom loads. Tracking your usage allows you to make environmentally mindful choices that actively shrink your household’s carbon footprint over time.
Electricity prices have been a real budget pressure for many households. When you look at recent trends in residential electricity prices, the steady upward climb paints a clear picture. Catching even small inefficiencies quickly adds up to significant annual savings. While exploring ways to save on your electric bill often involves adjusting the thermostat or replacing incandescent lightbulbs, an energy monitor gives you the precise, personalized data needed to make highly impactful changes.
💡 Pro Tip: Smart monitors do more than just track utility costs — some monitors can help you spot unusual appliance runtimes or energy spikes, which may point to maintenance issues.
What to Check Before You Buy a Home Energy Monitor
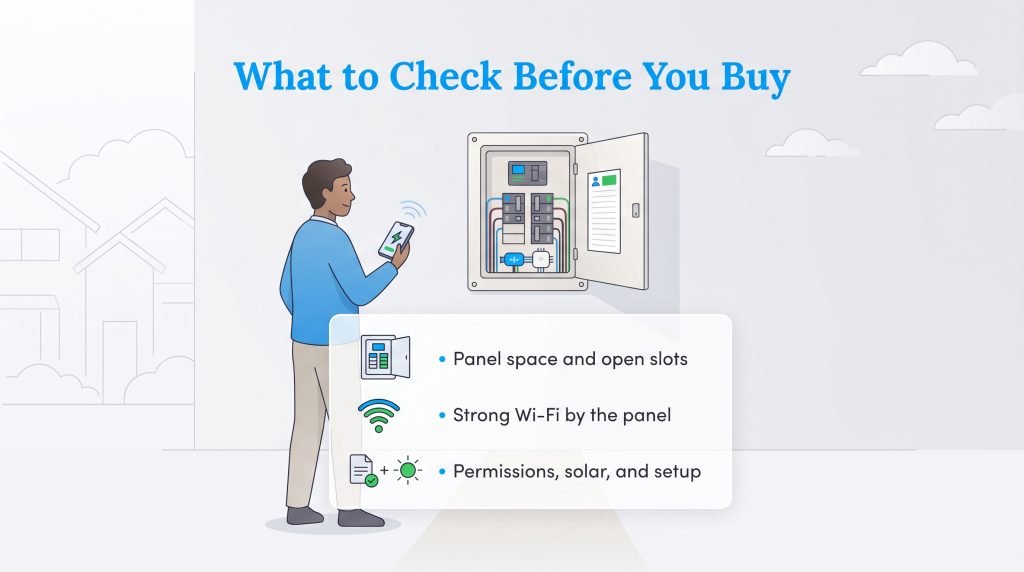
Before you purchase a device, it helps to understand your existing electrical setup. Every home is a bit different, and taking a quick inventory can save you from buying incompatible hardware or running into frustrating roadblocks during installation.
- Panel space: Ensure your breaker box has enough physical room for the sensors and, if necessary, an open slot for a new breaker.
- Wi-Fi signal: Check your phone’s network connection while standing next to your electrical panel to confirm the signal is strong enough for the monitor to broadcast data.
- Renting vs. owning: If you rent or are currently moving into a new home you do not own, don’t install a panel-based monitor without written permission from your landlord or property manager. A plug-in smart energy meter or smart plug may be a safer, removable alternative.
- Solar tracking: Determine whether you need specialized hardware to track energy production from your solar panels alongside your consumption.
Comparing Top Brands by Installation Difficulty
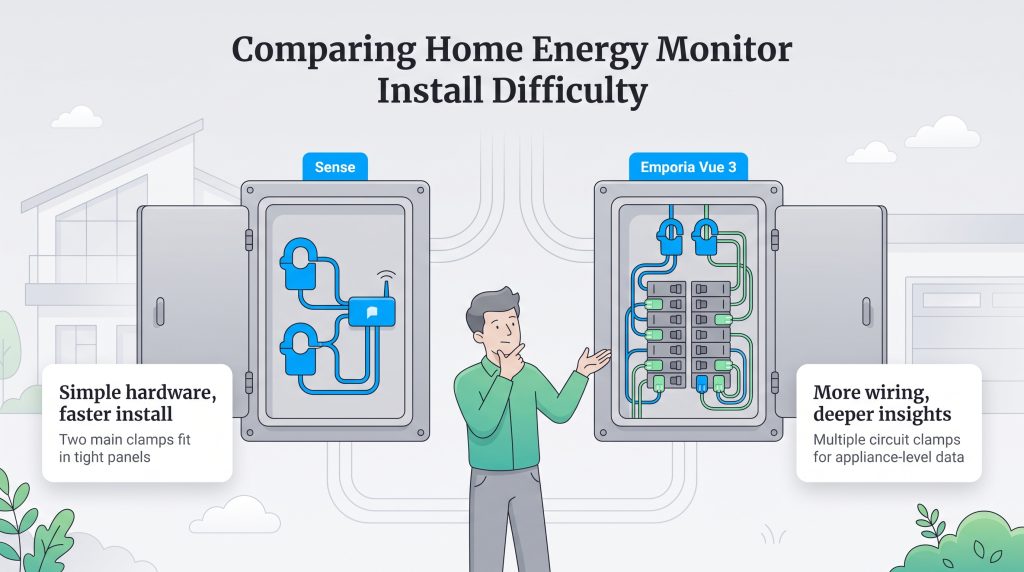
If you’re comparing home energy monitors, don’t judge them by app features alone. You also need to consider the physical footprint of the hardware itself. The layout of your breaker box plays a big role in whether a specific device will comfortably fit inside.
For example, a standard Sense energy monitor installation is relatively straightforward for most modern homes. It relies on a simple, two-clamp system that attaches directly to the main service wires. Because of its minimal hardware, it easily squeezes into surprisingly tight panels. On the flip side, following an Emporia Vue 3 installation guide requires quite a bit more patience and elbow grease. The Emporia system provides detailed circuit-level tracking, but it requires wiring multiple individual sensors to specific circuits. That level of detail can be useful for tracking specific appliances, but it means dealing with a dense maze of wires inside your panel.
| Brand / System | Best For | Hardware Setup | Installation Difficulty | Notes |
|---|---|---|---|---|
| Sense | Whole-home tracking with simple hardware | Two main CT clamps, plus optional solar sensors | Intermediate DIY or Pro Recommended | Relies heavily on app-based device detection |
| Emporia Vue 3 | Circuit-level tracking | Main-service tracking plus individual circuit-level sensors | Advanced DIY or Pro Recommended | More wiring inside the panel |
| IoTaWatt | Advanced users who want detailed data | Multiple CT clamps, often configured manually | Advanced DIY or Pro Recommended | Better suited to technically comfortable users |
| Smart Electrical Panel | Major upgrades or remodels | Panel-level hardware replacement | Professional Installation Required | Much higher cost than a monitor |
Home Energy Monitor vs. Smart Electrical Panel
As you evaluate your options, you might find yourself choosing between a home energy monitor and a full smart electrical panel upgrade. A home energy monitor is usually a lower-cost retrofit designed simply to read and report data from your existing setup. It is a fantastic entry point for the average household looking to improve energy efficiency.
A smart panel, on the other hand, is a much larger and more expensive investment that replaces your traditional breaker box entirely. Smart panels offer direct circuit control, backup-load management during outages, and deeper integration with solar arrays, battery storage, or EV chargers. For most homeowners, a monitor is the better first step unless they’re already planning an electrical panel upgrade or a major home remodel.
Do I Need an Electrician to Install an Energy Monitor?
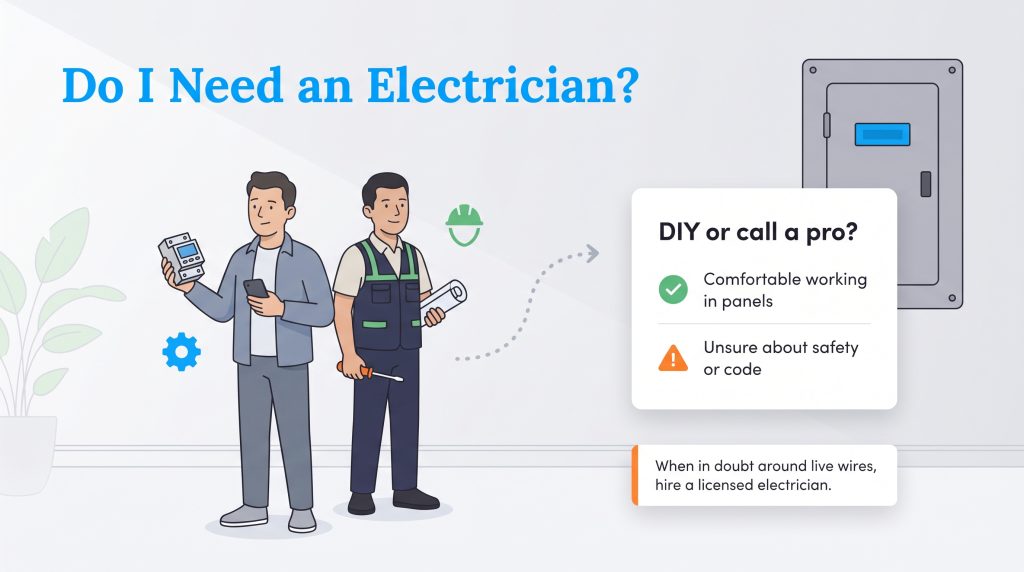
As you research this project, you will inevitably ask yourself: do I need an electrician to install an energy monitor? The answer depends entirely on your mechanical comfort level, electrical experience, and the specific layout of your breaker box. Working inside an electrical panel carries serious risks, including the potential for lethal shocks. In many panels, the service lugs above the main breaker can remain live even when the main breaker is off. Safety must always remain your top priority.
Before picking up a screwdriver, walk through this DIY vs. Pro Checklist to assess your readiness:
- You know how to safely turn off your main breaker and confidently test for live voltage.
- Your electrical panel has enough physical space for the new sensors and extra wiring.
- You understand local electrical codes and whether a permit is legally required in your municipality.
- You feel confident identifying neutral buses and safely wiring a new 240V breaker if your specific device requires one.
| Situation | Best Choice |
|---|---|
| You’ve never opened an electrical panel | Hire a licensed electrician |
| Your panel is crowded or outdated | Hire a licensed electrician |
| Your monitor needs multiple circuit sensors | Consider hiring a pro |
| You only need app setup after installation | DIY is usually fine |
| You rent your home | Get landlord approval first |
🚩 Heads Up: If you feel at all hesitant about removing the outer cover of your breaker box or working near live wires, hire a licensed electrician. Your personal safety is always worth the service fee.
How to Install a Home Energy Monitor: General Steps
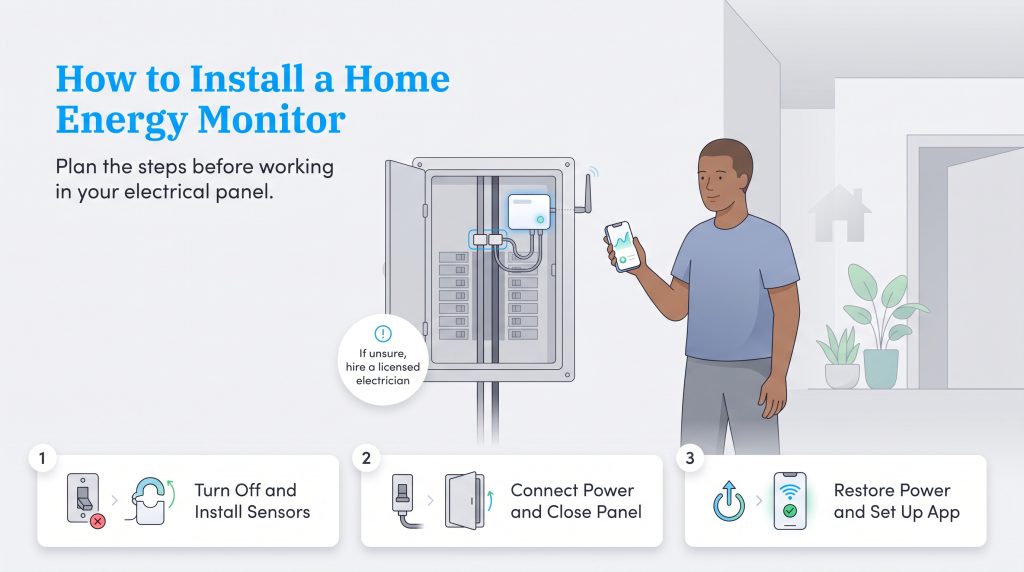
While every hardware brand features its own unique quirks, learning how to install a home energy monitor generally follows a universal sequence. A proper home energy monitor installation demands patience, the correct safety tools, and an unwavering respect for electricity. If you decide to tackle this project yourself, here is a chronological overview of what the standard process looks like.
This overview is for planning purposes only. Always follow your monitor manufacturer’s instructions, local electrical code, and permit requirements. If you aren’t trained to work inside an electrical panel, hire a licensed electrician.
- Turn off the main breaker: Shut off the primary power switch at the top of your electrical panel. Remember, the large utility wires feeding into this switch will still carry live, dangerous current.
- Remove the panel cover: Carefully unscrew the outer metal casing, keeping one hand flat against the cover so it does not slip and inadvertently catch a breaker switch on the way down.
- Attach the current transformers (CT clamps): Clip the main sensors securely around the thick, incoming service wires. Make sure they are oriented in the correct direction — usually, the manufacturer will label them to face the utility meter.
- Connect the power cable: Most monitors require a dedicated power source. You will need to wire the device’s power leads into an empty 240V or 120V breaker, depending on the system’s exact specifications, and properly secure the neutral and ground wires. Always follow the manufacturer’s wiring instructions, since breaker, voltage, neutral, and ground requirements vary.
- Mount the antenna and replace the cover: Thread the Wi-Fi antenna through a knockout hole in the metal casing for reliable reception. Then, carefully screw the main cover back into place.
- Restore power and configure the app: Flip the main breaker back on, download the manufacturer’s smartphone app, and follow the on-screen prompts to seamlessly connect the new device to your home network.
You can also pair the insights from your monitor with ENERGY STAR certified smart home systems, such as smart thermostats or smart plugs, to make energy-saving changes easier.
Questions to Ask an Electrician Before Installation
If you decide to search for an electrician to install an energy monitor near you, take a few minutes to vet them before they arrive. Getting clarity on their experience and pricing structures ensures a smooth, predictable installation day.
- Have you installed this specific monitor brand before?
- Is there enough room in my panel for the necessary hardware?
- Will this type of modification require a local electrical permit?
- Is my older panel safe for added monitoring equipment?
- Can you accurately install solar CT clamps if I have panels on my roof?
- What will the total labor and materials cost be?
Home Energy Monitor Installation Cost and Potential ROI
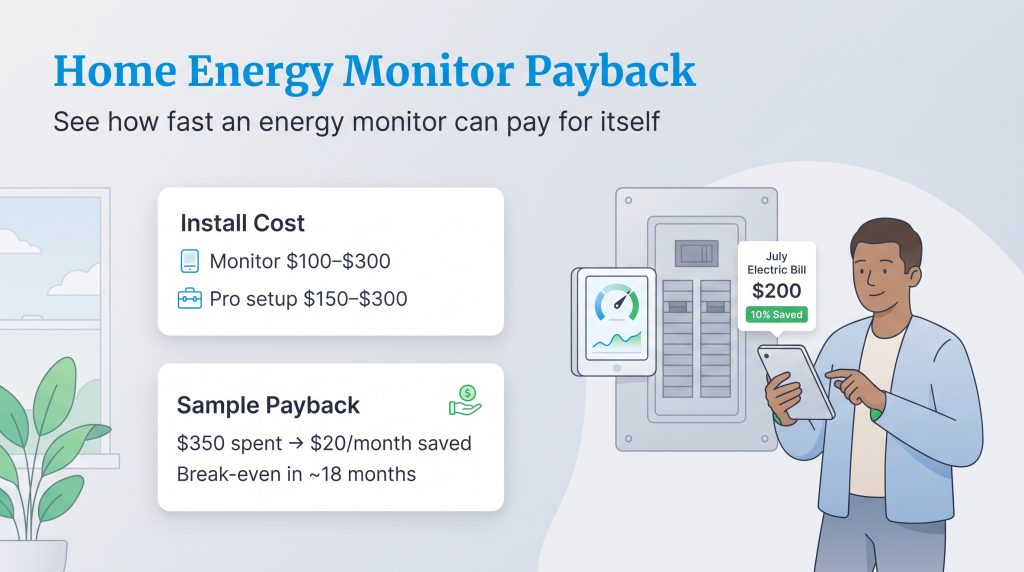
A major factor in deciding whether to upgrade your panel is understanding the baseline home energy monitor installation cost. You can expect to pay anywhere from $100 to $300 for the actual hardware, depending on whether you choose a basic model or a sprawling system with extensive circuit-level tracking features.
If you prefer to leave the intricate electrical work to an expert, hiring a local professional typically adds $150 to $300 to your total budget, depending on average hourly rates in your area. While that might sound like a somewhat steep upfront investment, the long-term payoff can justify the expense if you’re willing to act on the data. Uncovering hidden energy drains allows you to make highly targeted adjustments that rapidly drive down your monthly utility expenses.
💸 Money-Saver: If you spend $350 on hardware and installation, and you use the monitor’s data to reduce a $200 monthly electric bill by 10%, you’d save about $20 per month and break even in about 18 months. Your actual savings will depend on your home, habits, rates, and how much waste you can realistically eliminate.
Solar Energy Monitor Installation Considerations
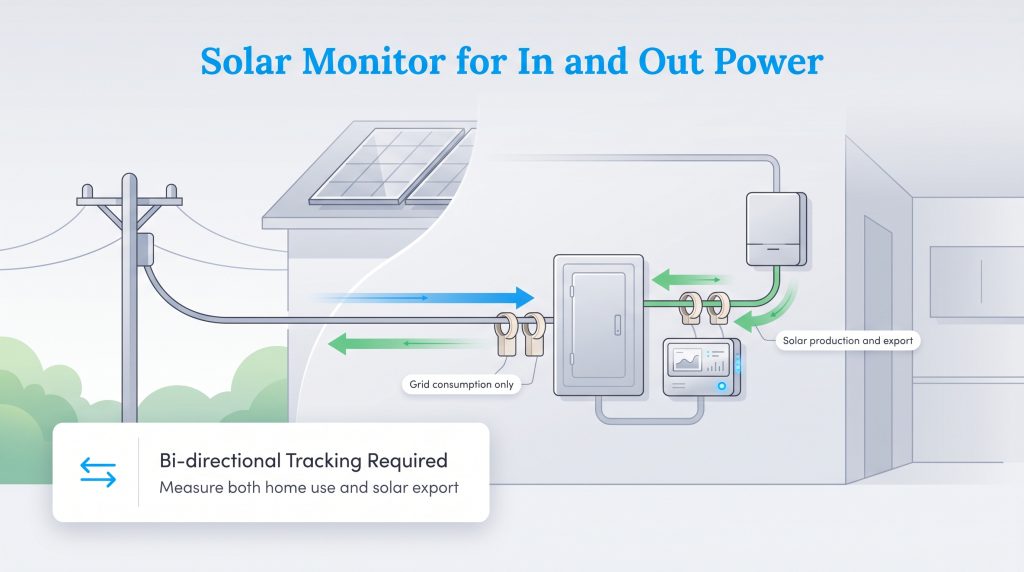
Homes equipped with solar panels introduce a unique layer of mechanical complexity. If you are actively planning a solar energy monitor installation, you need hardware explicitly designed to handle bi-directional tracking. Standard monitors only measure the electricity flowing into your house directly from the grid.
A solar-compatible device uses additional CT clamps attached to the wires running from your power inverter. This allows the system to seamlessly measure both your household energy consumption and the excess energy production going back to the grid. Gaining this dual-perspective visibility is an important step when evaluating your solar energy production, ensuring your panels are operating at peak efficiency and accurately tracking your net-metering credits.
Taking Control of Your Home’s Energy Future
Gaining clear visibility into your electricity usage is a powerful step toward maintaining a cost-effective and environmentally sound household. Guessing which appliances silently drain your wallet is a frustrating game, but live data completely eliminates the guesswork. Whether you grab a flashlight and carefully handle the DIY route or choose the added peace of mind that comes with hiring a licensed electrician, getting this hardware into your electrical panel is a smart step for your monthly budget. We recommend treating the DIY route as an option only if you already understand basic panel safety.
By remaining proactive, thoroughly addressing phantom loads, and making data-driven adjustments, you are setting your home up for long-term sustainability. Tracking your power consumption securely puts the control back into your hands — exactly where it belongs.
Frequently Asked Questions About Home Energy Monitor Installation
Can I install a home energy monitor myself?
Do I need a permit to install a home energy monitor?
How much does it cost to have an electrician install a Sense monitor?
Do home energy monitors work with older electrical panels?
Can a home energy monitor track solar production?
Will an energy monitor lower my electric bill automatically?
Is there a monthly subscription fee for these monitors?
Can I take my energy monitor with me if I move?
About the Author

LaLeesha has a Masters degree in English and enjoys writing whenever she has the chance. She is passionate about gardening, reducing her carbon footprint, and protecting the environment. She also recently served as President of the Board for City Sprouts (a community garden).

Jared Evans is a licensed electrician and the owner of Full Circuit Electric in Omaha, Nebraska. As an expert reviewer for UtilitiesForMyHome.com, Jared uses his 10+ years of hands-on experience to ensure our electrical advice is safe, accurate, and easy to follow. Whether he's troubleshooting a complex wiring issue or sharing tips on green energy upgrades, Jared is dedicated to helping you power your home efficiently — and safely.