Taking Proactive Steps to Prepare Your New Residence for Warm Weather Can Noticeably Lower Your Summer Cooling Costs
Key Takeaways
- Completing a few DIY weatherization projects this spring can noticeably lower your cooling costs as summer approaches.
- Learning how to identify and seal air leaks around your windows and doors keeps the hot air out and the cold air inside.
- Scheduling proactive spring HVAC maintenance ensures your system runs efficiently and typically improves the lifespan of your equipment.
Settling into a new home or rental property often brings unexpected utility costs, but tackling a few simple spring weatherization tips can often lower your monthly energy bills. Whether you are setting up utilities in a new home or renewing your lease, as the weather warms up, your primary goal shifts from keeping the freezing cold out to trapping expensive, air-conditioned air inside. Taking an afternoon to inspect your new space for air leaks, upgrade to energy-efficient settings, and apply basic weatherstripping can make a meaningful difference in your home’s comfort. Whether you are tackling a comprehensive spring home maintenance checklist or just looking for quick weekend projects, these practical steps will help you create a more eco-conscious and budget-friendly living space.
Start With a Spring Home Maintenance Checklist and Energy Audit
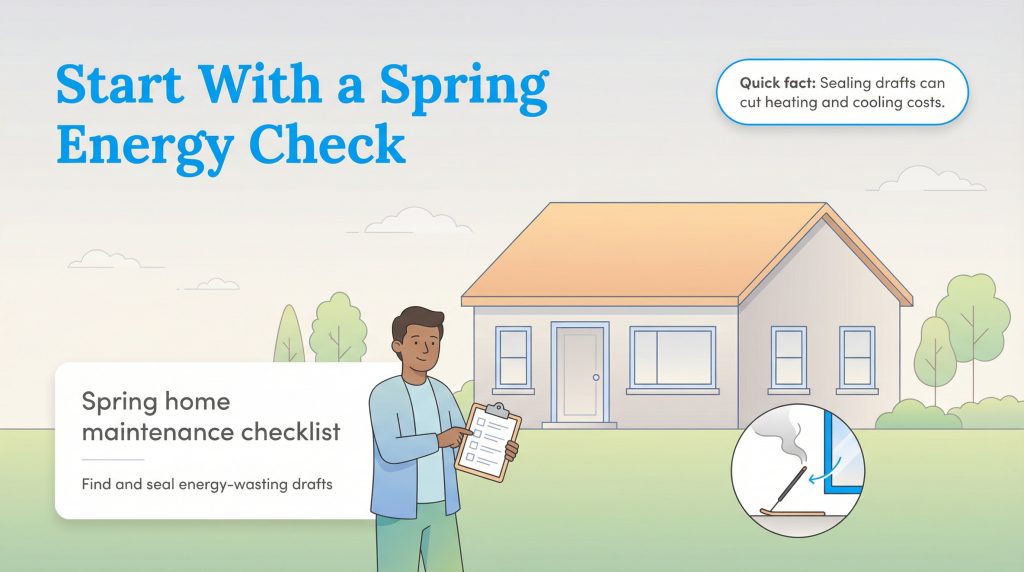
Every new homeowner should establish a solid baseline for their property’s energy efficiency before the sweltering heat arrives. Creating a comprehensive spring home maintenance checklist helps you diagnose the root causes of uneven temperatures and stubbornly high utility bills. To keep yourself organized, follow a simple checklist that outlines the most common cooling-season prep tasks.
| Task | Time Estimate | Cost Range | Skill Level |
|---|---|---|---|
| Perform a draft test around doors and windows | Under 1 hour | Free | Beginner |
| Apply fresh weatherstripping and caulk | 2 to 4 hours | Low | Beginner |
| Inspect attic insulation levels | 1 hour | Free (to inspect) | Intermediate |
| Schedule professional HVAC maintenance | 1 to 2 hours | Medium | Professional |
Rather than guessing where the cool air escapes, you can conduct a remarkably simple DIY draft test right now. Light an incense stick and slowly pass it around the edges of your window frames, exterior doors, and baseboards. If the smoke wavers or blows sideways, you have pinpointed an invisible gap. If you are sensitive to smoke, use a thin piece of tissue or simply feel for drafts with a damp hand on a breezy day. Alternatively, running a damp hand along these same boundaries makes it easy to feel subtle temperature changes. Tackling these targeted DIY weatherization projects empowers you to take control of your indoor climate rather than letting the weather dictate your comfort.
According to the U.S. Department of Energy, reducing drafts through proper sealing techniques can reduce your overall heating and cooling costs.
Weatherstripping Doors in Spring to Stop Air Leaks
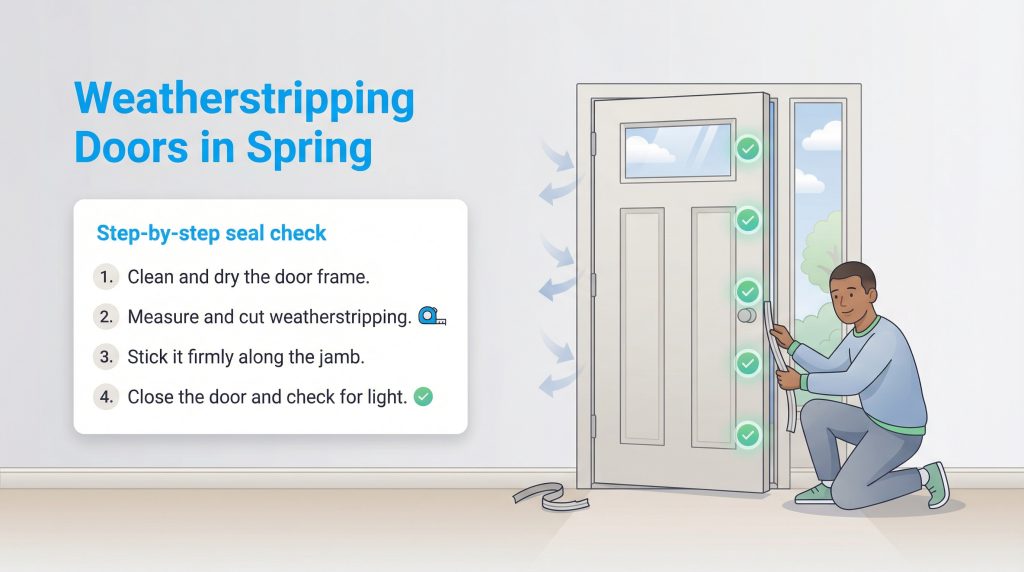
Drafty exterior doors are notorious energy wasters, but fixing them requires only basic tools and a little patience. If you want to figure out how to tackle draft sealing along your home’s perimeter, start by inspecting the main entryways. Winter weather brutalizes door seals, often leaving them cracked, brittle, or entirely flattened. Weatherstripping doors in spring is the perfect weekend task because the mild temperatures allow the adhesive backings on new foam or rubber strips to cure properly without freezing or melting. You will want to completely strip away the failing materials before applying anything new, ensuring the surface is pristine.
- Clean the door frame thoroughly with soapy water and let it dry completely to ensure maximum adhesive grip.
- Measure the top and sides of your door jamb, then cut your V-strip or foam tape to the exact lengths required.
- Peel back a small section of the adhesive liner, pressing the stripping firmly into place as you slowly work your way down the frame.
- Close the door to test the seal, checking that the latch clicks easily and no visible daylight peeks through the edges.
How to Weatherize Windows for Warm Weather
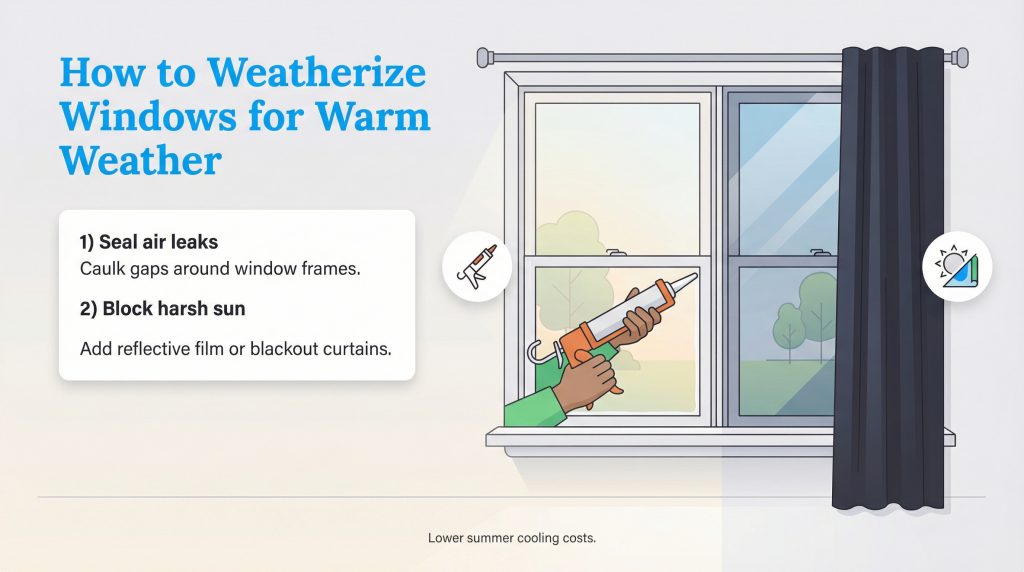
Many people assume window insulation is only for winter, but keeping blistering heat outside is just as vital as blocking winter chills. Learning how to weatherize windows for warm weather requires a dual approach. First, you must address the physical home envelope by caulking any gaps along the exterior and interior window frames. Old caulk shrinks and separates from the wood or vinyl, creating an easy pathway for unconditioned air to infiltrate your living room. A fresh bead of silicone caulk blocks those invisible leaks instantly. Renters should always check their lease or ask for landlord permission before applying exterior caulk. If you cannot use permanent sealants, consider pressing removable rope caulk into the gaps along the window sashes.
The second half of this strategy involves managing solar heat gain. Sunlight streaming through unprotected glass acts like a natural oven, forcing your air conditioner into overdrive. Adding treatments to block those harsh rays is one of the smartest energy-efficient home upgrades spring offers. By combining a sealed frame with strategic shading, you keep the cool air trapped inside, which is critical to lower your summer electric bill.
Investing in a Comprehensive Weatherization Kit Guide
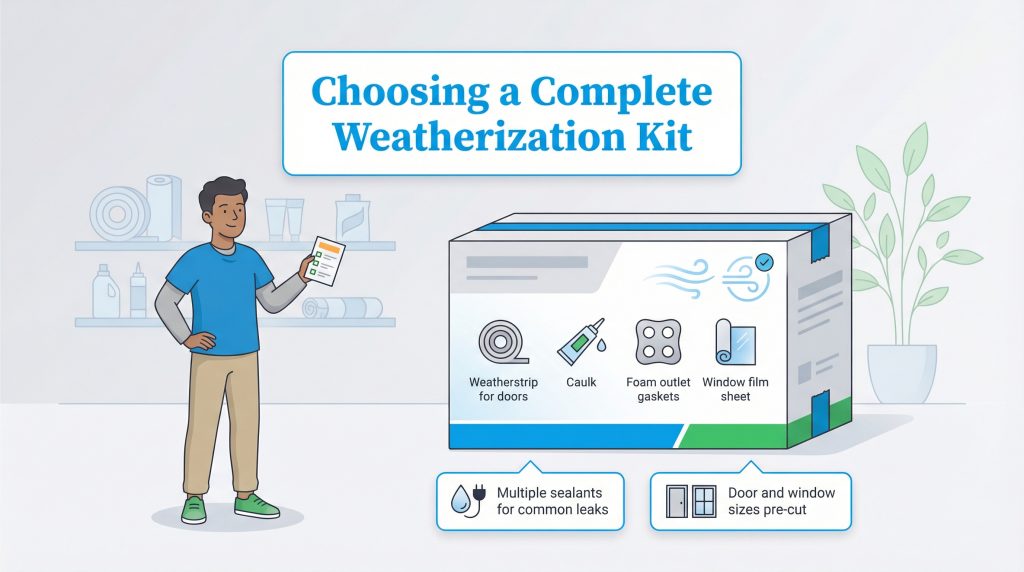
Walking through the aisles of a hardware store can feel overwhelming when you just want to stop a simple draft. Fortunately, retailers sell all-in-one packages that are absolutely perfect for renters or those short on spare time. Following a basic weatherization kit guide helps you understand exactly what to look for when purchasing these convenient bundles. A high-quality kit typically includes multiple types of sealants and insulators designed to tackle the most common household leaks. Instead of buying massive rolls of commercial material, you get perfectly sized portions for standard doors and windows.
| Item | Best Used For |
|---|---|
| Rope Caulk | Drafty older windows and temporary gap filling |
| Outlet Gaskets | Insulating light switches and exterior-facing wall plugs |
| Foam Tape | Interior door frames and slightly warped window sashes |
| Door Sweeps | Blocking under-door airflow and keeping out summer pests |
Check Your Attic Insulation and Ventilation
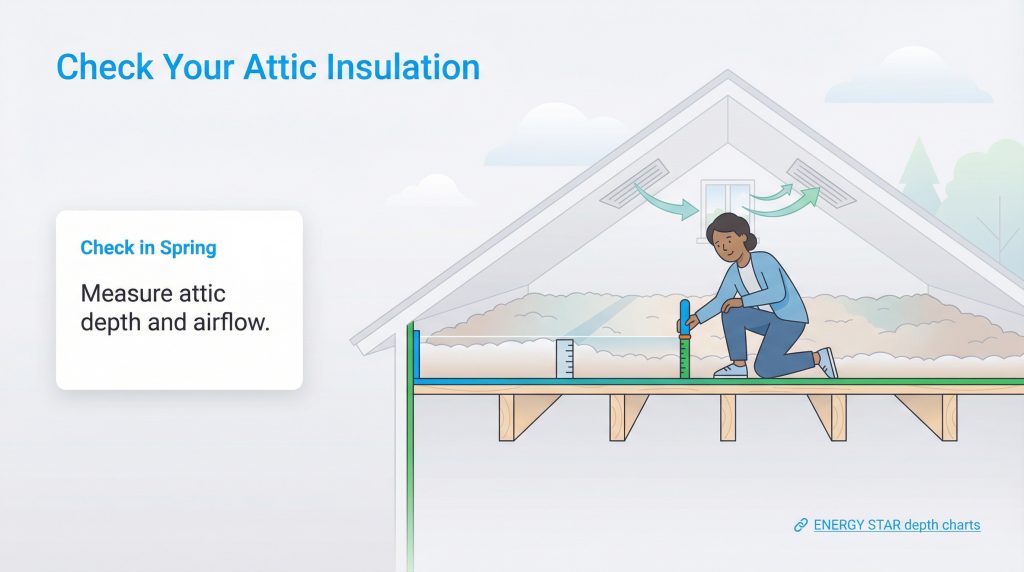
Your roof absorbs a massive amount of radiant heat from the summer sun, and without a solid thermal barrier, that heat easily bleeds into your living spaces. Performing a thorough home insulation check spring routine is especially critical if you recently purchased an older house. Over the years, loose-fill fiberglass or cellulose insulation slowly settles, compresses, and degrades. This natural degradation noticeably lowers the material’s ability to resist heat transfer. Peeking into your attic to measure the depth of your existing coverage is a fast diagnostic tool. Upgrading your attic’s thermal envelope provides a fantastic return on investment, keeping you comfortably cool while cutting energy waste. If you rent your home or cannot easily access the attic space, focus your efforts on ground-level improvements like installing outlet gaskets, sealing your doors, and practicing smart thermostat habits. For specific guidance on proper regional depth levels, you can consult the Environmental Protection Agency’s ENERGY STAR program to ensure your upgrades meet modern sustainability standards.
Program Your Smart Thermostat Spring Settings
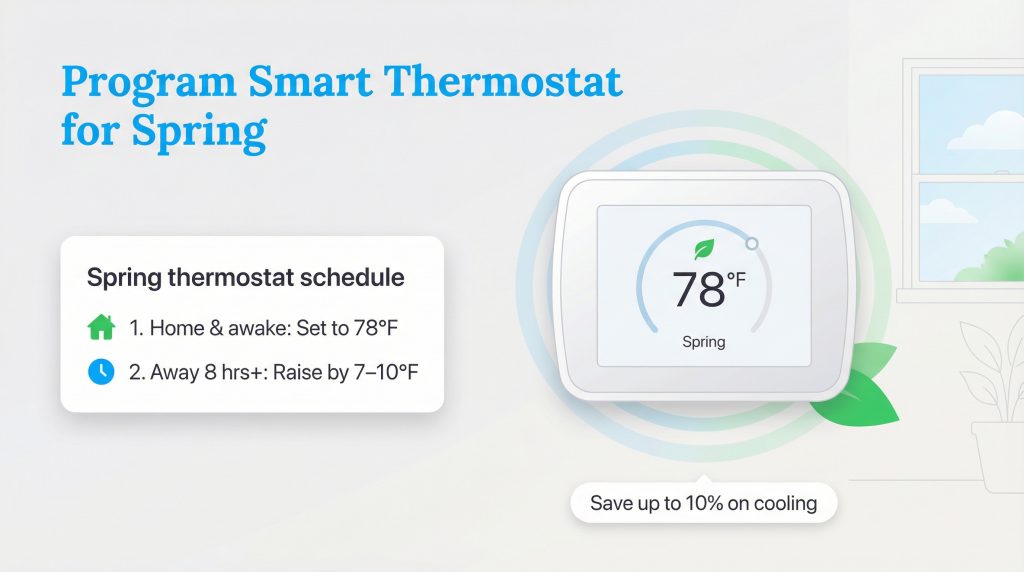
Digital climate controls are only as effective as the schedules programmed into them. Transitioning your smart thermostat spring settings ensures your equipment responds properly to unpredictable seasonal temperature swings. When making the switch from a heating schedule to a cooling schedule, a common energy-saving starting point is around 78 degrees Fahrenheit when you are home and awake. If you prefer a cooler sleeping environment, drop it slightly at night, but remember to program a warmer baseline for the hours the house sits entirely empty. Telling your system to ease up while you are at the office prevents your condenser from running needlessly during the hottest parts of the day.
Money-Saver: Adjusting your thermostat up by just seven to 10 degrees from its normal setting for eight hours a day can lower your annual cooling expenses by as much as 10%.
Schedule Professional Spring HVAC Maintenance
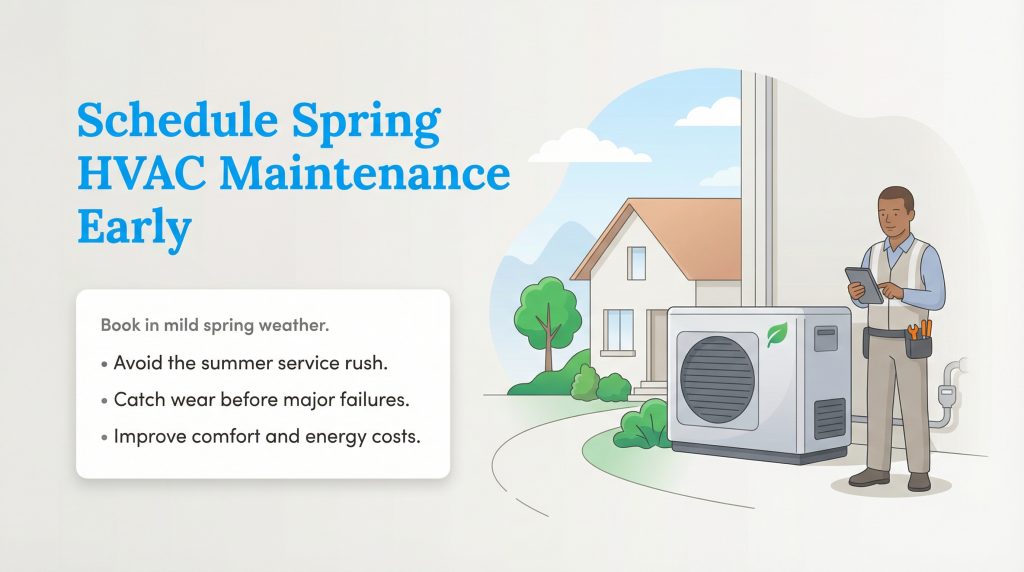
While sealing gaps and swapping filters are excellent weekend tasks, your central air conditioning unit requires expert attention to handle the demanding months ahead. Booking a licensed technician during the mild transition between seasons is one of the smartest spring HVAC maintenance tips we can offer. By scheduling your tune-up now, you completely avoid the frantic summer rush when local companies are booked out for weeks. A professional will test your refrigerant levels, clean the evaporator coils, and clear out the condensate drain line. They also handle crucial safety checks, like confirming your natural gas heating system switches over correctly for the cooling season. You should immediately call a pro if you notice weak airflow through the vents, hear grinding noises from the outdoor compressor, or experience unexplained spikes in your monthly utility bills. Catching minor wear and tear in April easily prevents a catastrophic mechanical failure in July.
Inspect Your System for Leaky Ducts
During your spring checkup, it is crucial to address your ventilation network. Leaky air ducts are a major hidden issue for many new homeowners, often causing cool air to escape into unfinished basements or crawl spaces before it ever reaches your living room. If you notice certain rooms feel significantly warmer than others, ask your HVAC technician to inspect your ductwork for loose connections and compromised seals.
Deciding Between DIY Weatherization and Hiring a Professional
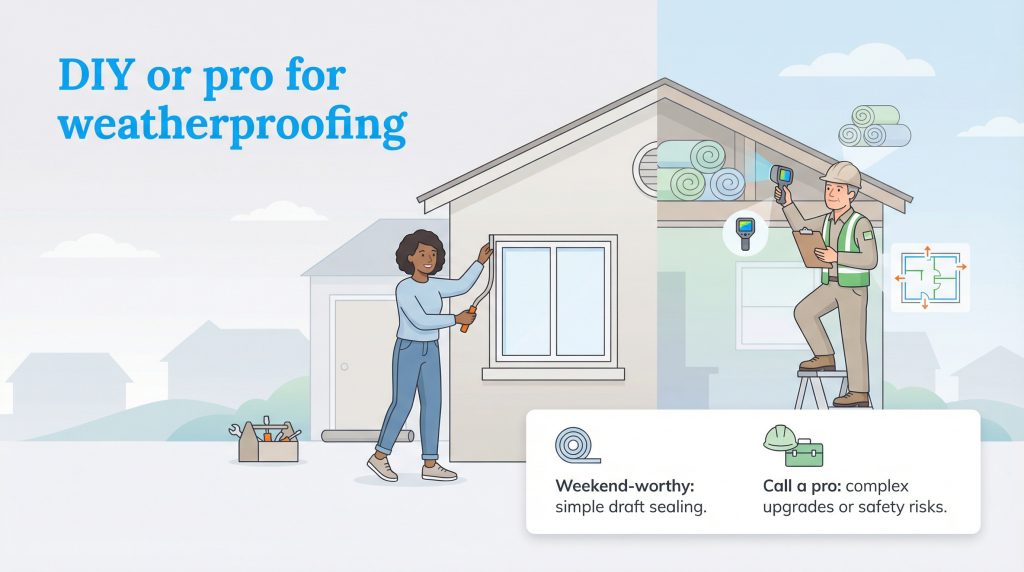
Knowing your limits is a vital part of any home improvement journey. While many simple draft-sealing projects are perfect for a weekend warrior, complex upgrades require specialized tools and expert knowledge. Using a quick reference guide helps you determine the best approach for your specific situation, preventing costly mistakes and ensuring your residence remains safe.
| Task | DIY If | Hire a Pro If |
|---|---|---|
| Caulking and Weatherstripping | You are sealing ground-level windows or basic exterior doors. | You need to seal second-story windows or replace entire door frames. |
| Attic Insulation | You are simply unrolling a few fiberglass batts over easily accessible areas. | You need to blow in deep loose-fill insulation or address old, damaged materials. |
| HVAC Maintenance | You are only swapping out the disposable air filter. | You need a seasonal tune-up, refrigerant check, or ductwork inspection. |
| Window Upgrades | You are applying removable thermal films or hanging blackout curtains. | You are fully replacing old, single-pane glass units with modern fixtures. |
Wrapping Up Your Spring Weatherization Projects
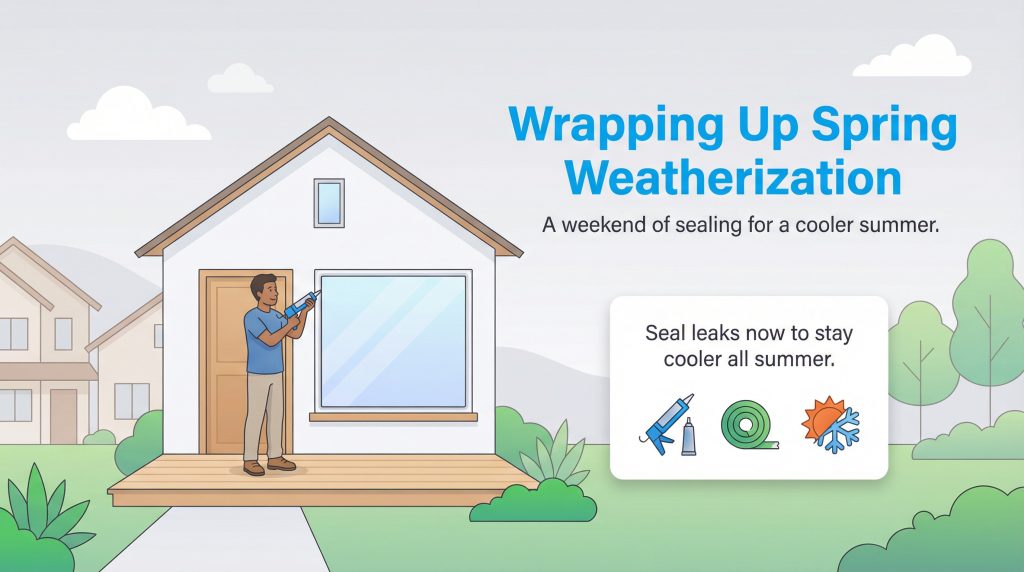
Moving into a new home brings an endless to-do list, making it tempting to push climate efficiency to the back burner. Yet, dedicating a single weekend to sealing unexpected leaks and optimizing your equipment will often pay substantial dividends throughout the blistering summer months. Taking the time to patch a few drafts or swap out flattened weatherstripping protects your wallet and lowers your household’s overall carbon footprint. Once you master these basic seasonal tasks, you might even consider researching long-term solar energy upgrades to further offset your electricity usage. You deserve a relaxing, consistently cool environment after a long day. Roll up your sleeves, grab a tube of caulk, and enjoy the immediate comfort that comes with a well-sealed home.
Frequently Asked Questions About Spring Weatherization
Is weatherstripping necessary in the spring and summer?
What is the most cost-effective DIY weatherization project?
Can renters weatherize their apartments without losing their security deposit?
When should I hire a professional instead of using a weatherization kit?
How do I know if my home has air leaks?
About the Author

LaLeesha has a Masters degree in English and enjoys writing whenever she has the chance. She is passionate about gardening, reducing her carbon footprint, and protecting the environment.