Installing a rain barrel system is a practical way to lower your water bill and create a sustainable garden irrigation source.
Key Takeaways
- A rainwater harvesting system captures runoff from your roof, reducing stormwater pollution and providing free water for landscaping.
- Proper rain barrel installation requires a level foundation, a diverter kit to prevent overflow, and regular maintenance to ensure water quality.
- You can choose between a DIY rain barrel made from a drum or a pre-made commercial kit depending on your budget and aesthetic preference.
Although the idea of capturing storm runoff might sound highly technical, setting up a rain barrel is a straightforward weekend project that transforms how you manage your home’s water supply. A rain barrel is a specialized container connected directly to your gutter downspout, designed to collect and store rainwater for future outdoor use. We love this sustainable upgrade because it allows you to easily reduce your reliance on municipal resources, lower your monthly utility costs, and provide your garden with water that is completely free of the harsh chemicals often found in tap water. Whether you decide to build a custom system from scratch or install a pre-made commercial kit, harvesting rainwater is one of the smartest, most impactful upgrades you can make for your wallet and the local environment.
Why You Need a Rain Barrel
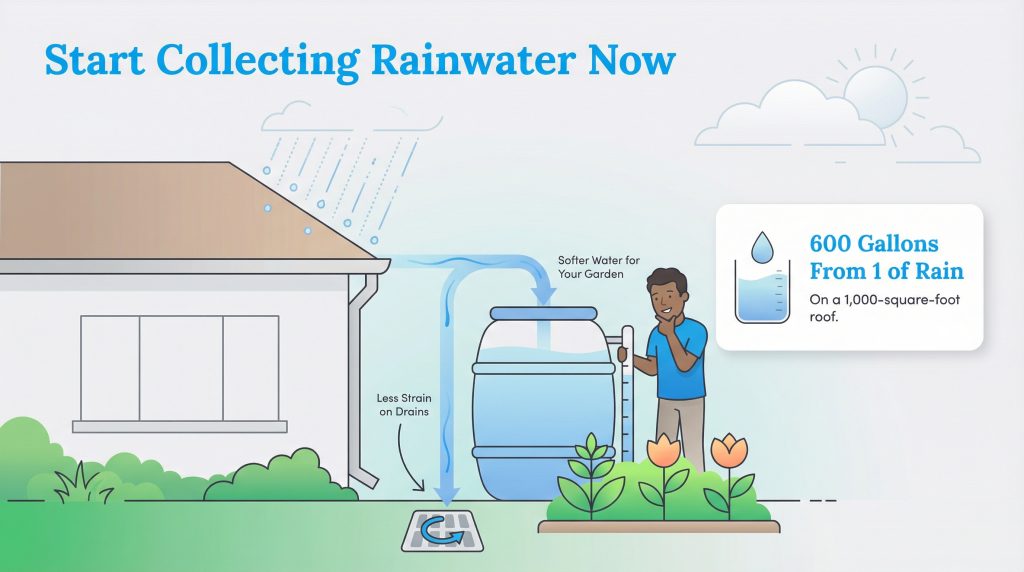
Many homeowners overlook the staggering volume of water their roof sheds during a single storm. By capturing just a fraction of this runoff, you can noticeably cut how much tap water you use outdoors, directly lowering your water bill during the peak growing season. Beyond the obvious financial savings, your plants will thrive. Rainwater is naturally soft, oxygen-rich, and free of the chlorine and fluoride found in municipal supplies, making it the perfect choice for a vibrant, sustainable garden.
Environmental Impact and Reducing Stormwater Runoff
When heavy rain hits your roof, it races down your gutters, across your driveway, and straight into the municipal storm drains. Along the way, this rapid runoff picks up fertilizers, motor oil, and pet waste, carrying those pollutants directly into local streams and rivers. By installing a rain barrel, you actively interrupt this cycle. Your system holds back hundreds of gallons of water during peak storm hours, easing the load on your local infrastructure and mitigating localized flooding. Additionally, diverting water safely away from your foundation helps protect your home’s structural integrity by preventing severe soil erosion and water seepage around your basement.
Calculating Your Potential Cost Savings and Water Yield
The math behind rainwater harvesting is incredibly encouraging. As a general rule, 1 inch of rain falling on a 1,000-square-foot roof yields approximately 623 gallons of usable water. Depending on your local climate, a few heavy spring showers can easily generate enough reserve water to carry your garden through a dry summer spell. Using the standard formula, you can calculate your specific roof yield: multiply your roof’s square footage by the rainfall in inches, then multiply that result by 0.623.
To give you a clearer picture of the financial benefits, here is a comparison of typical municipal water costs versus harvesting rainwater for a garden over a standard three-month summer season:
| Water Source | Summer Usage (Gallons) | Estimated Cost (3 Months) |
|---|---|---|
| Municipal Tap Water | ~3,000 gallons | $15 – $35+ (varies by city) |
| Harvested Rainwater | ~3,000 gallons | $0 (100% Free) |
| Total Potential Savings | — | Up to $35+ per summer |
Types of Rain Barrels: How to Choose the Best Rain Barrel
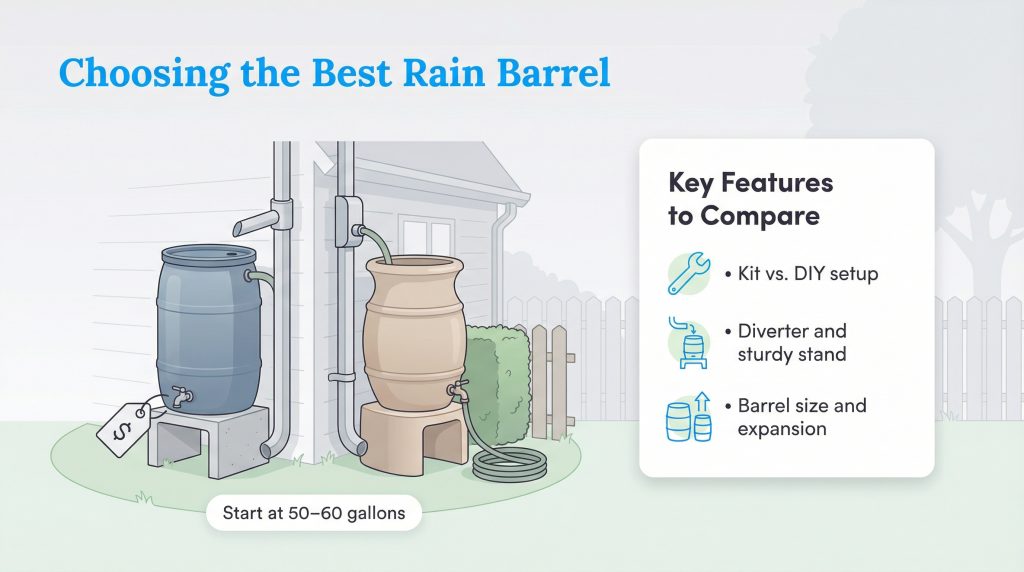
When selecting a rainwater harvesting system, you need to carefully balance your budget, your DIY skills, and the visual aesthetics of your home. The market today offers a vast array of options, ranging from repurposed industrial drums to highly decorative urns designed to blend seamlessly with your backyard landscaping. Understanding the pros and cons of each material is the best way to make a long-term, eco-conscious investment.
- Plastic / Polyethylene Barrels: These are the most common and affordable options. They are lightweight, crack-resistant, and come in numerous colors. Pros: Highly durable, budget-friendly, and easy to drill for custom fittings. Cons: Can fade in the sun if not properly UV-treated, and some lower-end models look overtly utilitarian.
- Wood / Oak Whiskey Barrels: Upcycled wooden casks provide a beautiful, rustic charm that complements historic or heavily landscaped homes. Pros: Exceptional aesthetics and heavy-duty stability. Cons: Expensive, incredibly heavy when full, and prone to rotting or warping over time if the internal plastic liner fails.
- Ceramic-Look or Stone-Look Resin: These decorative barrels offer the sophisticated appearance of real stone or pottery without the immense weight. Pros: UV-resistant, aesthetically pleasing, often come with built-in planters on top. Cons: Usually hold slightly less water (40-50 gallons) and cost more than standard plastic drums.
Regardless of the material you choose, always look for specific functional features. Prioritize models made from UV-resistant materials to prevent sun degradation and algae growth. Flat-back designs are highly recommended, as they allow the barrel to sit perfectly flush against your exterior wall, saving space and improving stability. Additionally, pay close attention to the built-in spigot placement — it needs to be positioned high enough to easily fit a watering can underneath, but low enough to maximize the usable water capacity.
If you prefer ultimate convenience, buying a set of commercial kits is the ideal route. They come pre-drilled with spigots, debris screens, and overflow valves already installed, making them a true plug-and-play solution. Conversely, if you are handy and want to save money, building your own DIY setup is a rewarding alternative.
Step-by-Step Rain Barrel Installation Guide
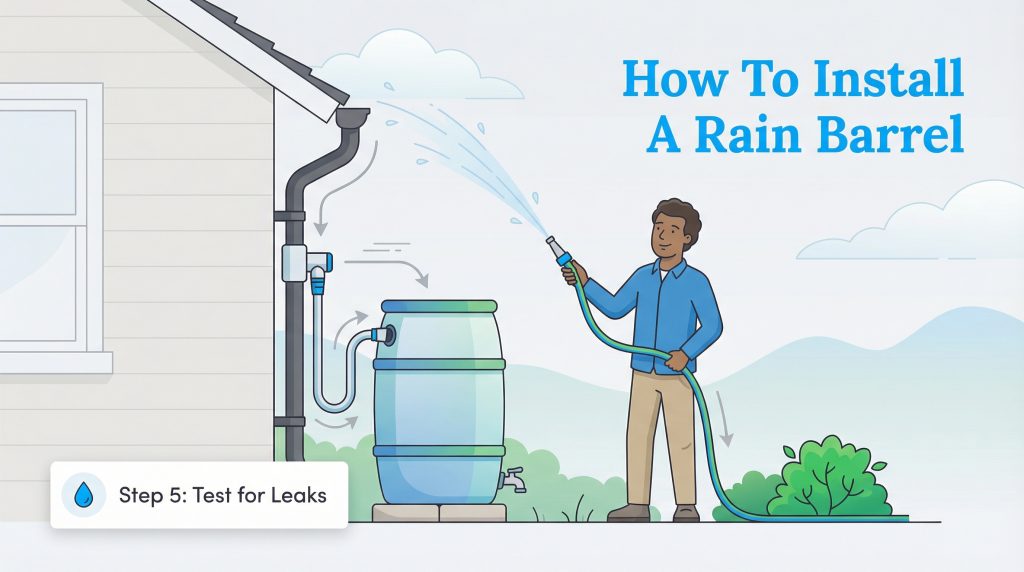
Proper rain barrel installation ensures your system remains safe, stable, and highly effective throughout the changing seasons. Before you begin, gather the necessary tools for the job. You will need a power drill, an appropriately sized hole saw attachment (usually included in diverter kits), a level, a tape measure, a hacksaw, safety glasses, and a reliable diverter kit.
Warning: A full 55-gallon rain barrel weighs roughly 400 to 500 lbs. It requires a reinforced, perfectly level cinderblock or solid wood platform to prevent tipping, which could cause severe injury or property damage.
Step 1: Choosing and Prepping the Location
Select a location near a downspout that is also within a reasonable distance of the garden beds you plan to water. The ground beneath the barrel must be prepared meticulously. Dig out the top layer of soft soil and compact the earth. Lay down a bed of crushed gravel or a set of flat concrete patio pavers. Use your level to ensure the surface is completely flat. A leaning barrel is a major safety hazard once it fills with hundreds of pounds of water.
Step 2: Elevating the Barrel Safely
Because these systems rely entirely on gravity to move water, a barrel sitting flat on the ground won’t create enough water pressure to push water through a hose. You need a sturdy rain barrel stand to elevate the container. Place your stand securely on your leveled gravel or paver base. Lift the empty barrel onto the stand and verify once more with your level that the entire setup is perfectly balanced.
Step 3: Installing the Rain Barrel Diverter Kit
The diverter is the unsung hero of your system. This device connects your downspout to the barrel, sending water into the tank until it reaches maximum capacity. Hold your diverter kit against the downspout to determine the correct height. Use your tape measure and pencil to mark where you need to cut or drill into the downspout according to the manufacturer’s exact specifications. Put on your safety glasses, cut the downspout with your hacksaw or hole saw, and insert the diverter. Connect the flexible fill hose from the diverter directly to the intake port on your barrel, ensuring the hose slopes downward without kinking.
Step 4: Routing the Overflow Management System
Once the barrel reaches capacity, the diverter automatically routes excess water back down the downspout, preventing the barrel from overflowing violently right next to your home’s foundation. However, some older systems or DIY setups use an external overflow hose instead of an automatic diverter. If your system relies on an overflow hose, route that tubing at least four to six feet away from your foundation, preferably directing it into a designated rain garden, a dry well, or a highly permeable lawn area.
Rain Barrel Maintenance and Safety Protocols
A rain barrel is not a “set it and forget it” appliance. Regular upkeep ensures the harvested water remains relatively clean and your hardware lasts for years without cracking. Neglecting basic maintenance can lead to clogged spigots, nasty odors, and pest infestations.
Warning: Harvested rainwater is strictly non-potable and must not be consumed by humans or pets. Additionally, because roof runoff can contain bird droppings and chemical residues from roofing materials, you must not use this water directly on the edible parts of plants (like leafy greens or root vegetables).
Mosquito Control for Rain Barrels
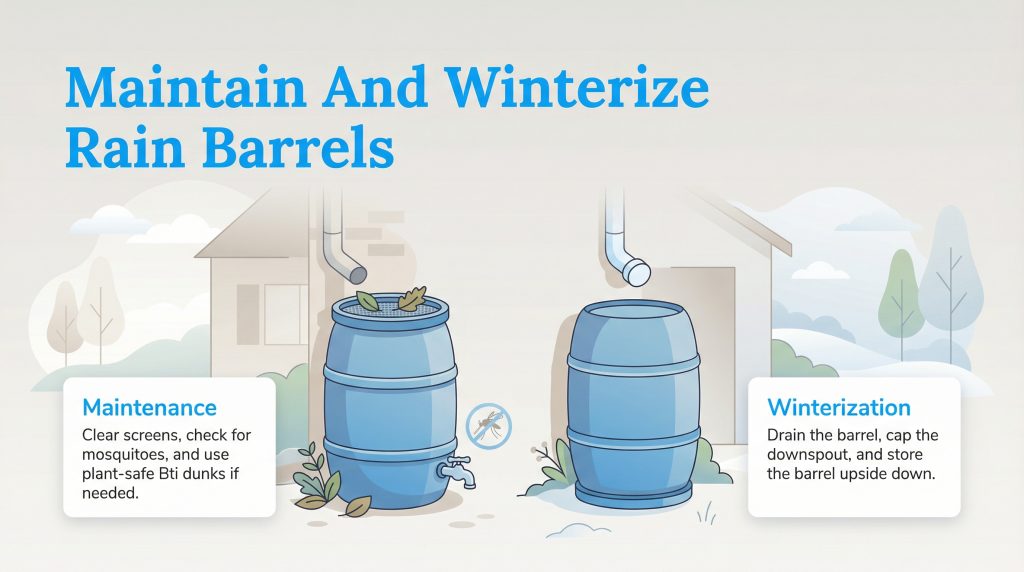
Standing water is a notorious breeding ground for mosquitoes, but a well-maintained system easily prevents this. Always ensure your barrel is equipped with fine mesh netting over any intake or overflow vents to block adult mosquitoes from entering and laying eggs. As a best practice, make it a habit to empty the barrel completely every 3 to 4 days during the summer. If you cannot use the water that quickly, drop organic larvicide dunks (made with Bacillus thuringiensis israelensis, or Bti) into the water. These dunks are highly effective at killing mosquito larvae while remaining completely safe for your plants and surrounding wildlife.
Preventing Algae Growth
Algae thrives in warm, nutrient-rich water exposed to sunlight. To combat this, place your rain barrel in a shaded area if possible, or purchase a dark-colored, opaque barrel that completely blocks UV light. If you are using a translucent DIY container, painting the exterior a dark color will solve the issue. You should also routinely flush the system and scrub the interior lightly with a mild solution of white vinegar or heavily diluted bleach at the start and end of the growing season.
How to Winterize a Rain Barrel
If you live in a region where temperatures regularly drop below freezing, you must winterize your system. Water expands as it turns to ice, which will quickly crack a plastic barrel or split a brass spigot, destroying your investment.
- Spring Checklist: Reconnect the diverter kit to the downspout, flush out any lingering debris from the gutters, and inspect the barrel for hairline cracks before the first major rainstorm.
- Summer Checklist: Empty the water every 3 to 4 days, visually inspect the fine mesh netting for tears, and apply Bti mosquito dunks monthly.
- Winter Checklist: Drain the barrel entirely before the first hard freeze. Leave the bottom spigot fully open so lingering moisture can escape. Remove the diverter hose from the downspout and install a winterized cap over the downspout hole. Finally, turn the empty barrel upside down and store it in a garage or shed.
Rainwater Collection Laws and HOA Regulations
Before you purchase tools and begin cutting into your downspouts, you must verify your local, state, and Homeowner Association (HOA) regulations regarding rainwater harvesting. While the vast majority of municipalities heavily encourage water conservation, certain states have strict restrictions based on complex historical water rights.
For example, states like Colorado and Utah have historically regulated rainwater collection because local laws dictate that all precipitation naturally belongs to the existing watershed and downstream rights holders. While these states have recently relaxed their rules to allow small-scale residential rain barrels, strict capacity limits still apply. Additionally, many HOA communities maintain strict aesthetic guidelines. Your HOA may require you to place your rain barrel out of public view behind a fence, obscure it with native shrubs, or paint it to precisely match the exterior siding of your home. Taking a few minutes to read your HOA bylaws or check your state’s environmental protection website can save you from costly fines and forced removals.
Preparing Your Home for Sustainable Water Use
Taking control of your home’s water management is a deeply rewarding utility decision that benefits your landscape and the broader ecosystem. Whether you opt for a sleek, pre-made commercial kit or build a custom DIY setup tailored to your specific gardening needs, capturing stormwater empowers you to utilize resources that literally fall from the sky. You will see a tangible difference in your municipal water bill and the overall health of your garden almost immediately. By dedicating a single weekend to installing a rain barrel system, you establish a solid foundation for a more resilient, self-reliant, and eco-conscious household.
Frequently Asked Questions (FAQs)
Do rain barrels attract mosquitoes?
How do you keep rain barrel water from smelling?
Is rainwater safe to drink?
How much money can I save with a rain barrel?
Can I link multiple rain barrels together?
Do I need a pump for my rain barrel?
Is it illegal to collect rainwater in my state?
“`
About the Author

LaLeesha has a Masters degree in English and enjoys writing whenever she has the chance. She is passionate about gardening, reducing her carbon footprint, and protecting the environment.