Identifying pollutants is the first step toward ensuring safer, cleaner hydration for your entire household.
Key Takeaways
- Check your Consumer Confidence Report before spending money to identify known local municipal contaminants for free.
- Choose the right testing method by comparing the convenience of DIY test strips against the accuracy and depth of professional lab analysis.
- Understand your results and costs to make informed, eco-conscious decisions about home filtration systems or necessary plumbing repairs.
Whether you just moved into a new property or worry about invisible health hazards lurking in your pipes, learning how to test your water for pollutants is critical for your family’s safety. While municipal water systems in the U.S. face strict regulation, aging household plumbing and private well variances frequently introduce unexpected risks like lead, forever chemicals, or bacteria. We want to guide you through a highly practical, step-by-step process to evaluate your water supply, from reading local municipal data to utilizing accredited laboratories, so you can trust every single glass you pour.
Step 1: Check Your Consumer Confidence Report (CCR)
Before you spend money on testing kits, your very first step is to leverage the free data already available to you. If you pay a water utility bill, your local provider is federally mandated by the Safe Drinking Water Act to provide an annual Consumer Confidence Report (CCR) by July 1 of each year. This document acts as a comprehensive report card for your municipal water supply.
Your CCR details exactly where your water comes from and lists any regulated contaminants detected during the utility’s testing process over the past year. It highlights if your local water district violated any health standards and explains the potential health risks associated with those violations. You can usually find a link to your CCR printed directly on your monthly utility bill, by visiting your local water provider’s website, or by using the EPA’s online CCR search tool.
Step 2: Identify Signs of Water Contamination
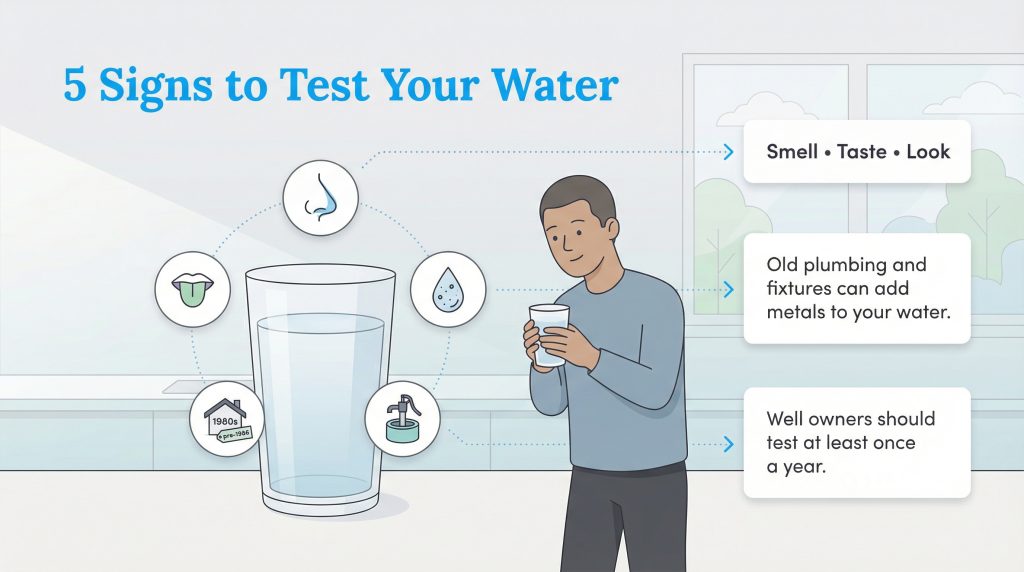
While your CCR tells you what leaves the municipal treatment plant, it does not account for what happens inside your home’s unique plumbing system. Paying close attention to the physical signs of water contamination can help you narrow down exactly which tests you need to buy. Use your own senses as a preliminary screening tool.
| Sensory Symptom | Likely Culprit or Pollutant |
|---|---|
| Rotten egg or sulfur odor | Hydrogen sulfide gas or sulfur bacteria |
| Strong bleach or chemical smell | Excess chlorine from municipal treatment |
| Metallic taste | Iron, copper, zinc, or lead corrosion |
| Cloudy or milky appearance | Trapped air or high sediment/hardness levels |
| Red or brown stains on laundry/sinks | High iron content or rusting galvanized pipes |
| Blue or green stains on fixtures | Copper pipe corrosion (often due to low pH) |
If you live in a home built before 1986, learning how to check tap water for lead is critical regardless of sensory cues, as lead pipes and solder were heavily used prior to federal bans.
Step 3: Choose Between DIY Water Quality Testing Kits and EPA-Certified Labs
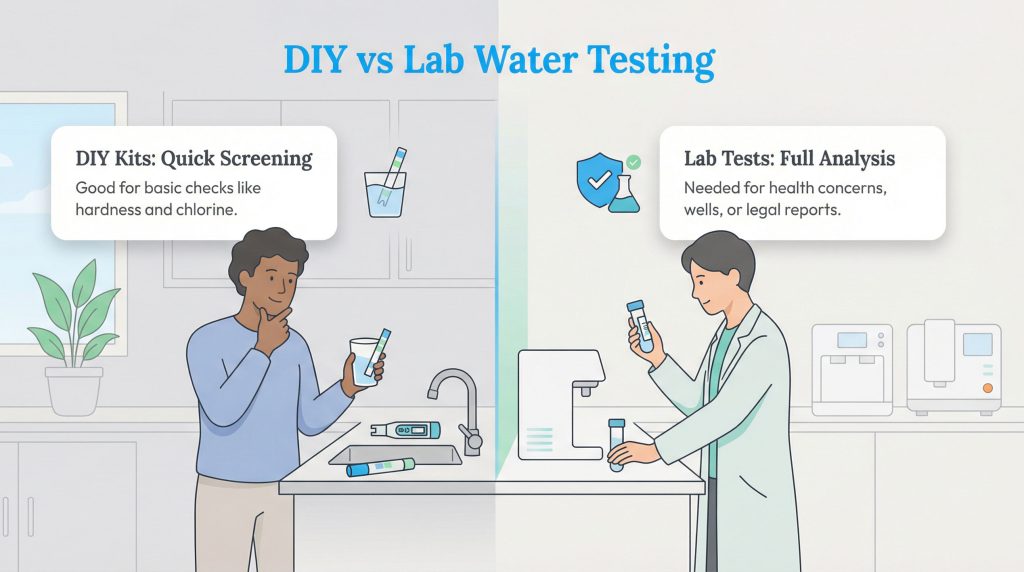
Once you identify a potential issue, you must decide how to proceed with testing. Water quality testing kits vary wildly in scope, methodology, and price. Think of a DIY kit as a rapid screening tool for basic chemistry, whereas a professional lab acts as a definitive diagnostic test for toxic threats. The table below outlines the primary differences.
| Method | Accuracy | Average Cost | Time to Results | Best For Detecting |
|---|---|---|---|---|
| DIY Test Strips | Moderate | $10 – $30 | Minutes | Hardness, pH, chlorine, and iron |
| Professional Lab | High | $150 – $300+ | 1–2 Weeks | Heavy metals, PFAS, VOCs, and bacteria |
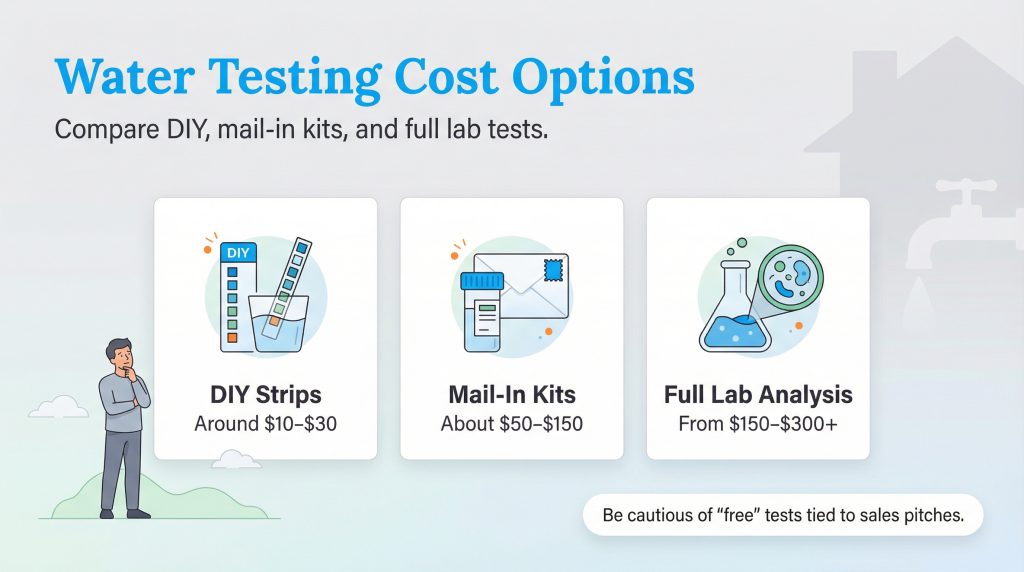
Best Home Water Test Kits for Quick Checks
The most accessible solutions rely on water contamination test strips. You simply dip the chemically treated paper into a fresh sample of your tap water and match the resulting color change to a provided chart. These strips are highly affordable and give instant feedback on aesthetic issues like hard water scaling or high municipal chlorine.
You can also utilize a digital Total Dissolved Solids (TDS) meter. A TDS meter measures the electrical conductivity of your water to calculate the sheer volume of dissolved inorganic salts and organic matter present. However, it is vital to understand that a TDS meter cannot identify specific toxic pollutants. It will tell you that something is in the water, but it will not distinguish between harmless calcium and deadly lead. These meters are best used to monitor the ongoing performance of an existing home water system rather than as a primary diagnostic tool.
When to Choose a Certified Lab
When you are dealing with genuine health concerns, at-home color-changing strips are entirely insufficient. To guarantee the safety of your drinking supply, you must partner with an EPA-certified water testing lab. You should always opt for professional lab analysis under the following scenarios:
- You are buying a new home and need legal verification of water safety for a mortgage (especially FHA or VA loans on well properties).
- Someone in your household is experiencing recurrent gastrointestinal illness.
- You are expecting a baby or have an infant in the home, as developing immune systems are highly vulnerable to nitrates and lead.
- You notice a sudden, drastic change in your private well water’s taste, color, or flow.
You can verify accredited facilities by searching the EPA’s Certified Lab List, ensuring your results carry scientific weight.
Common Pollutants and How to Test for Them
Different contaminants require entirely different testing methodologies. Understanding what you are actually looking for prevents you from wasting money on the wrong diagnostic panels.
Coliform Bacteria & E. coli
Coliform bacteria are naturally present in the environment, but their presence in your drinking water indicates a pathway for more dangerous pathogens, such as E. coli, to enter your supply. This usually occurs via agricultural runoff, flooding, or a failing septic system near a private well. DIY tests can only give a vague “present or absent” reading, so you need a biological culture test from a certified lab to verify the exact strain and concentration.
Nitrates & Nitrites
Common in rural, agricultural areas, nitrates infiltrate groundwater through heavy fertilizer application and animal waste. Nitrates are extremely dangerous for infants under six months old, causing a life-threatening condition known as “blue baby syndrome,” which limits the blood’s ability to carry oxygen. Because boiling water actually concentrates nitrates rather than removing them, professional lab screening is mandatory for rural households.
Heavy Metals (Lead/Copper)
Testing tap water for heavy metals is essential if you live in a historically older neighborhood. Lead and copper typically leach directly from your own plumbing network, meaning your municipal CCR will not accurately reflect your home’s unique risk. Ingestion of these heavy metals causes severe neurological damage over time. You must request a specific “metals panel” from a lab, as standard mineral tests will not flag them.
VOCs
Volatile Organic Compounds (VOCs) are harmful industrial chemicals found in solvents, gasoline, and industrial cleaners that vaporize into the air and seep into groundwater tables. Chronic exposure damages the liver, kidneys, and central nervous system. Identifying VOCs requires highly sensitive laboratory equipment (like Gas Chromatography-Mass Spectrometry), making DIY identification completely impossible.
PFAS
Per- and polyfluoroalkyl substances (PFAS) are man-made “forever chemicals” traditionally used in non-stick cookware, firefighting foam, and water-resistant fabrics. They do not break down in the environment and accumulate in the human body, leading to significant cancer and fertility risks. To test drinking water for PFAS, you must specifically request a PFAS-targeted panel from an EPA-certified facility, as these emergent chemicals are excluded from standard municipal or broad-spectrum lab screens.
Step 4: How to Collect a Water Sample Correctly
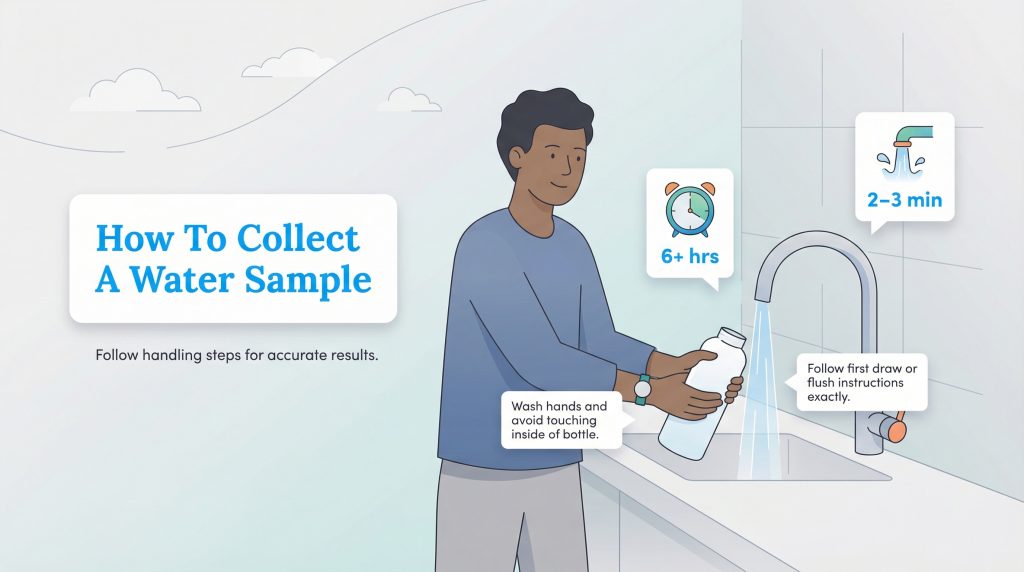
Whether you use a mail-in kit or drop a sample off at a local health department, the accuracy of your entire test depends entirely on your collection methodology. Improper handling easily contaminates the vial, resulting in false positives and unnecessary panic.
- Preparation: Wash your hands thoroughly with unscented soap. Do not touch the inside of the bottle or the underside of the cap, as your skin oils and natural bacteria will skew the lab results.
- The “First Draw”: If you are looking for lead or copper, you must capture the “first draw.” This involves collecting the very first water that exits the tap after sitting stagnant in the pipes for a minimum of six hours (usually first thing in the morning). This ensures you capture the highest concentration of heavy metals leaching from your pipes.
- The “Flush”: For general mineral content or VOCs, the lab will instruct you to let the water run for two to three minutes before filling the vial. This guarantees you are testing the fresh water sitting in the municipal main line, rather than the water sitting idle inside your household faucet.
- Removing the Aerator: If you are figuring out how to test well water for bacteria, you must unscrew and remove the faucet aerator before taking the sample. The tiny mesh screen at the end of your faucet traps debris and grows localized bacteria that will falsely represent the overall health of your well aquifer.
Step 5: Understanding Your Maximum Contaminant Level (MCL) Results
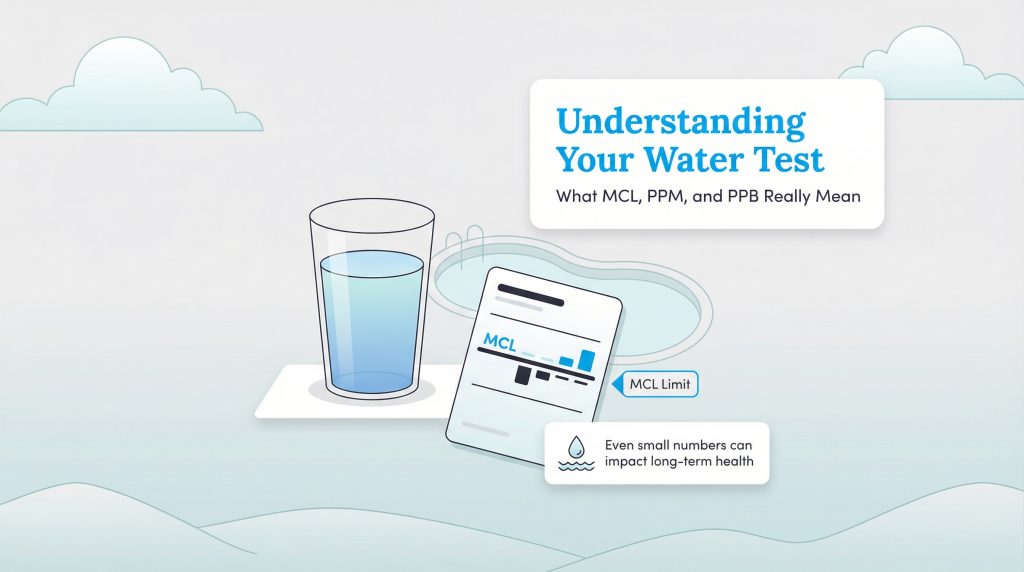
Receiving a multi-page lab report can feel overwhelming, especially when faced with rows of scientific acronyms. The single most important figure to identify on your sheet is the Maximum Contaminant Level (MCL). This represents the absolute highest, legally enforceable limit of a specific pollutant that the EPA allows in public drinking water systems.
If your test results show a chemical concentration sitting above the MCL, your water is deemed unsafe for long-term consumption. You will typically see your results broken down into two primary measurements:
- PPM (Parts Per Million): Equivalent to one milligram per liter. To visualize this, imagine a single drop of water inside a standard 50-gallon bathtub.
- PPB (Parts Per Billion): Equivalent to one microgram per liter. To picture this, imagine one single drop of water diluted across a massive Olympic-sized swimming pool.
Even at these microscopically tiny levels, certain toxic chemicals remain incredibly harmful over a lifetime of exposure. For instance, the EPA’s action level for lead is 15 parts per billion, though most pediatricians advocate for a target level of absolute zero. To better interpret what your specific lab numbers mean for your family’s health, we recommend reviewing the CDC’s Drinking Water page.
Preparing Your Home for Clean Water Filtration
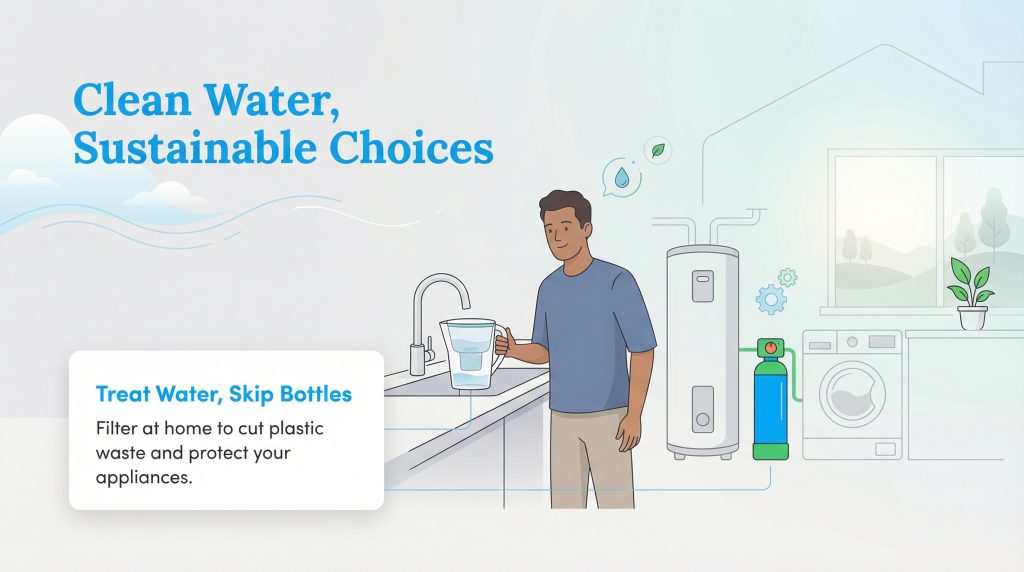
If your results confirm the presence of pollutants, do not panic. The purpose of testing is to empower you to choose the correct, eco-conscious treatment method rather than relying on wasteful single-use plastic water bottles. You must match the specific filtration technology to the exact pollutants flagged on your lab report.
If your report highlights high levels of PFAS, nitrates, or heavy metals, you will need a robust under-sink filtration system that utilizes Reverse Osmosis (RO) technology, as standard carbon filters cannot strip these heavy toxins. Conversely, if your primary issue involves high chlorine, VOCs, or strange tastes, a simple pitcher filter or activated carbon block is highly effective. For structural issues like high mineral hardness, installing a whole-home water softener prevents scale buildup from destroying your appliances.
Learn more about choosing the best setups for your household on our dedicated Water Filtration Systems page.
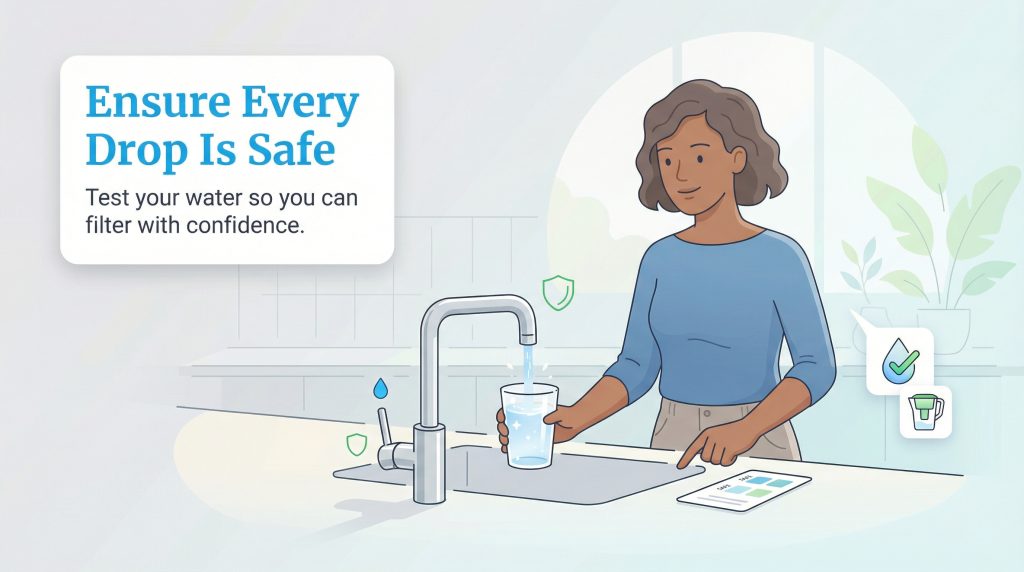
Ultimately, analyzing your water is a relatively minor investment that yields incredible peace of mind. Whether you start by evaluating your municipal CCR or move forward with shipping a complex PFAS panel to an accredited lab, removing the guesswork is vital. By identifying exactly what flows through your plumbing, you ensure that your home remains a safe, sustainable sanctuary for every person living under your roof.
FAQs About Testing Water Quality
How do I test well water for bacteria?
What is the most accurate water quality testing kit?
Do Total Dissolved Solids (TDS) meters detect pollutants like lead?
How accurate are home water test kits?
Can I test my own water for bacteria?
How often should I test my well water?
Is city tap water tested automatically?
Where can I get my water tested for free?
About the Author

David has been an integral part of some of the biggest utility sites on the internet, including InMyArea.com, HighSpeedInternet.com, BroadbandNow.com, and U.S. News. He brings over 15 years of experience writing about, compiling and analyzing utility data.