Use These Spring Composting Tips to Revive Your Winter Bin and Reduce Household Waste
Key Takeaways
- Restarting your compost bin in spring requires balancing your carbon and nitrogen materials to kickstart the decomposition process quickly.
- Maintaining a 2:1 browns to greens compost ratio prevents soggy piles and neutralizes unpleasant odors after the winter thaw.
- Using your finished compost helps reduce your household waste footprint and lowers the need for store-bought fertilizers or excessive watering.
As the winter freeze yields to the spring thaw, your garden is finally ready to wake up — and so is your organic waste. We know managing seasonal yard chores feels overwhelming, but using a few reliable spring tips for composting makes the transition much easier. Reviving your outdoor bin right now not only enriches your upcoming flower beds, but it actively lowers your household waste footprint all season long. Let’s look at exactly how to restart a compost bin so you can reap the immediate environmental and financial rewards before transitioning to summer composting tips for the busy growing season.
Why Waking Up Your Compost Pile in Spring Matters

Understanding the science behind waking up your compost pile and refreshing a dormant compost bin comes down to a little basic biology. Over the long winter months, freezing temperatures naturally halt the microbial activity that turns your kitchen scraps into soil. However, those same freeze-thaw cycles actually work in your favor by expanding the water inside organic scraps, effectively shattering cell walls and helping to break down tougher fibrous materials. Once the spring temperatures steadily rise and the stronger sun hits your pile, that dormant microbial activity begins to multiply rapidly. This natural biological jumpstart makes spring the optimal window to refresh your pile, especially if you are in the middle of evaluating your sustainable living habits for a brand new growing season. Taking full advantage of the warming weather significantly speeds up decomposition, ensuring you have rich, loamy soil ready for summer planting.
Spring Composting To-Do List: Step-by-Step Maintenance
Navigating the messiness of a recently thawed waste pile is usually the least glamorous part of seasonal yard work. However, establishing a reliable spring composting to-do list makes the entire maintenance process highly efficient. We recommend grabbing your favorite pair of sturdy gardening gloves and following this step-by-step approach before you start tossing in fresh kitchen scraps. A healthy, active pile in the spring should smell earthy, not sour, and look like dark, crumbly dirt.
Inspect the Bin for Winter Damage
Before adding new material or turning the heavy organic matter, it is crucial to assess the physical state of your container. Extreme freeze-thaw cycles easily compromise structural integrity. Take a few minutes to inspect your setup and complete any necessary repairs:
- Check for cracked plastic: Freezing temperatures often make plastic bins incredibly brittle. Seal any large cracks with heavy-duty weather tape to keep unwanted rodents out.
- Look for warped wood: Wooden pallet bins shift as trapped moisture freezes and thaws. Realign and reinforce any bowed slats with fresh screws so your pile stays neatly contained.
- Test broken hinges or latches: Ensure your bin’s lid securely closes to block out scavenging animals. Replace rusted or snapped metal hinges immediately before the spring rains arrive.
Fixing Soggy Piles and Aerating the Compost
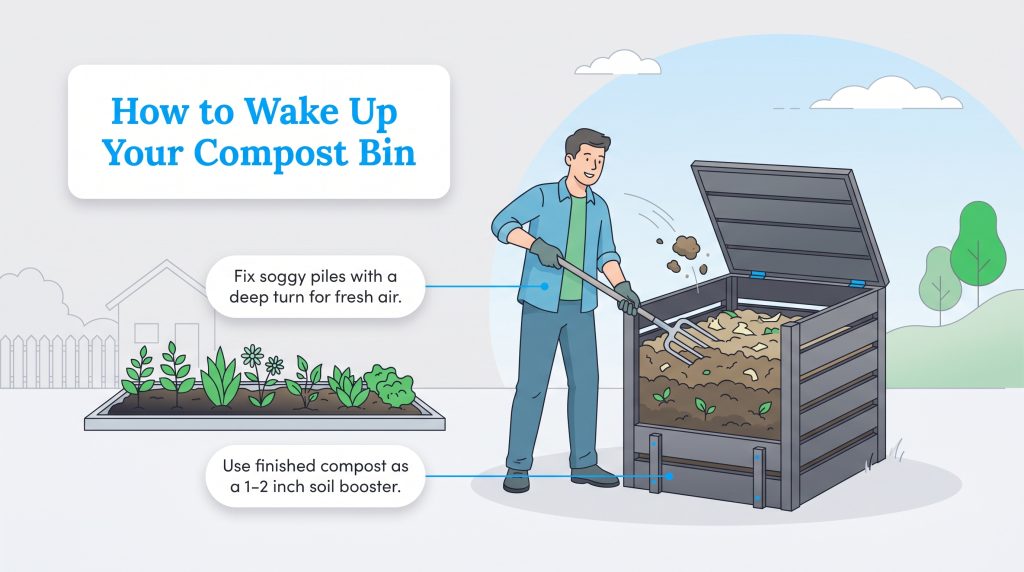
Heavy spring rains frequently turn dormant outdoor heaps into soggy, anaerobic messes. If your pile looks like a wet sponge or smells strongly of ammonia, you need to introduce oxygen immediately to fuel those beneficial bacteria. Turning compost in spring is a non-negotiable step for healthy soil. Grab a sturdy pitchfork and deeply turn the pile from the bottom up, aggressively breaking apart any compacted layers of matted leaves or old, slimy food scraps. Furthermore, you should cover the bin with a heavy tarp during this transitional season. A thick tarp securely fastened over the pile retains vital heat during unpredictable spring temperature swings, while also acting as an effective shield to block heavy downpours from completely waterlogging your newly turned heap.
Managing Spring Yard Waste and Indoor Debris
A thorough seasonal reset isn’t limited exclusively to the outdoors. You can quickly bulk up your bin by scavenging the house for dead winter houseplants, expired holiday bulbs, and depleted old potting soil to toss straight into the pile. These indoor materials add fantastic diversity to the microbial environment. When it comes to managing outdoor composting spring yard waste, remember that size dictates speed. Instruct yourself to chop up pruned tree branches, ornamental grasses, and early yard debris into small, manageable pieces before adding them. Smaller fragments provide a massively increased surface area for hungry microbes, vastly accelerating the biological breakdown process.
Perfecting Your Spring Compost Ratio (Browns to Greens)
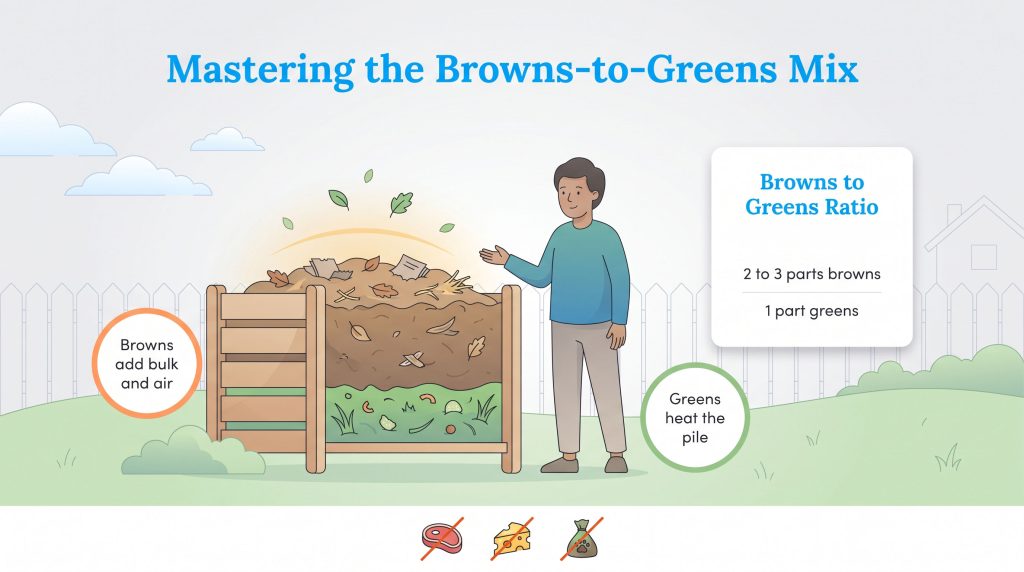
Building a thriving, odor-free pile means mastering your compost ratio browns to greens before dumping in your fresh waste. Instead of getting bogged down in complex soil chemistry, focus entirely on your basic carbon-to-nitrogen balance. While many agricultural extension offices suggest an optimal carbon-to-nitrogen ratio of 30:1, achieving that exact measurement in a backyard setting is practically impossible. Instead, as a reliable guideline, we recommend using a straightforward 2:1 or 3:1 ratio of browns to greens by volume. “Browns” act as your carbon source, providing vital structural bulk and necessary aeration, while “greens” deliver the heavy, moist nitrogen needed to physically heat the pile up. Striking this balance keeps your heap smelling earthy rather than rotten. If you accidentally dump a huge load of wet grass clippings into the bin, simply balance it out with a double scoop of shredded newspaper or dried leaves. To make your daily routine even easier, keep our handy reference chart nearby when sorting your kitchen and yard waste.
| Material Type | Examples | Purpose |
|---|---|---|
| Browns (Carbon) | Non-glossy newsprint, cardboard toilet paper rolls, dry leaves | Provides structural bulk, aeration, and carbon for energy. |
| Greens (Nitrogen) | Coffee grounds, fruit peels, fresh grass clippings | Supplies essential nitrogen to heat the pile and feed bacteria. |
What Not to Add from Spring Clean-Ups
While a vigorous spring gardening clean-up produces an abundance of organic material, not everything belongs in your backyard bin. Avoid tossing in meat, dairy, greasy oils, or pet waste, as these problematic items quickly rot and attract hungry rodents to your property. Additionally, keep diseased plants or heavily insect-infested clippings out of your pile. Most home compost setups simply do not get consistently hot enough to kill harmful fungal pathogens or hardy pests, so it is always safer to dispose of sick plants with your municipal yard waste collection.
Starting a Brand New Compost Pile This Spring
If you are starting from scratch rather than reviving an old heap, there is no better time than the spring thaw to establish your setup. Composting for beginners starts with one critical decision: choosing the right location. Select a well-drained, partially sunny area in your yard that is convenient to reach from your back door. A spot with gentle morning sun helps warm the pile to encourage microbial growth, while excellent ground drainage ensures the bottom of your bin doesn’t turn into a stagnant puddle after heavy April showers.
Building the Base Layer for Better Airflow
The true secret to a successful new bin lies in laying a proper foundation. Build the absolute bottom layer of your new pile using coarse, highly structured materials like small twigs, dried corn stalks, or a thick bed of straw. This loose, airy foundation is vital because it actively allows oxygen to circulate upward into the center of the pile. Proper aeration from the ground up prevents the base from becoming a dense, anaerobic mess as you begin to stack heavier, wetter greens on top of it.
Once your base layer is constructed, managing your household food waste doesn’t have to be a complicated or intimidating chore. The process becomes highly accessible once you establish a reliable daily routine for moving scraps from your kitchen directly to the backyard. Follow these easy, actionable steps to streamline your process:
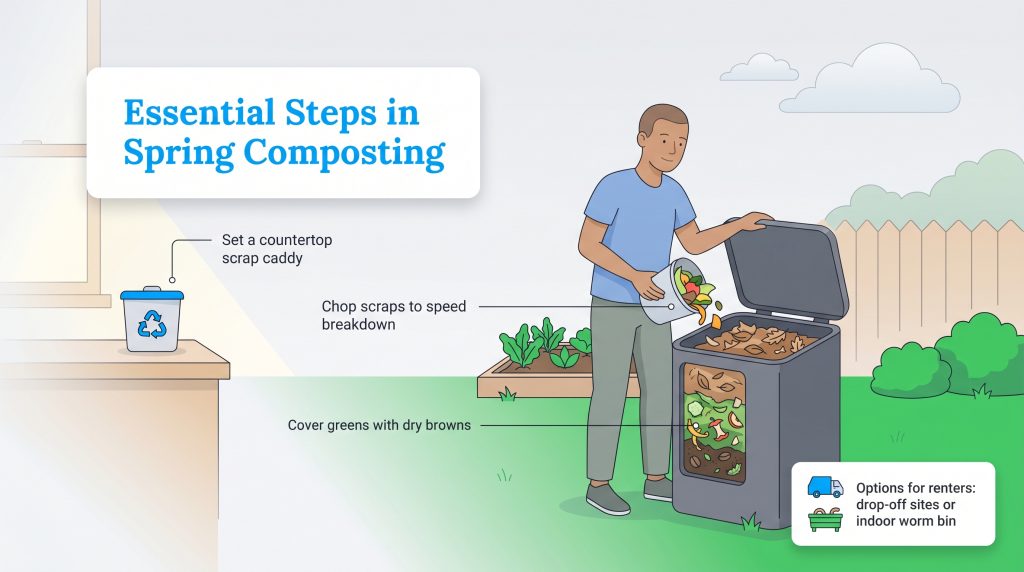
- Designate a convenient spot on your kitchen counter for a small collection caddy.
- Chop up larger fruit and vegetable scraps before tossing them into the container to accelerate decomposition.
- Empty the indoor caddy into your outdoor bin every two to three days to prevent fruit flies.
- Immediately cover the fresh greens in your outdoor bin with a layer of dry browns to trap odors.
Composting Options for Renters and Small Spaces
If you don’t have a backyard, you can still participate in the organic waste reduction cycle to complement your daily recycling routine. Renters or apartment dwellers can easily collect food scraps in a countertop or under-sink caddy and drop them off at a designated municipal composting site or local farmers market. Some progressive cities even offer convenient curbside organic waste collection. If you prefer to manage the entire process yourself, consider an indoor worm composting bin (vermicomposting), which is compact, completely odor-free, and perfect for turning small amounts of daily food scraps into incredibly rich soil.
Harvesting and Using Finished Compost
Before you add massive amounts of new yard waste to an established bin, you should focus on harvesting the mature dirt resting at the very bottom. Sifting out that dark, crumbly “black gold” provides immediate, organic nutrients for your entire landscape. Using finished compost correctly helps your soil retain vital moisture and supports robust root growth for the upcoming summer. By pulling out the fully processed dirt now, you make plenty of room for fresh grass clippings while directly supporting the federal guidelines for home composting.
Once you have sifted the finished compost, it is incredibly versatile and ready to work its magic across your property. We highly recommend using this nutrient-dense material for top-dressing your existing lawns. Simply broadcast a thin, quarter-inch layer evenly across the grass to naturally fertilize the turf and improve overall soil structure without relying on synthetic chemicals. It is also the ideal organic amendment for prepping spring transplant beds. Work a one- to two-inch layer deeply into the soil where you plan to plant delicate summer vegetables or blooming flowers, giving those new root systems a gentle, sustained nutritional boost.
Quick Spring Compost Troubleshooting Guide
Even the most experienced gardeners run into occasional issues when executing their spring compost maintenance. The transition from freezing temperatures to wet, warmer days often disrupts the delicate ecosystem inside your bin. If your pile isn’t behaving properly this spring, simply use this quick troubleshooting table to diagnose the problem and get the decomposition process back on track.
| Problem | Likely Cause | What to Do |
|---|---|---|
| Foul or ammonia odor | Too much nitrogen (greens) or poor aeration | Add dry browns (leaves, paper) and turn the pile to add oxygen. |
| Pile is too dry | Lack of moisture or too many dry materials | Lightly mist with a hose while turning, or add wet food scraps. |
| Pile won’t heat up | Too small, too dry, or lack of nitrogen | Ensure the pile is at least 3 cubic feet, add fresh greens, and check moisture. |
| Pests are attracted | Exposed food scraps or added meat/dairy | Bury fresh greens deep in the center and cover with a thick layer of browns. |
How Composting Reduces Home Utility Costs
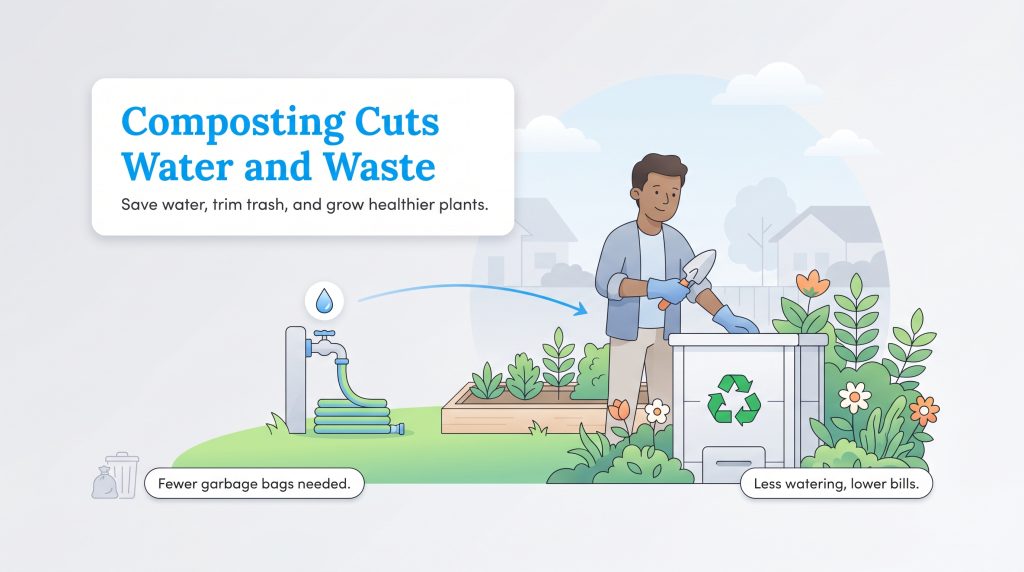
We firmly believe that eco-conscious habits should also directly benefit your household budget. When you regularly amend your garden beds with rich organic matter, the soil’s natural water retention drastically improves. According to the USDA Natural Resources Conservation Service, every 1% increase in soil organic matter can help soil hold up to 20,000 gallons of additional water per acre. This remarkable water retention means you won’t have to run the sprinkler system nearly as often, actively lowering your municipal water bills during the scorching summer months. Buying fewer municipal garbage bags throughout the year is another distinct financial advantage when you divert heavy, wet food scraps away from the trash. Every small, environmentally mindful choice adds up to help you reduce your overall home waste and supports your broader summer sustainable gardening efforts for a blooming landscape.
Preparing for a Sustainable Summer
Wrapping up your spring transition process early guarantees a highly productive and stress-free growing season. By completing your structural bin repairs, balancing your carbon inputs, and thoroughly aerating the damp pile now, you effectively reset your entire organic waste management system. As the intense summer heat rapidly approaches, simply instruct yourself to maintain your daily kitchen scraps routine and regularly monitor the moisture levels in the bin. Enjoy the tangible rewards of a vibrant, healthier backyard landscape while confidently running a much more energy-saving, eco-conscious home.
Frequently Asked Questions About Spring Composting
Should I add water to my compost bin in the spring?
How long does it take for a compost pile to heat up after winter?
Can I compost weeds pulled from my spring garden?
What is the fastest way to break down yard waste in the spring?
Is it safe to put eggshells in my compost bin?
How do I keep pests away from my outdoor compost pile?
What should I put at the bottom of a new spring compost pile?
How can I keep my compost warm during cold spring nights?
Can I compost dead indoor plants from the winter?
About the Author

LaLeesha has a Masters degree in English and enjoys writing whenever she has the chance. She is passionate about gardening, reducing her carbon footprint, and protecting the environment. She also recently served as President of the Board for City Sprouts (a community garden).