Discover the most accurate and affordable ways to ensure your tap water is safe for your family.
Key Takeaways
- Check with your local utility provider first for free testing vouchers or annual water quality reports before spending money.
- Use DIY home test kits for a quick, initial screening, but understand they are less accurate than professional analysis.
- Send samples to an EPA-certified laboratory for the most reliable results if you suspect lead contamination in your pipes.
Moving into a new home or raising a family often brings a long list of worries, and the safety of your drinking water is a valid concern that deserves attention. Even if the idea of contaminated plumbing feels overwhelming, testing your water is straightforward and fits nearly any budget. Whether you want to start with a simple visual inspection or go straight to a certified laboratory analysis, we can guide you through the confusing array of testing methods to help you secure peace of mind and safe drinking water. Plus, confirming your water is clean helps you avoid the cost and waste of relying on bottled water.
Why You Should Test Your Water for Lead
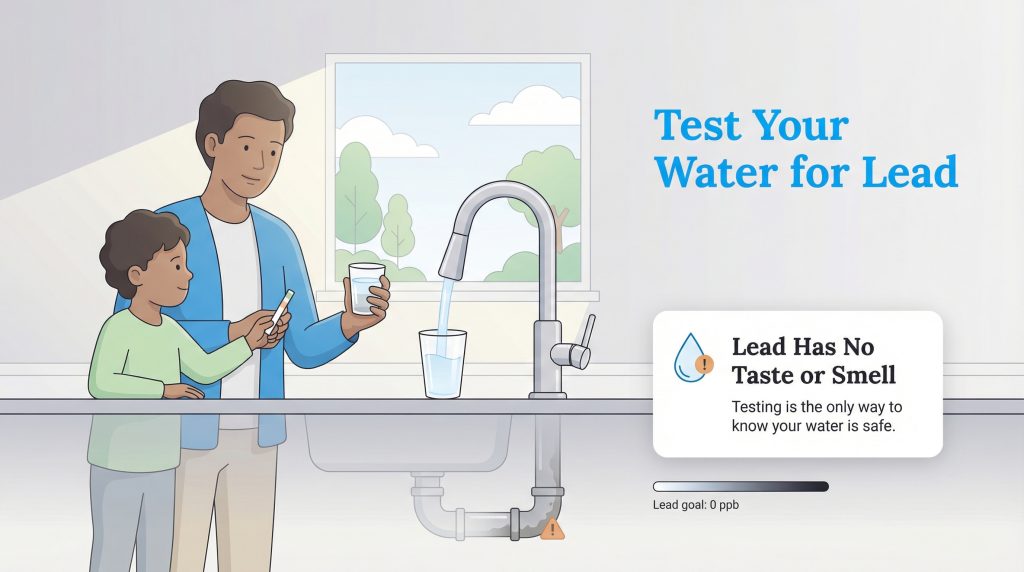
Lead is a toxic metal that poses significant health risks, particularly to young children and pregnant women. Even at low levels, exposure can affect physical and mental development; in children, long-term lead exposure can affect learning, behavior, and growth. The tricky part about lead is that it is tasteless, odorless, and invisible to the naked eye. You cannot determine if your water is safe just by looking at it or tasting it; testing is the only way to know for sure.
The primary source of lead in drinking water is usually the corrosion of older plumbing materials. If your home was built before 1986, there is a higher chance that your pipes, fixtures, or solder contain lead. Regulations have since changed to require “lead-free” plumbing, but older infrastructure remains in millions of homes across the country. Understanding the condition of your pipes empowers you to make smart decisions for your household’s health. The EPA’s health-based goal for lead in drinking water is actually 0 ppb, because no amount is considered completely safe for children.
Step 1: Inspect Your Plumbing (The “Scratch Test”)
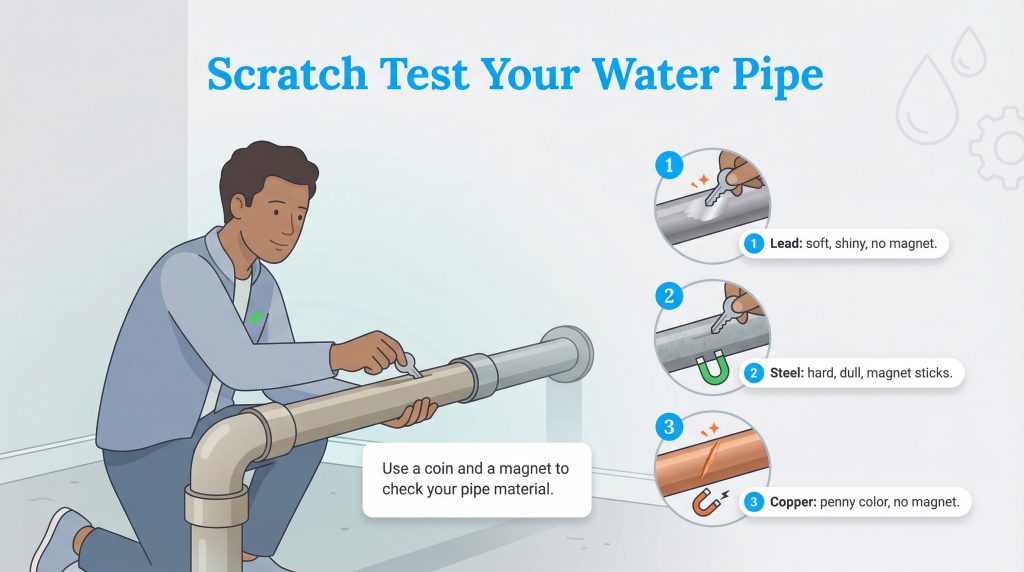
Before you spend money on kits or lab fees, you should perform a physical inspection of your plumbing. This simple check, often called the “Scratch Test,” helps you identify the material of your incoming water service line. You will need a key or a coin and a strong refrigerator magnet. Locate where your water pipe enters your home, which is often near the water meter or shut-off valve.
Carefully scratch the outside of the pipe with your coin or key. Compare what you see to these characteristics:
- Lead: The pipe will feel soft and scratch easily. The scratched area will turn a shiny silver color. A magnet will not stick to it.
- Galvanized Steel: The pipe will be a dull gray color and is very hard to scratch. A magnet will stick to it.
- Copper: The pipe will be the color of a penny. If you scratch it, it will look like a bright new penny. A magnet will not stick to it.
Identifying your pipe material gives you a baseline for understanding your risk. If you find lead pipes or lead solder, you should proceed immediately to water testing. Remember, the scratch test only tells you what your pipes are made of; even if your pipes aren’t made of lead, small parts and fixtures can still contribute lead, so you’ll still want to test the water itself to know what you’re actually drinking. For more tips on managing your home’s utilities, check out our guide on understanding your water bill and service details.
Step 2: Check Local Resources for Free Testing
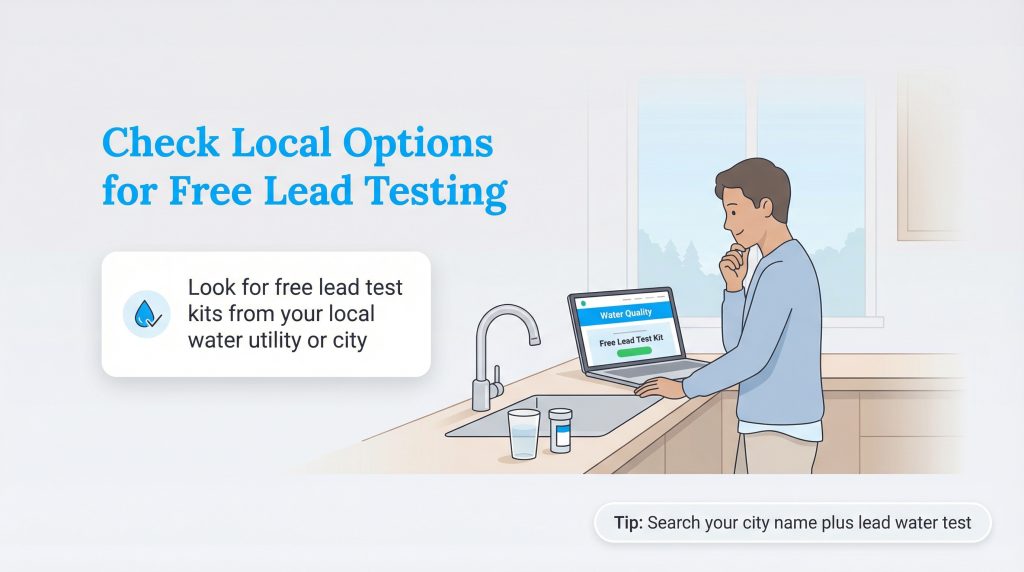
You might be able to get your water tested without spending a dime. Many municipalities and water utility companies offer free lead testing kits to residents, especially in communities known to have older infrastructure or lead service lines. Before you head to the hardware store, take a moment to research what is available in your specific area. This is the smart first step that can save you money.
Start by visiting your local water utility’s website or calling 311 to ask about free lead testing programs. You should also look for your local Annual Water Quality Report, also known as the Consumer Confidence Report (CCR). This document provides neighborhood-level data on water contaminants and can tell you if lead has been detected in your area recently, though it reflects system-wide quality rather than your specific tap. You can find your local report using the EPA’s Consumer Confidence Report search tool. If your utility offers a free kit, they will typically drop it off or mail it to you, and pick it up once you have filled the sample bottle. If you’re not sure where to start, type your city name and ‘lead water test’ into a search engine or check the ‘Water Quality’ section of your utility’s website.
Step 3: Use a DIY Home Test Kit
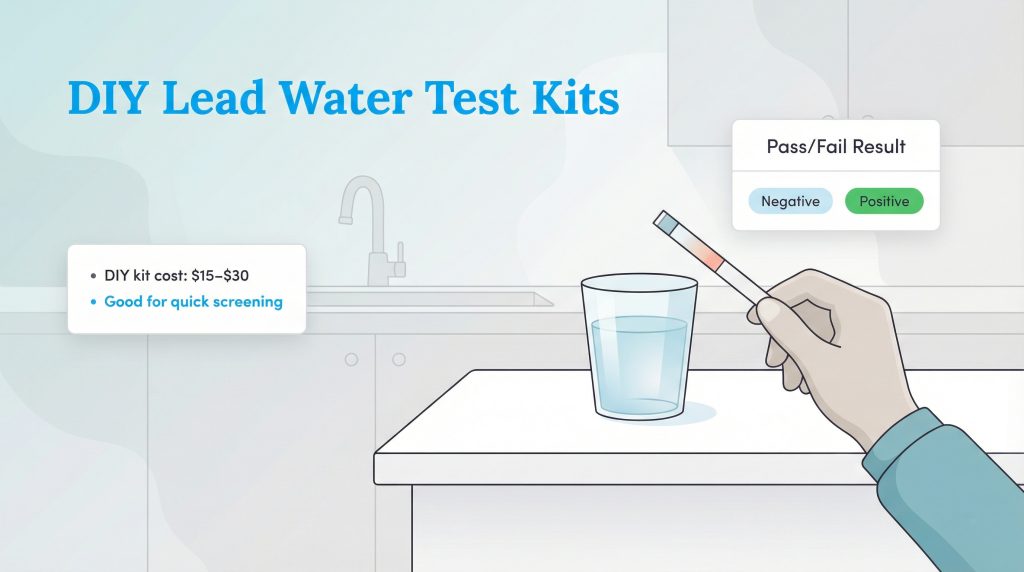
If free resources aren’t available or you want an immediate answer, you can purchase a DIY lead water test kit from most home improvement stores or online retailers. These kits usually cost between $15 and $30. They are best used as a preliminary screening tool rather than a final diagnosis. Most DIY kits use test strips that change color to indicate the presence of lead.
To use these kits, you typically dip a chemically treated strip into a sample of your tap water and wait for a specific amount of time, following the manufacturer’s instructions carefully. If the strip changes color, it indicates that lead is present. However, it is important to understand the nuance here: these tests are generally “pass/fail.” They tell you if lead is detected, but they rarely tell you exactly how much is there. If your strip tests positive, you definitely have an issue that needs addressing. If it tests negative, it is possible that low levels of lead are still present but below the strip’s detection limit.
Step 4: Send a Sample to a Certified Lab
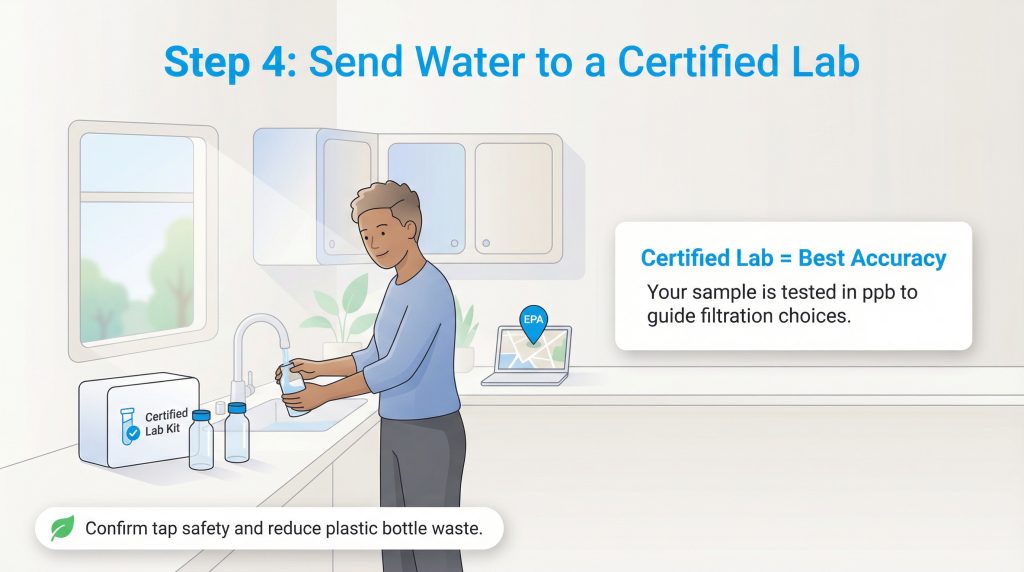
For the most accurate assessment of your water quality, sending a sample to a certified laboratory is the gold standard. Unlike store-bought strips, a lab analysis provides a precise measurement of lead concentration, usually expressed in parts per billion (ppb). This detailed data is crucial for determining the severity of the problem and choosing the right filtration system.
The process is simple but requires patience. You will generally order a kit online or pick one up from a local lab. Fill the provided bottles with water, often the “first draw” of the morning before any water has been used, and mail them back to the facility. You will receive a detailed report via email a few days or weeks later. Costs typically range from $50 to $100. To ensure you are using a legitimate provider, use the EPA’s map of certified laboratories to find an accredited facility near you.
Choosing this method is also an environmentally mindful choice. By confirming your tap water is safe, you avoid the long-term need to rely on bottled water, which generates massive amounts of plastic waste.
How to Read and Act on Your Results
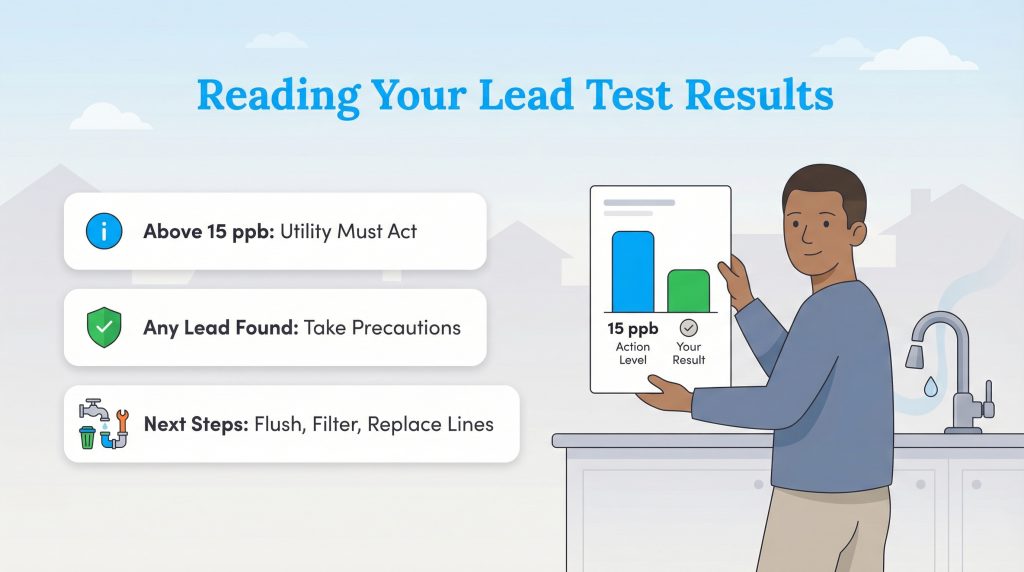
Once you have your results, you need to know what the numbers mean. The EPA’s current “action level” for lead is 15 parts per billion (ppb). If tap water in a community exceeds 15 ppb at more than 10% of sampled homes, the utility is required to take steps like optimizing corrosion control and, in some cases, replacing lead service lines. However, many health organizations and the EPA argue that there is no safe level of lead for children, so you may want to take action even if your results are below that 15 ppb threshold. If your report says ‘non-detect’ (ND), it means the lab didn’t find lead above its detection limit, which is typically much lower than what home strips can measure.
If lead is found in your water, you should implement an immediate action plan. First, flush your taps for one to two minutes before using water for drinking or cooking, especially in the morning. This clears out water that has been sitting in the pipes absorbing metal. For a short-term fix, purchase a water filter that is certified to NSF/ANSI Standard 53 for lead reduction. You can verify a filter’s capabilities through NSF International. Long-term, look into replacing lead service lines, and check with your city for potential grants or financial assistance programs.
Safe Water Is a Smart Investment
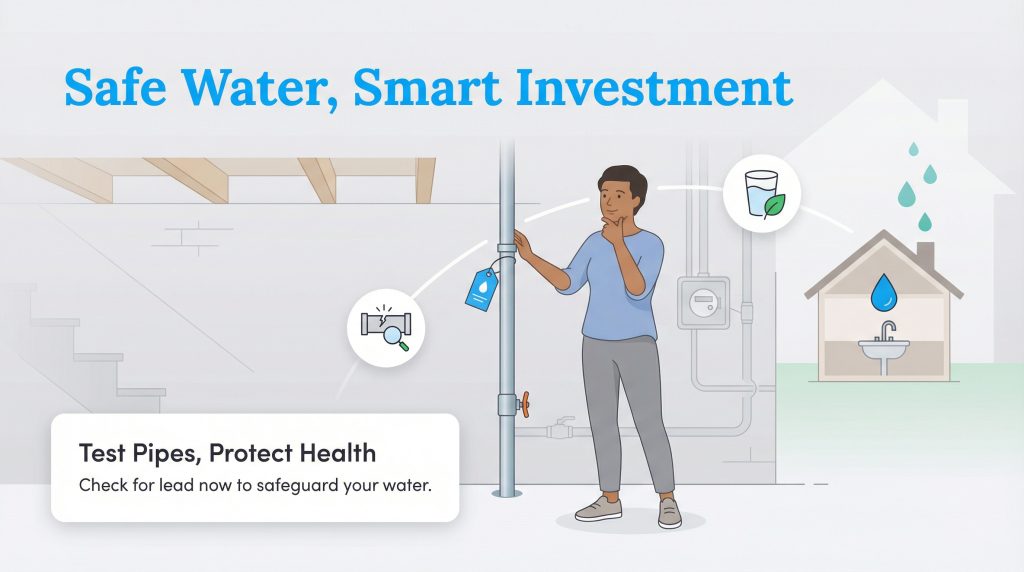
Ensuring your water is free from lead is one of the most important steps you can take for your home environment. Whether you utilize a free voucher from your city or invest in a private laboratory analysis, the clarity you gain is worth the effort. Identifying a problem is the first step toward fixing it, and modern filtration solutions make it easier than ever to protect your family.
Don’t wait for a specialized kit to arrive to start the process. Go to your basement or crawl space today and perform the quick scratch test on your pipes. It is a simple, proactive move that puts you in control of your utilities and your health. When your tap water is truly safe, you can rely less on bottled water, saving money and reducing plastic waste over time.
FAQs About Testing Your Water for Lead
How much does it cost to test water for lead?
Can I test for lead in water myself?
How do I know if my water has lead without testing?
What is the most accurate way to test for lead in water?
Do water filters remove lead?
How often should I test my water for lead?
Is it safe to shower or bathe if my water has lead?
About the Author

LaLeesha has a Masters degree in English and enjoys writing whenever she has the chance. She is passionate about gardening, reducing her carbon footprint, and protecting the environment.